> ## Documentation Index
> Fetch the complete documentation index at: https://docs.usetusk.ai/llms.txt
> Use this file to discover all available pages before exploring further.
# Onboarding
> Get started with Tusk in a few clicks
Before you begin, make sure that you have these permissions:
GitHub user permissions to manage external apps in your GitHub organization
Maintainer or Owner role in your GitLab group while on the GitLab Premium or Ultimate plan (plans not required for GitLab Self-Managed)
## Creating an organization
[Sign up to Tusk](https://app.usetusk.ai) with Google, GitHub, GitLab, or with email/password. If you create an account with your company's Google Workspace, Tusk will create an organization for your company.
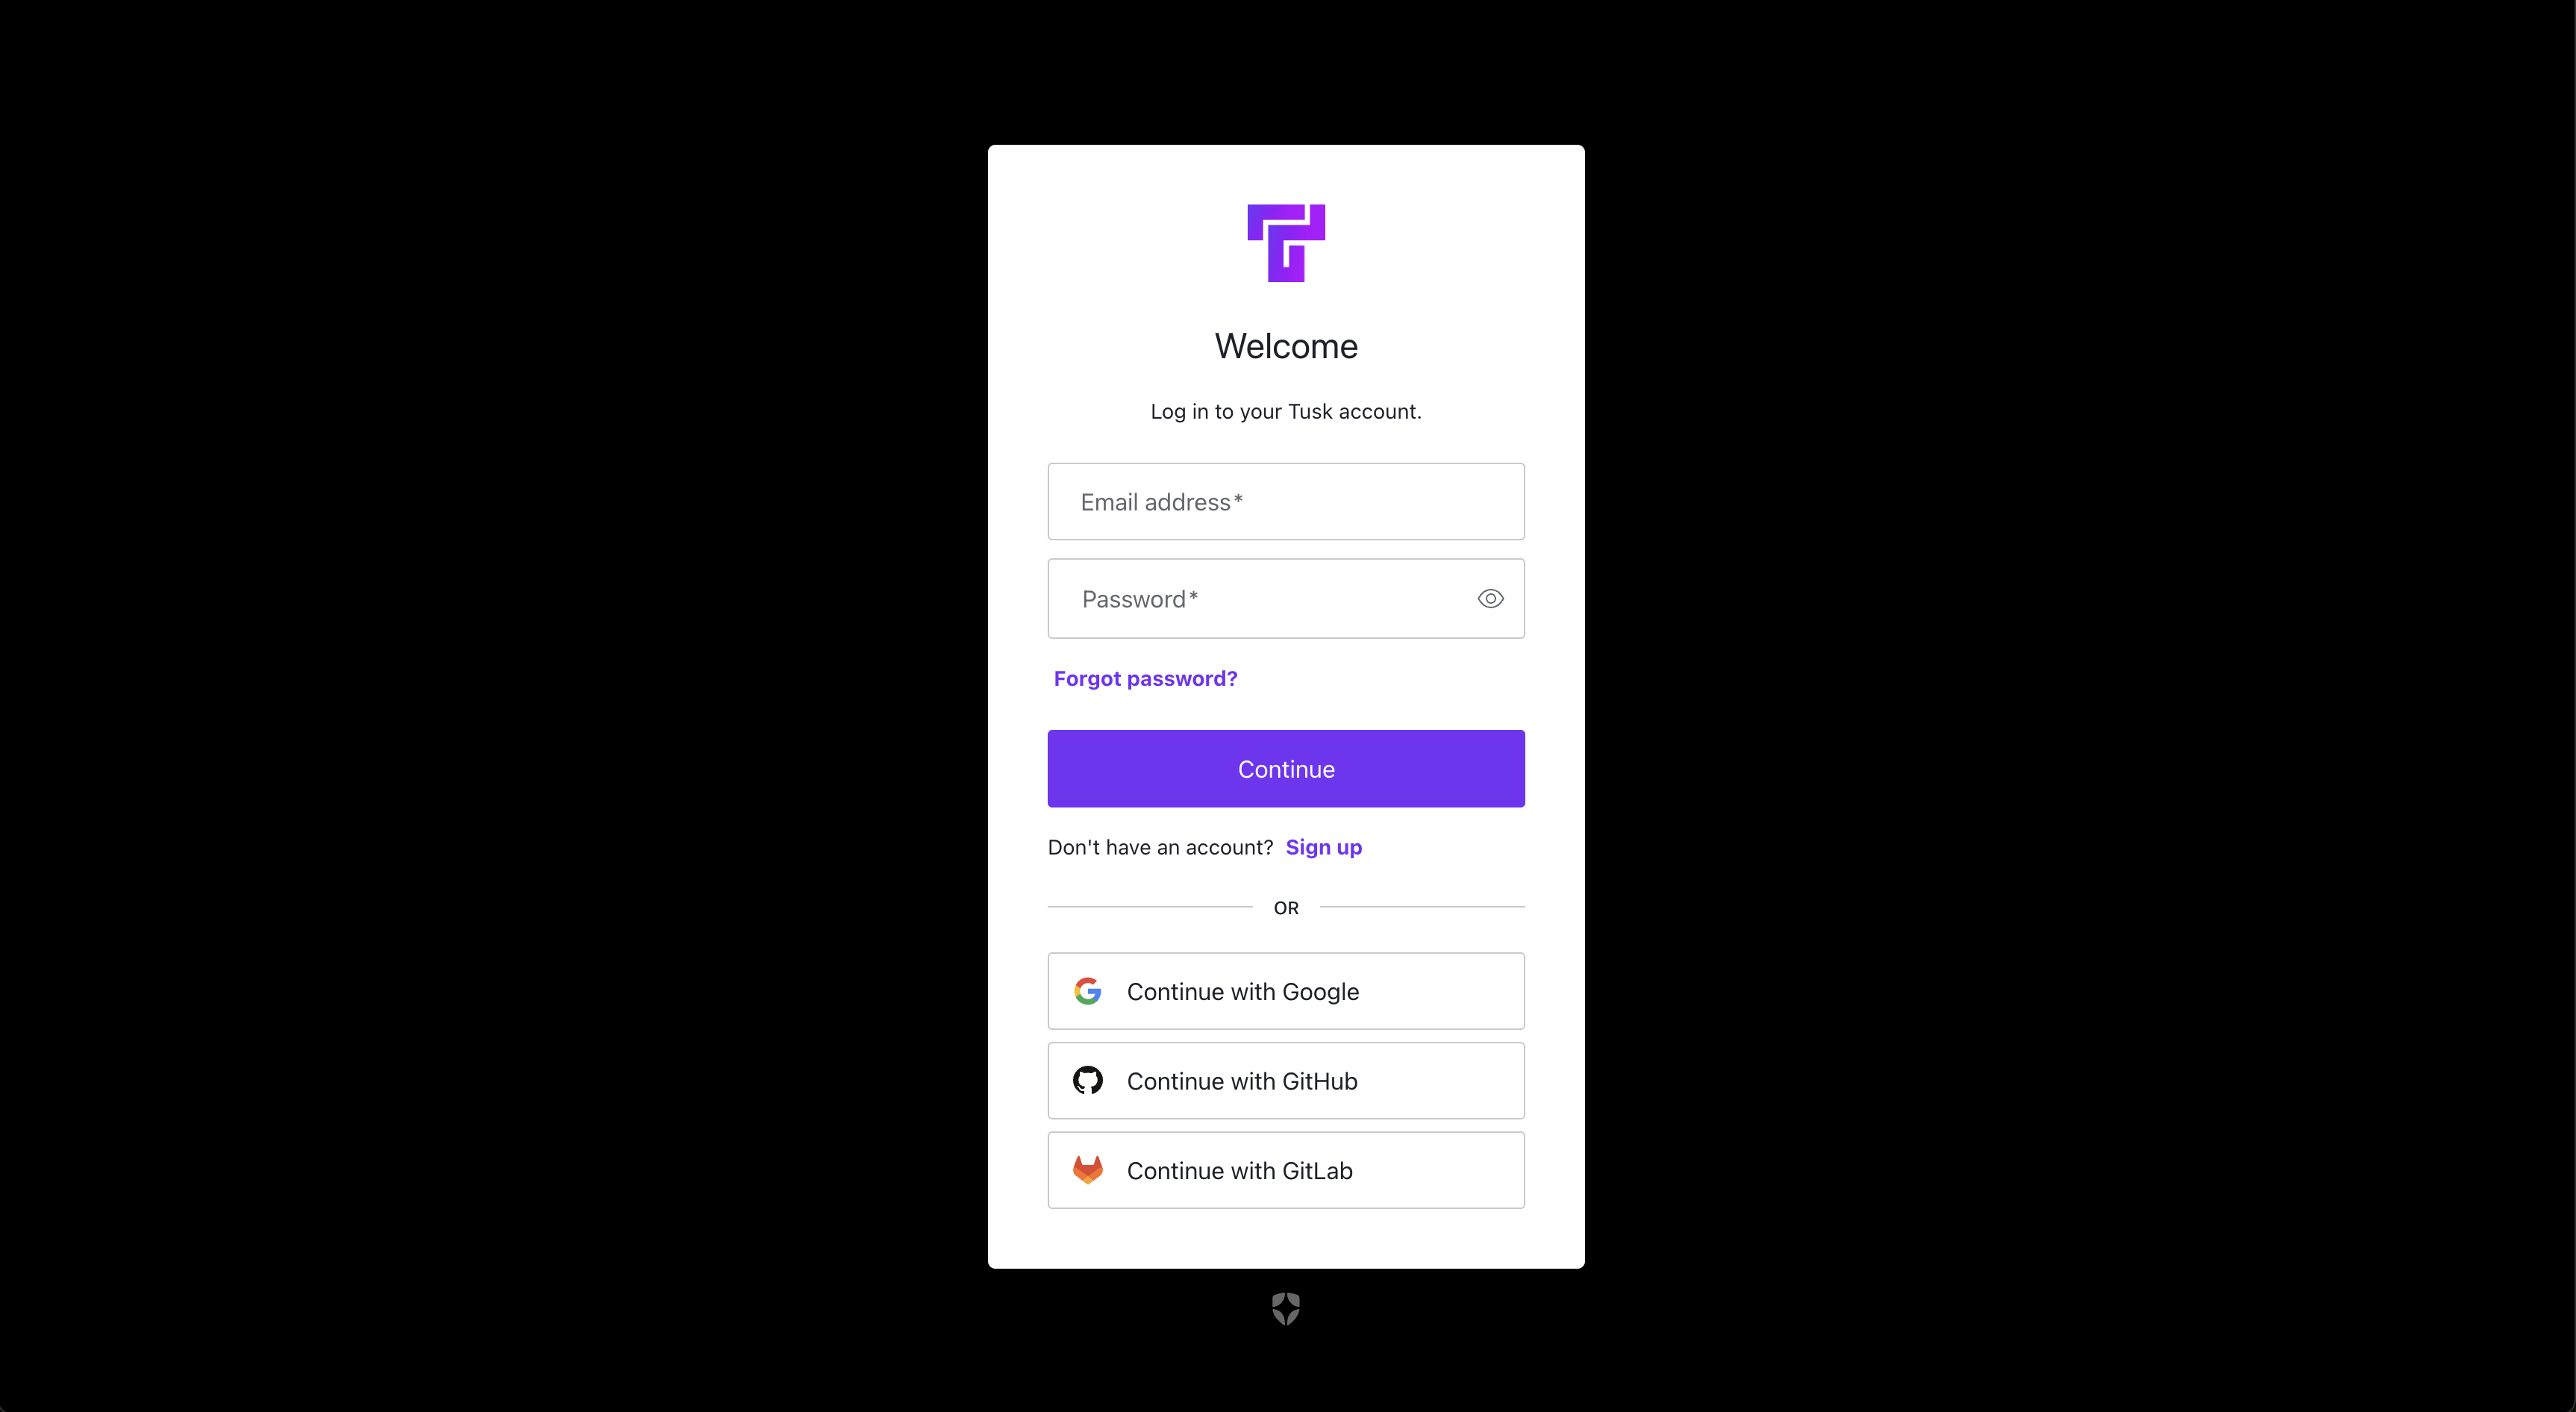 **Note:** Any team member who signs up via Google with your company's email domain, or with GitHub/GitLab *and* who are in your GitHub/GitLab organization will automatically be added to the Tusk company organization.
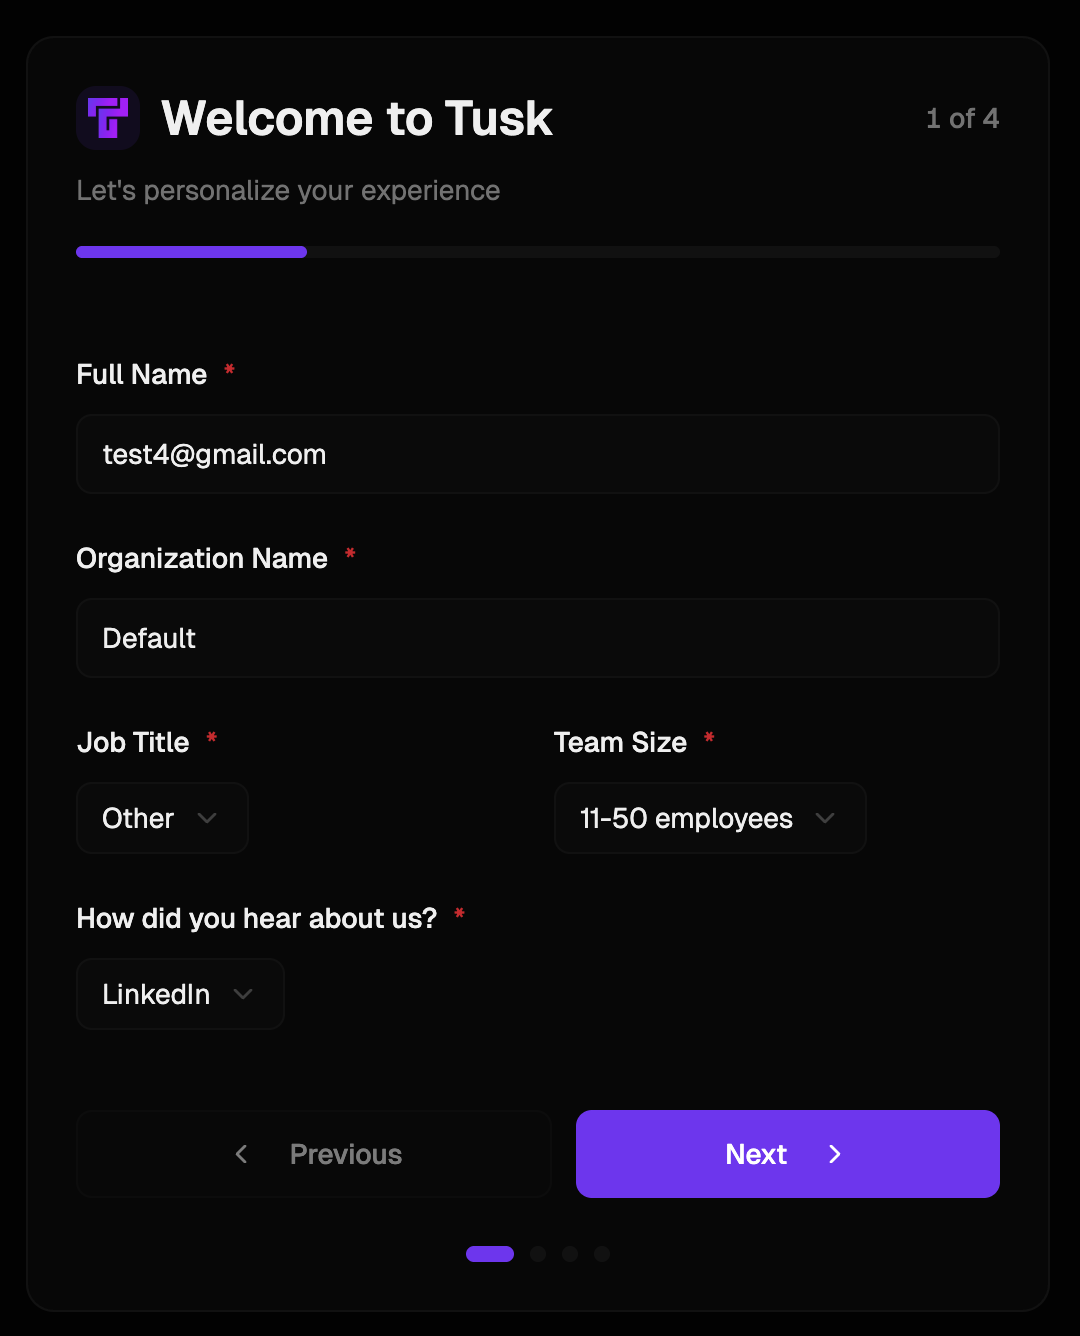
Fill out your profile and organization details to personalize your experience.
**Note:** Any team member who signs up via Google with your company's email domain, or with GitHub/GitLab *and* who are in your GitHub/GitLab organization will automatically be added to the Tusk company organization.
Fill out your profile and organization details to personalize your experience.
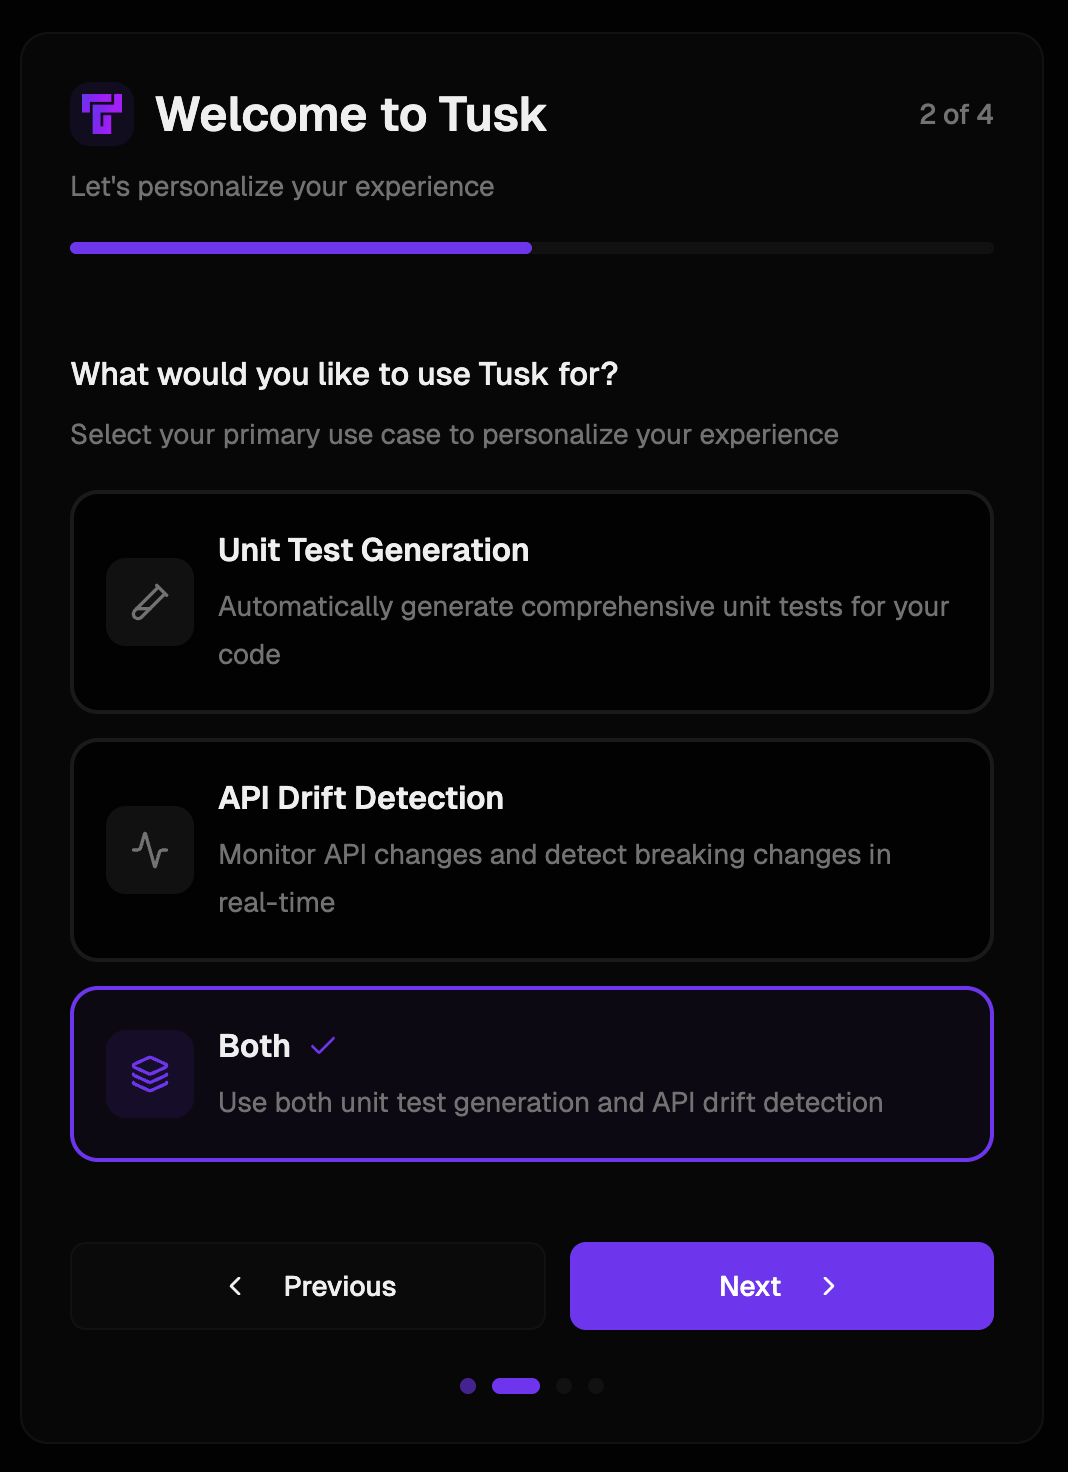
 Select your primary use case. This directs you to your ideal onboarding flow.
 ## Connect version control platform
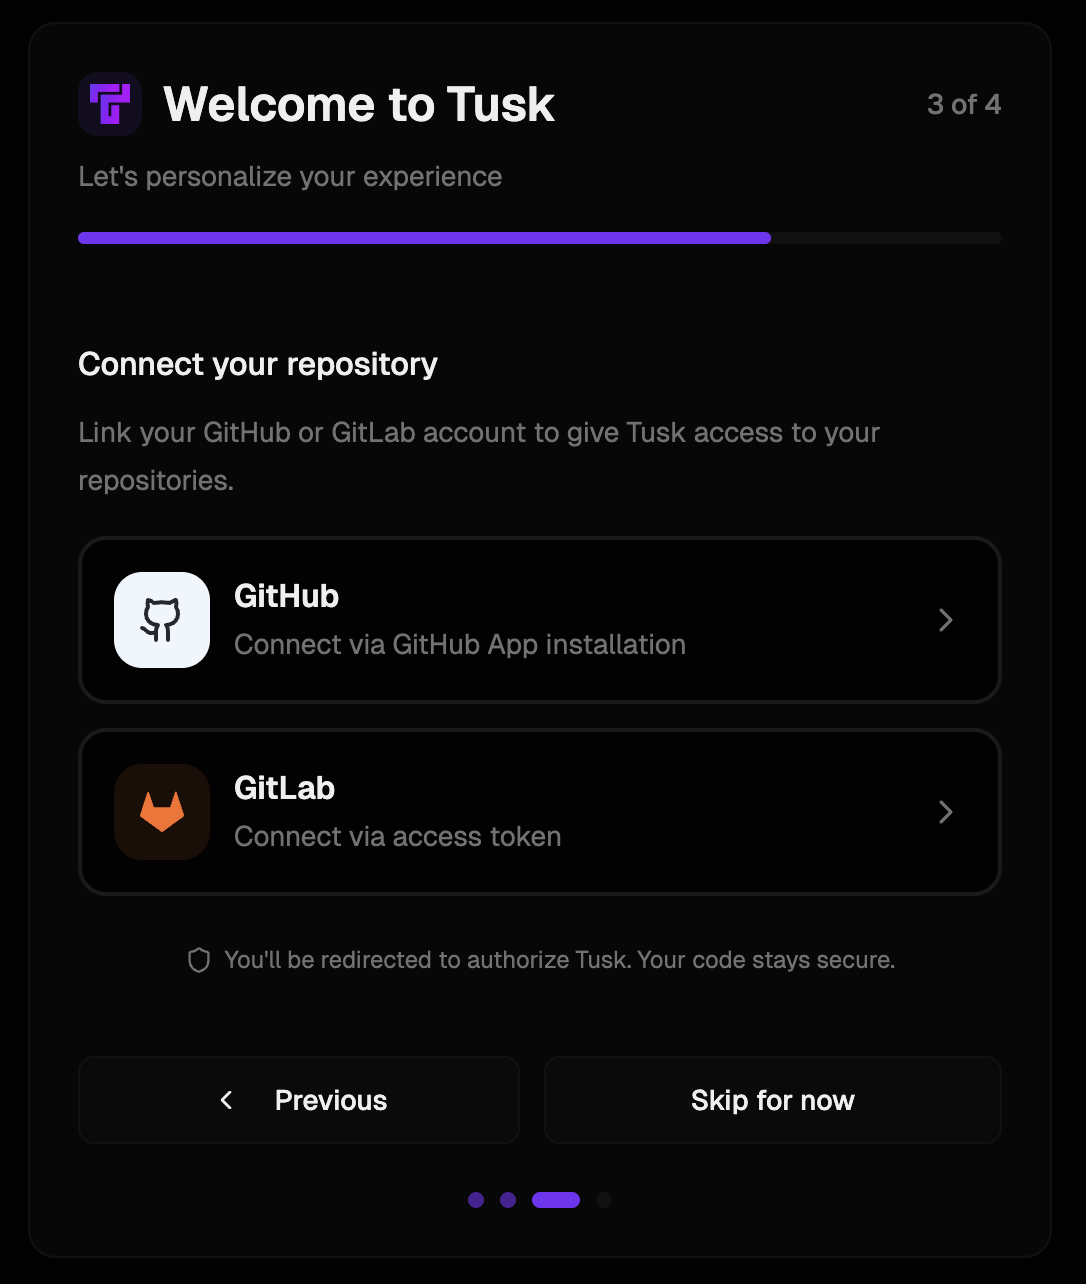
Click the GitHub card in the onboarding wizard.
## Connect version control platform
Click the GitHub card in the onboarding wizard.
 Click on your GitHub organization.
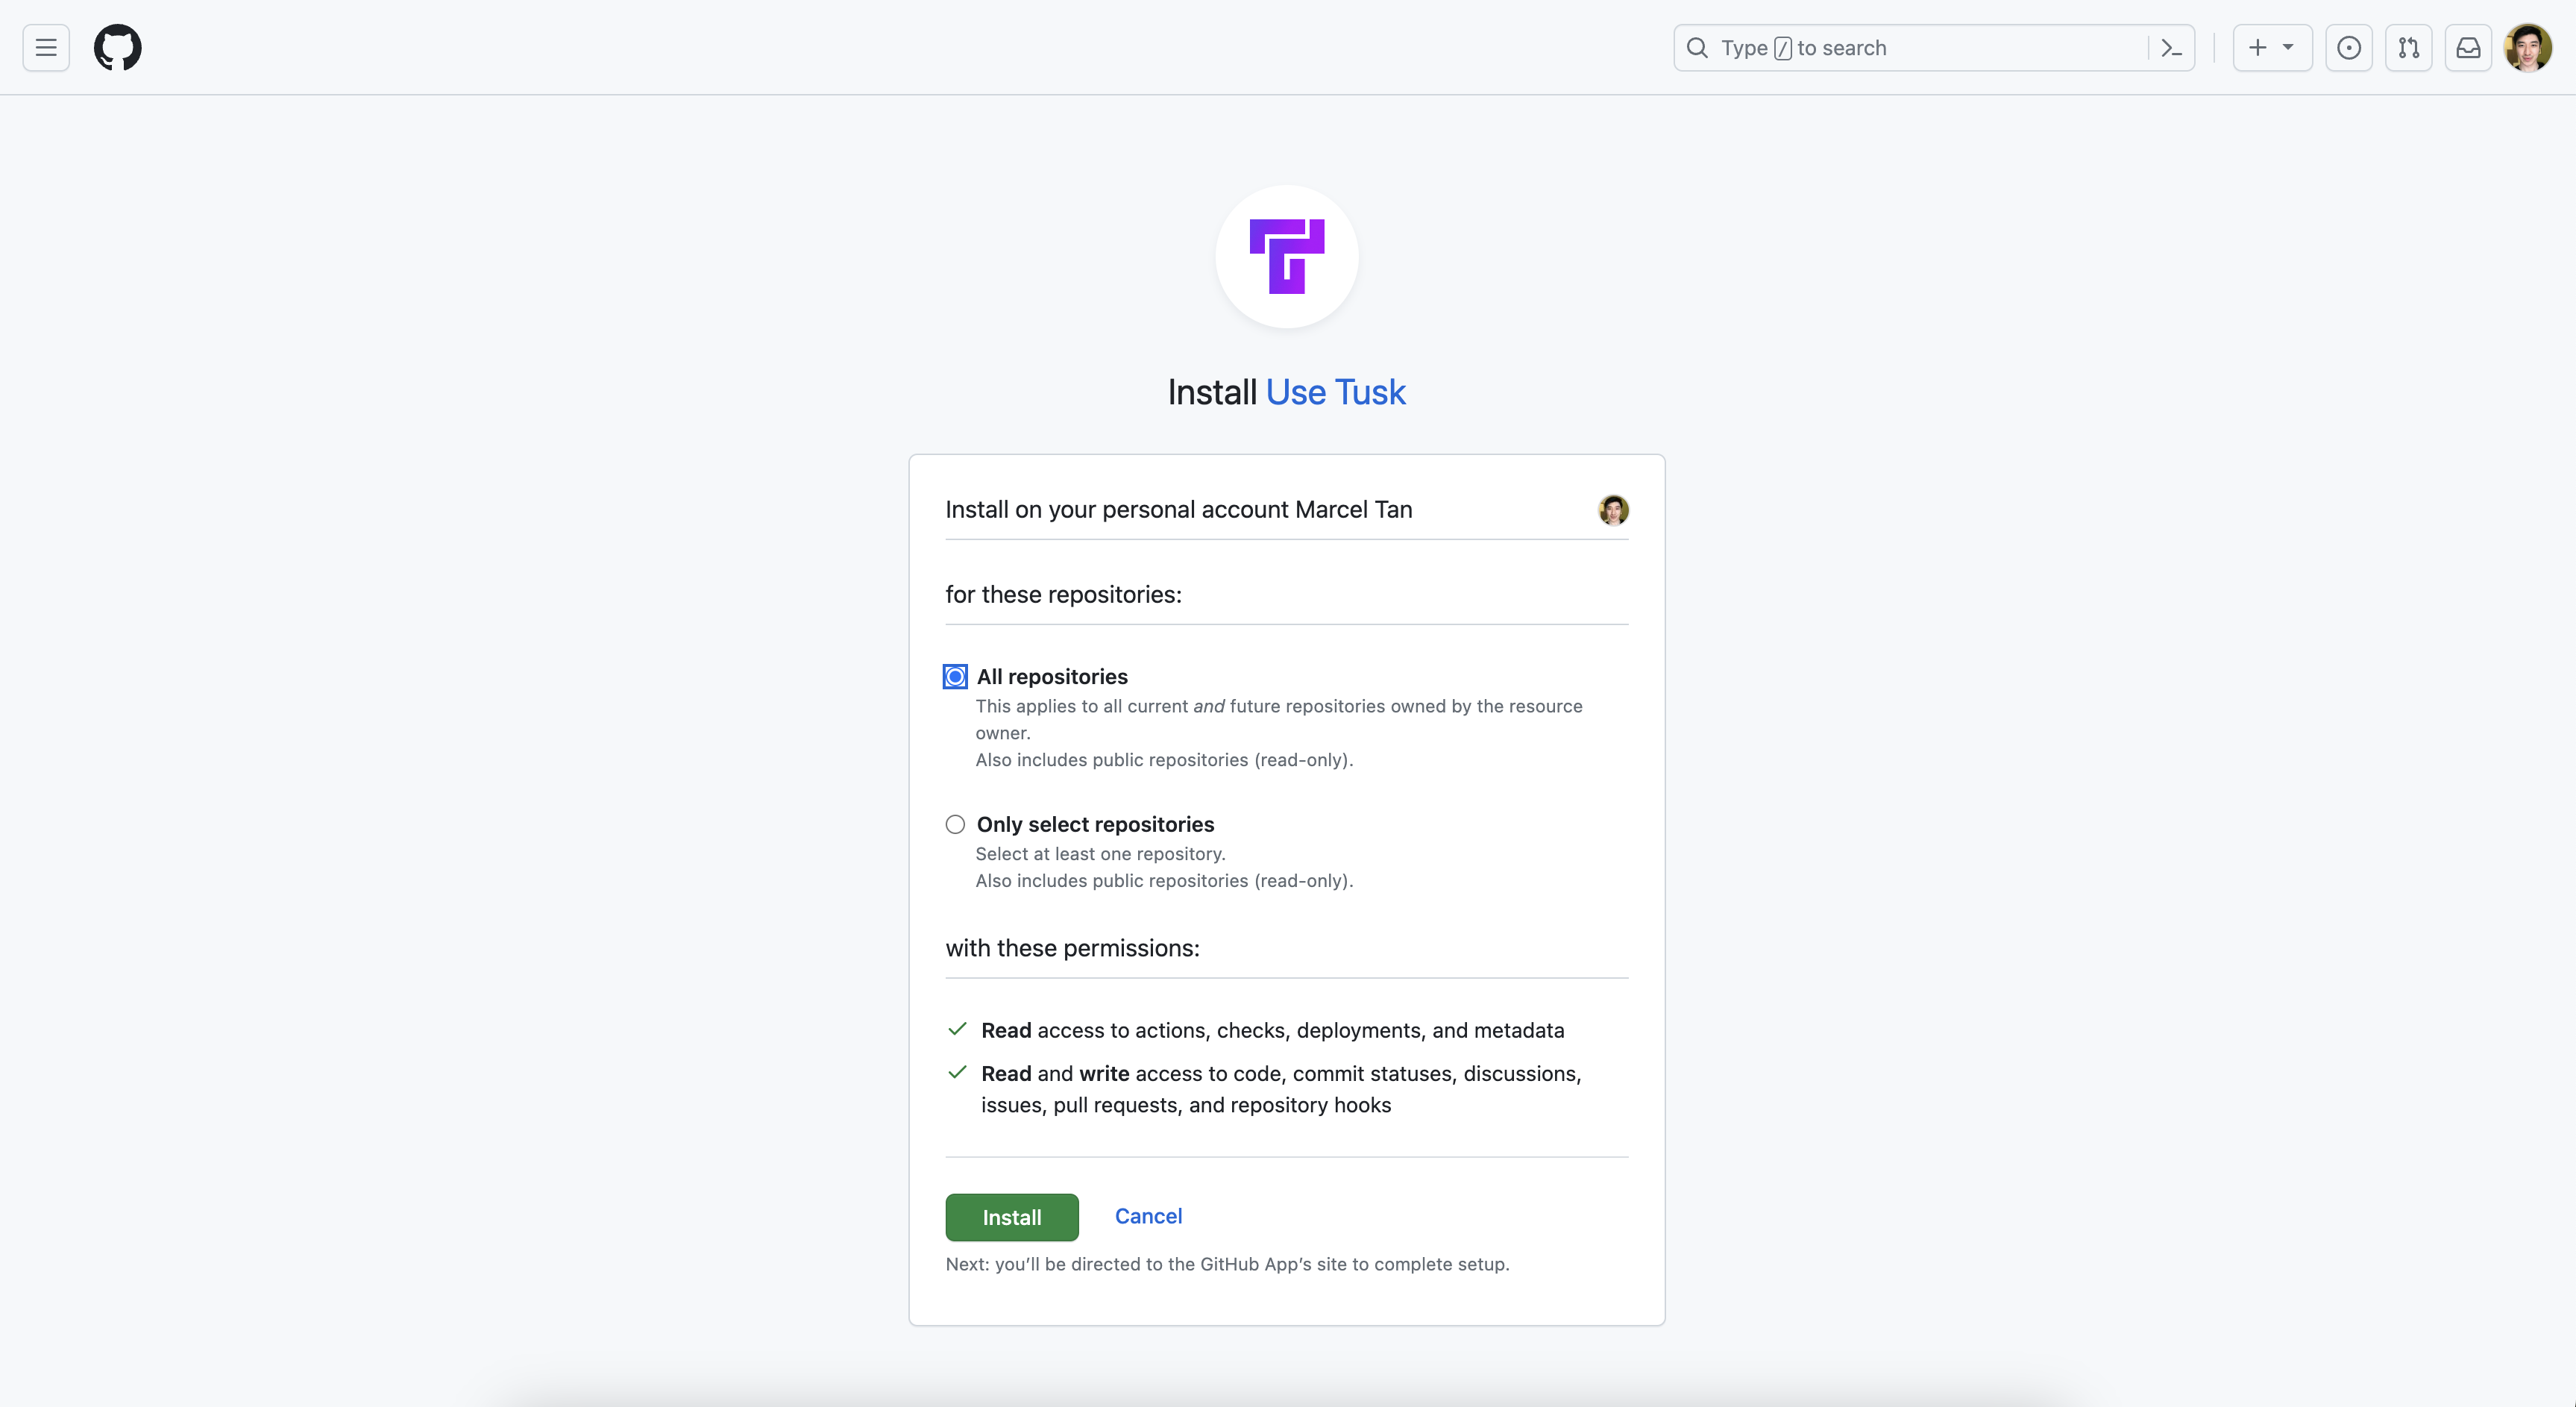
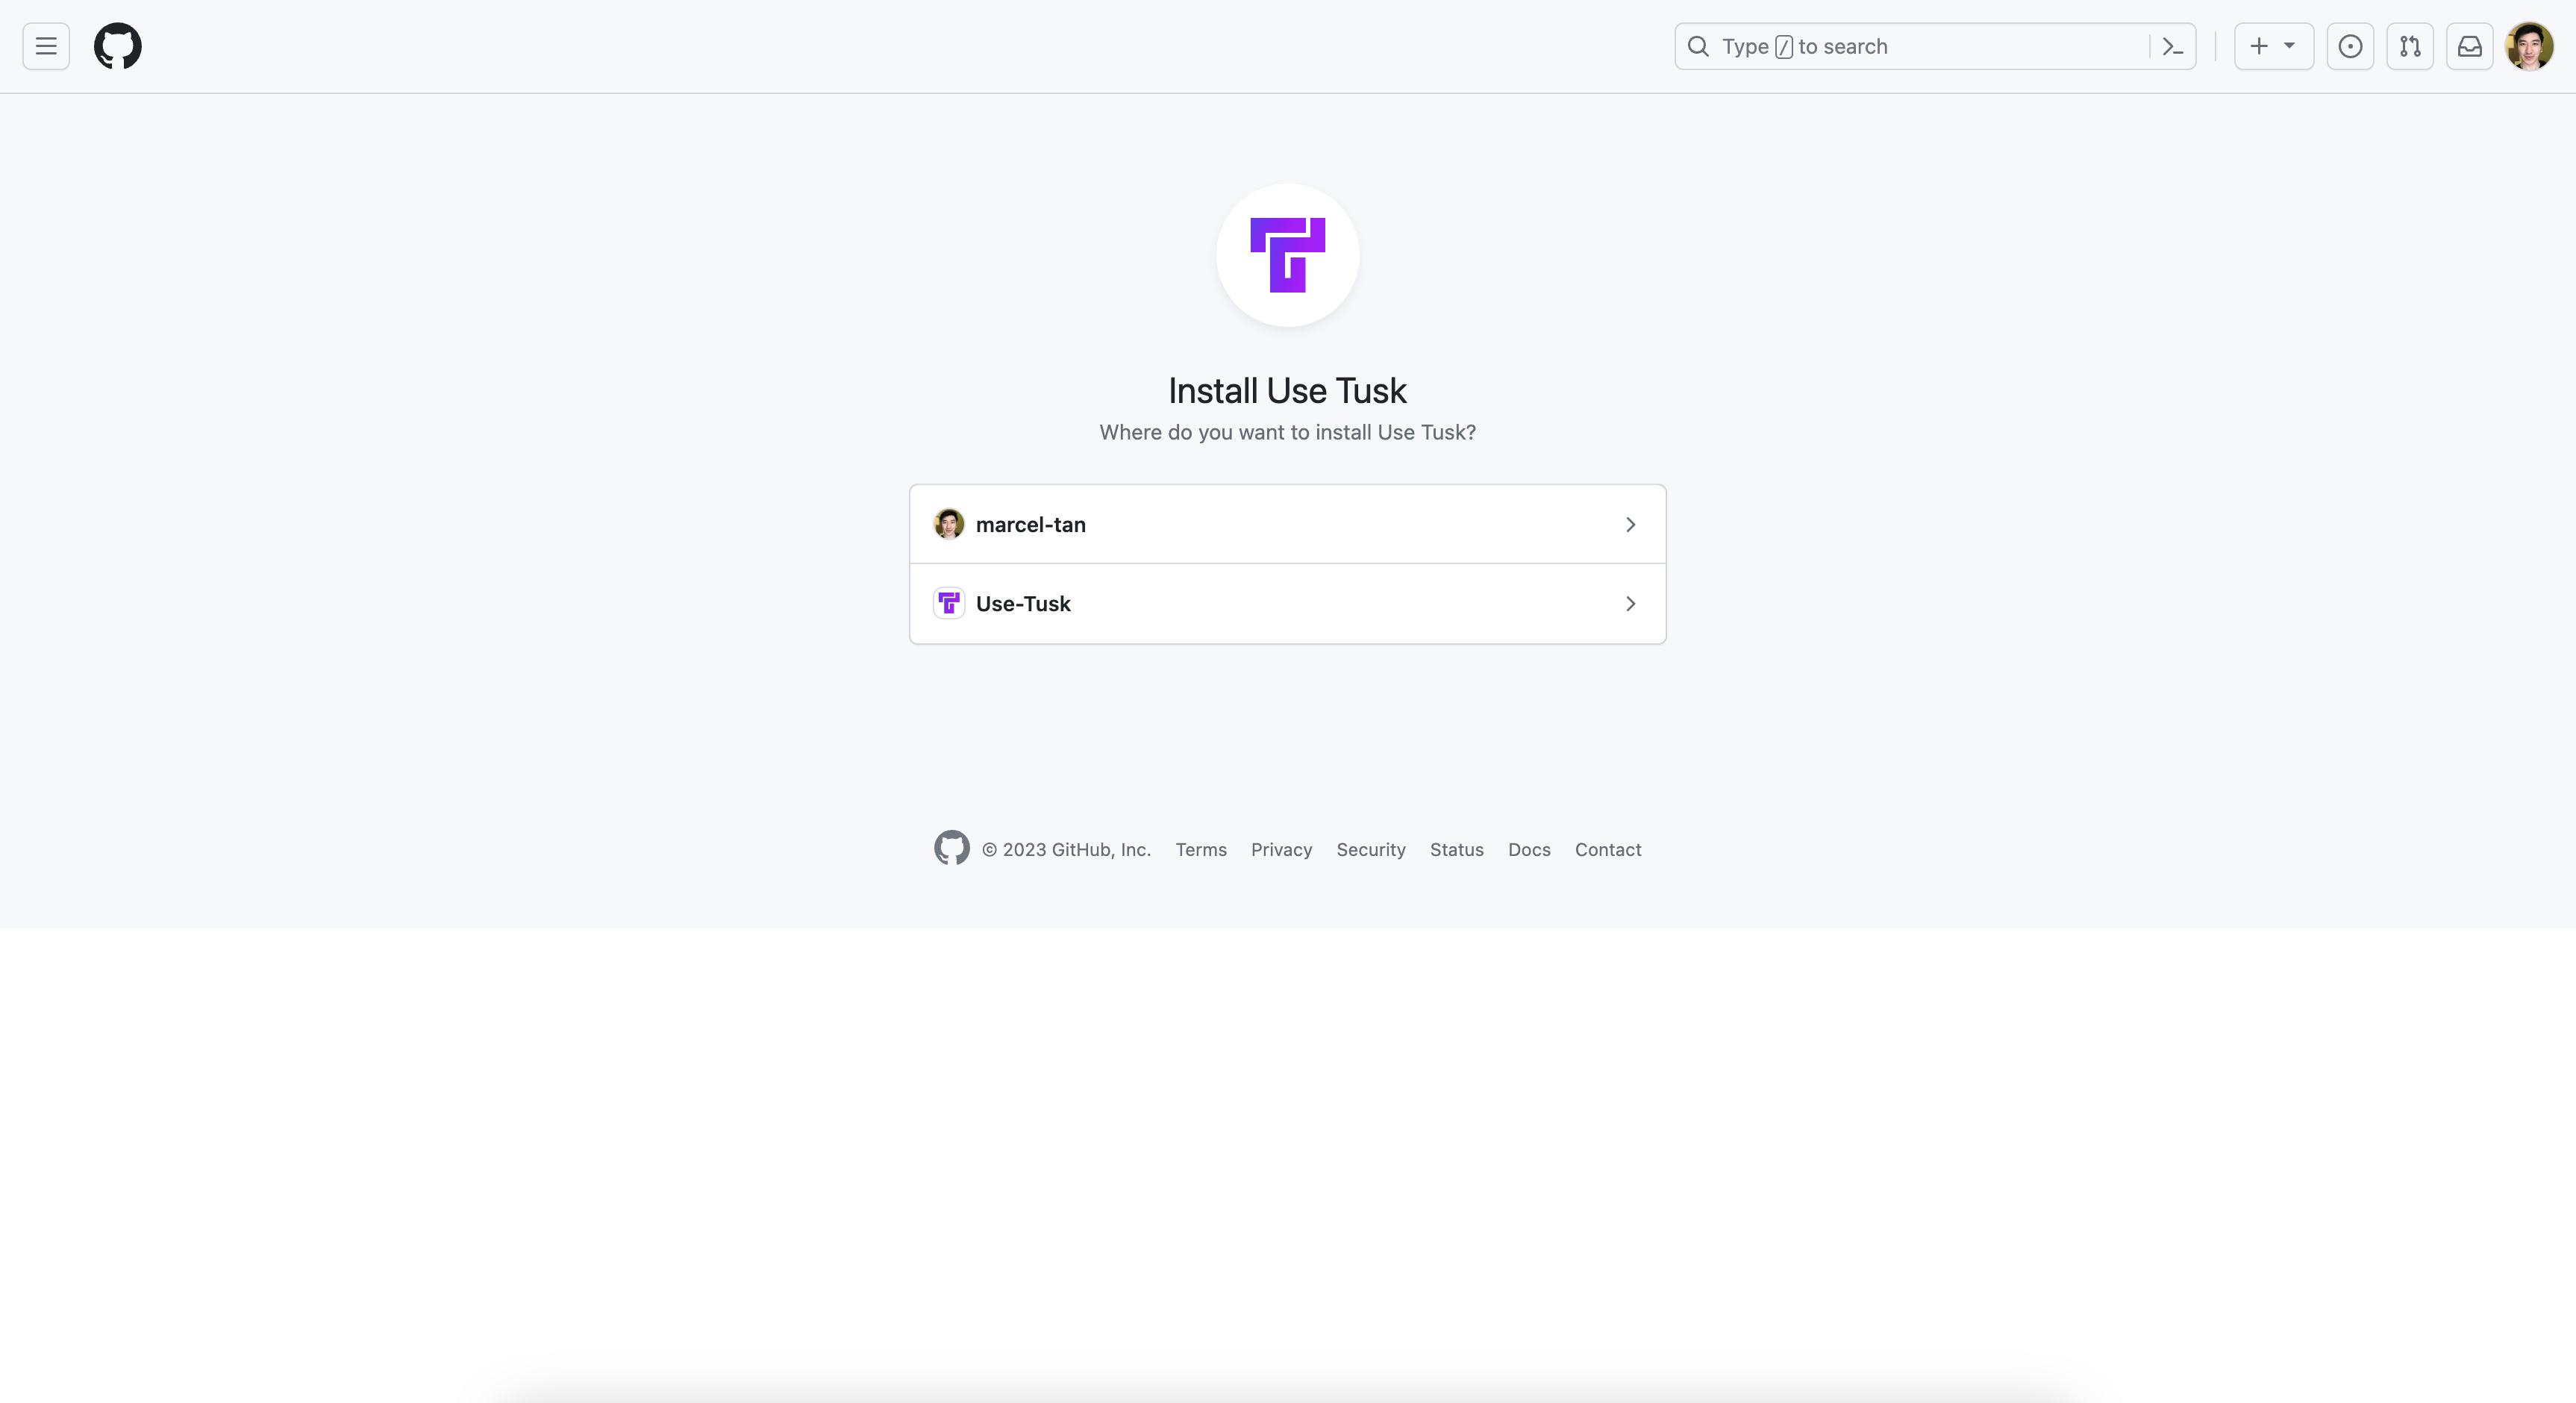 Choose whether to authorize all repositories or only select repositories in your organization. Click **Install**.
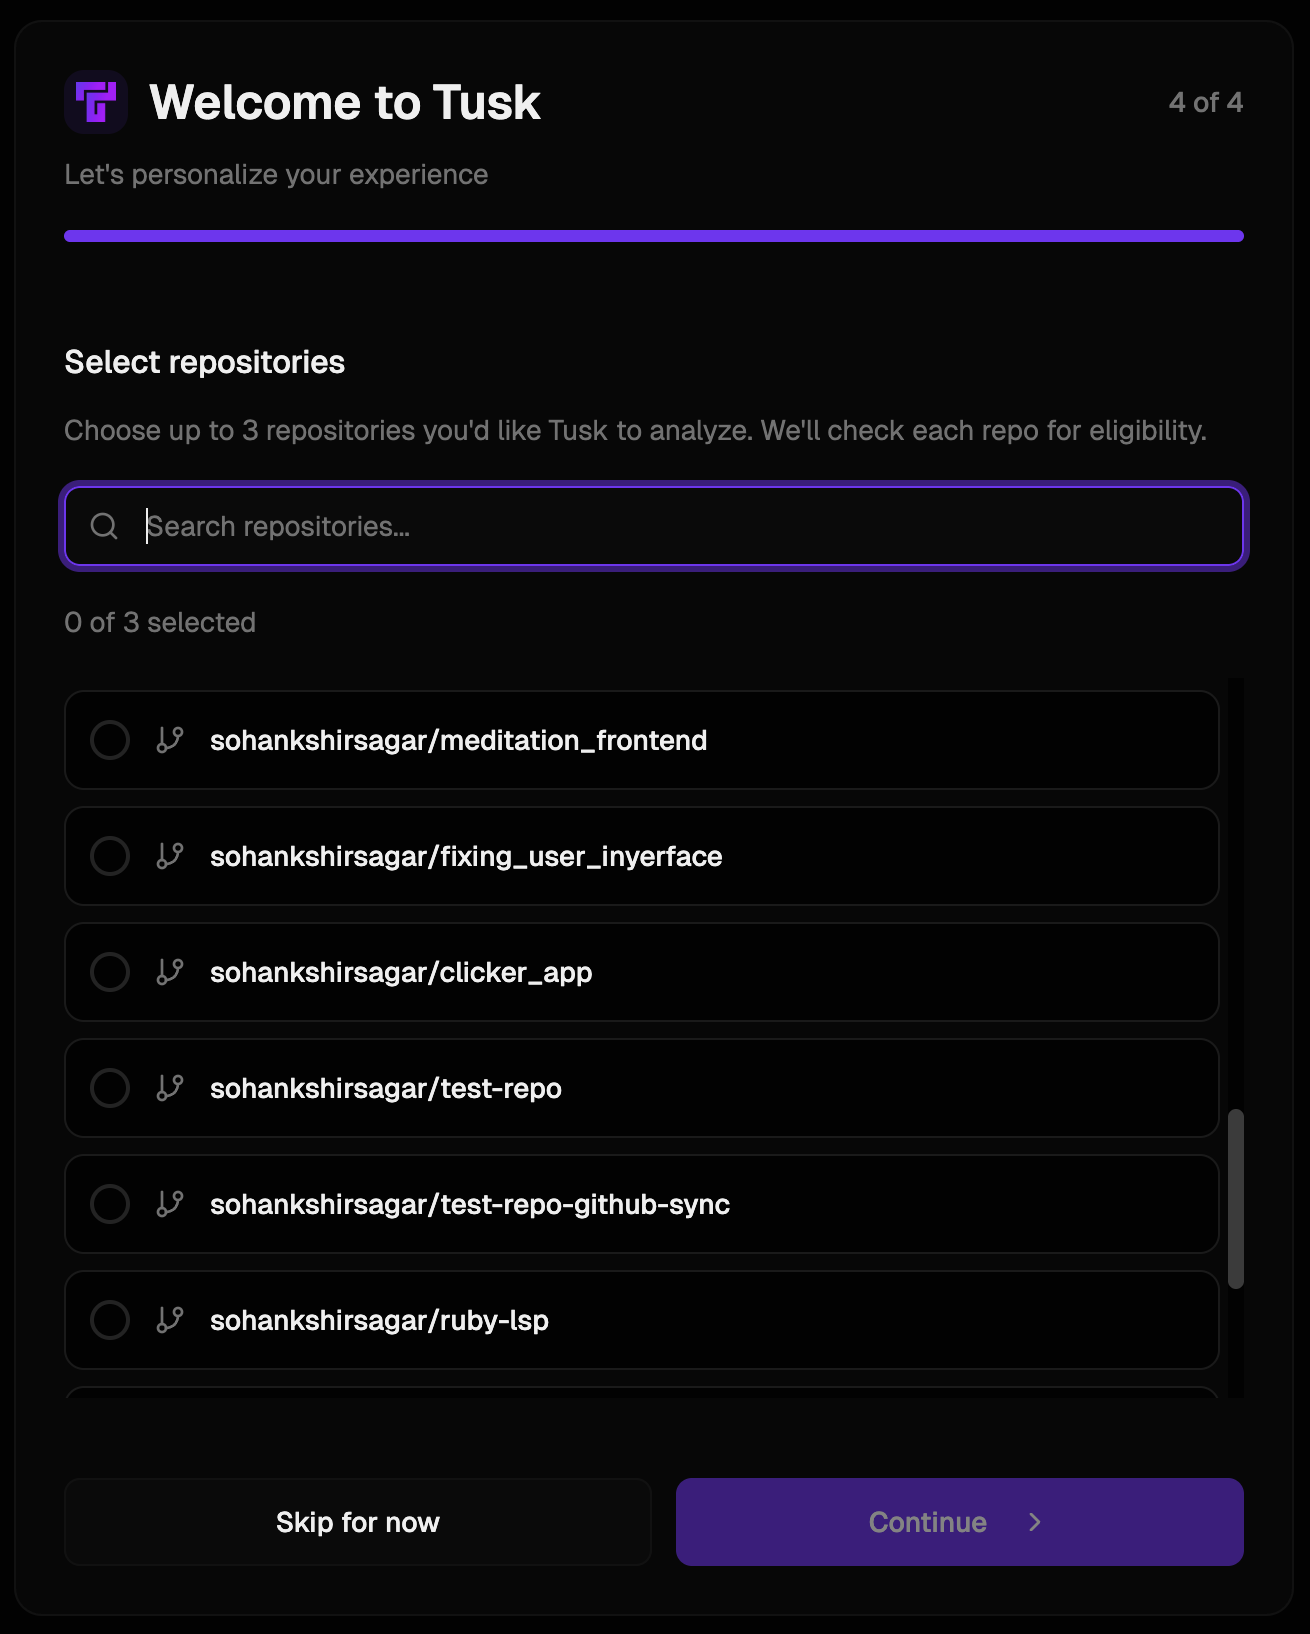
 Choose up to 3 repos in your organization you'd like Tusk to start the setup process for. Click **Continue**.
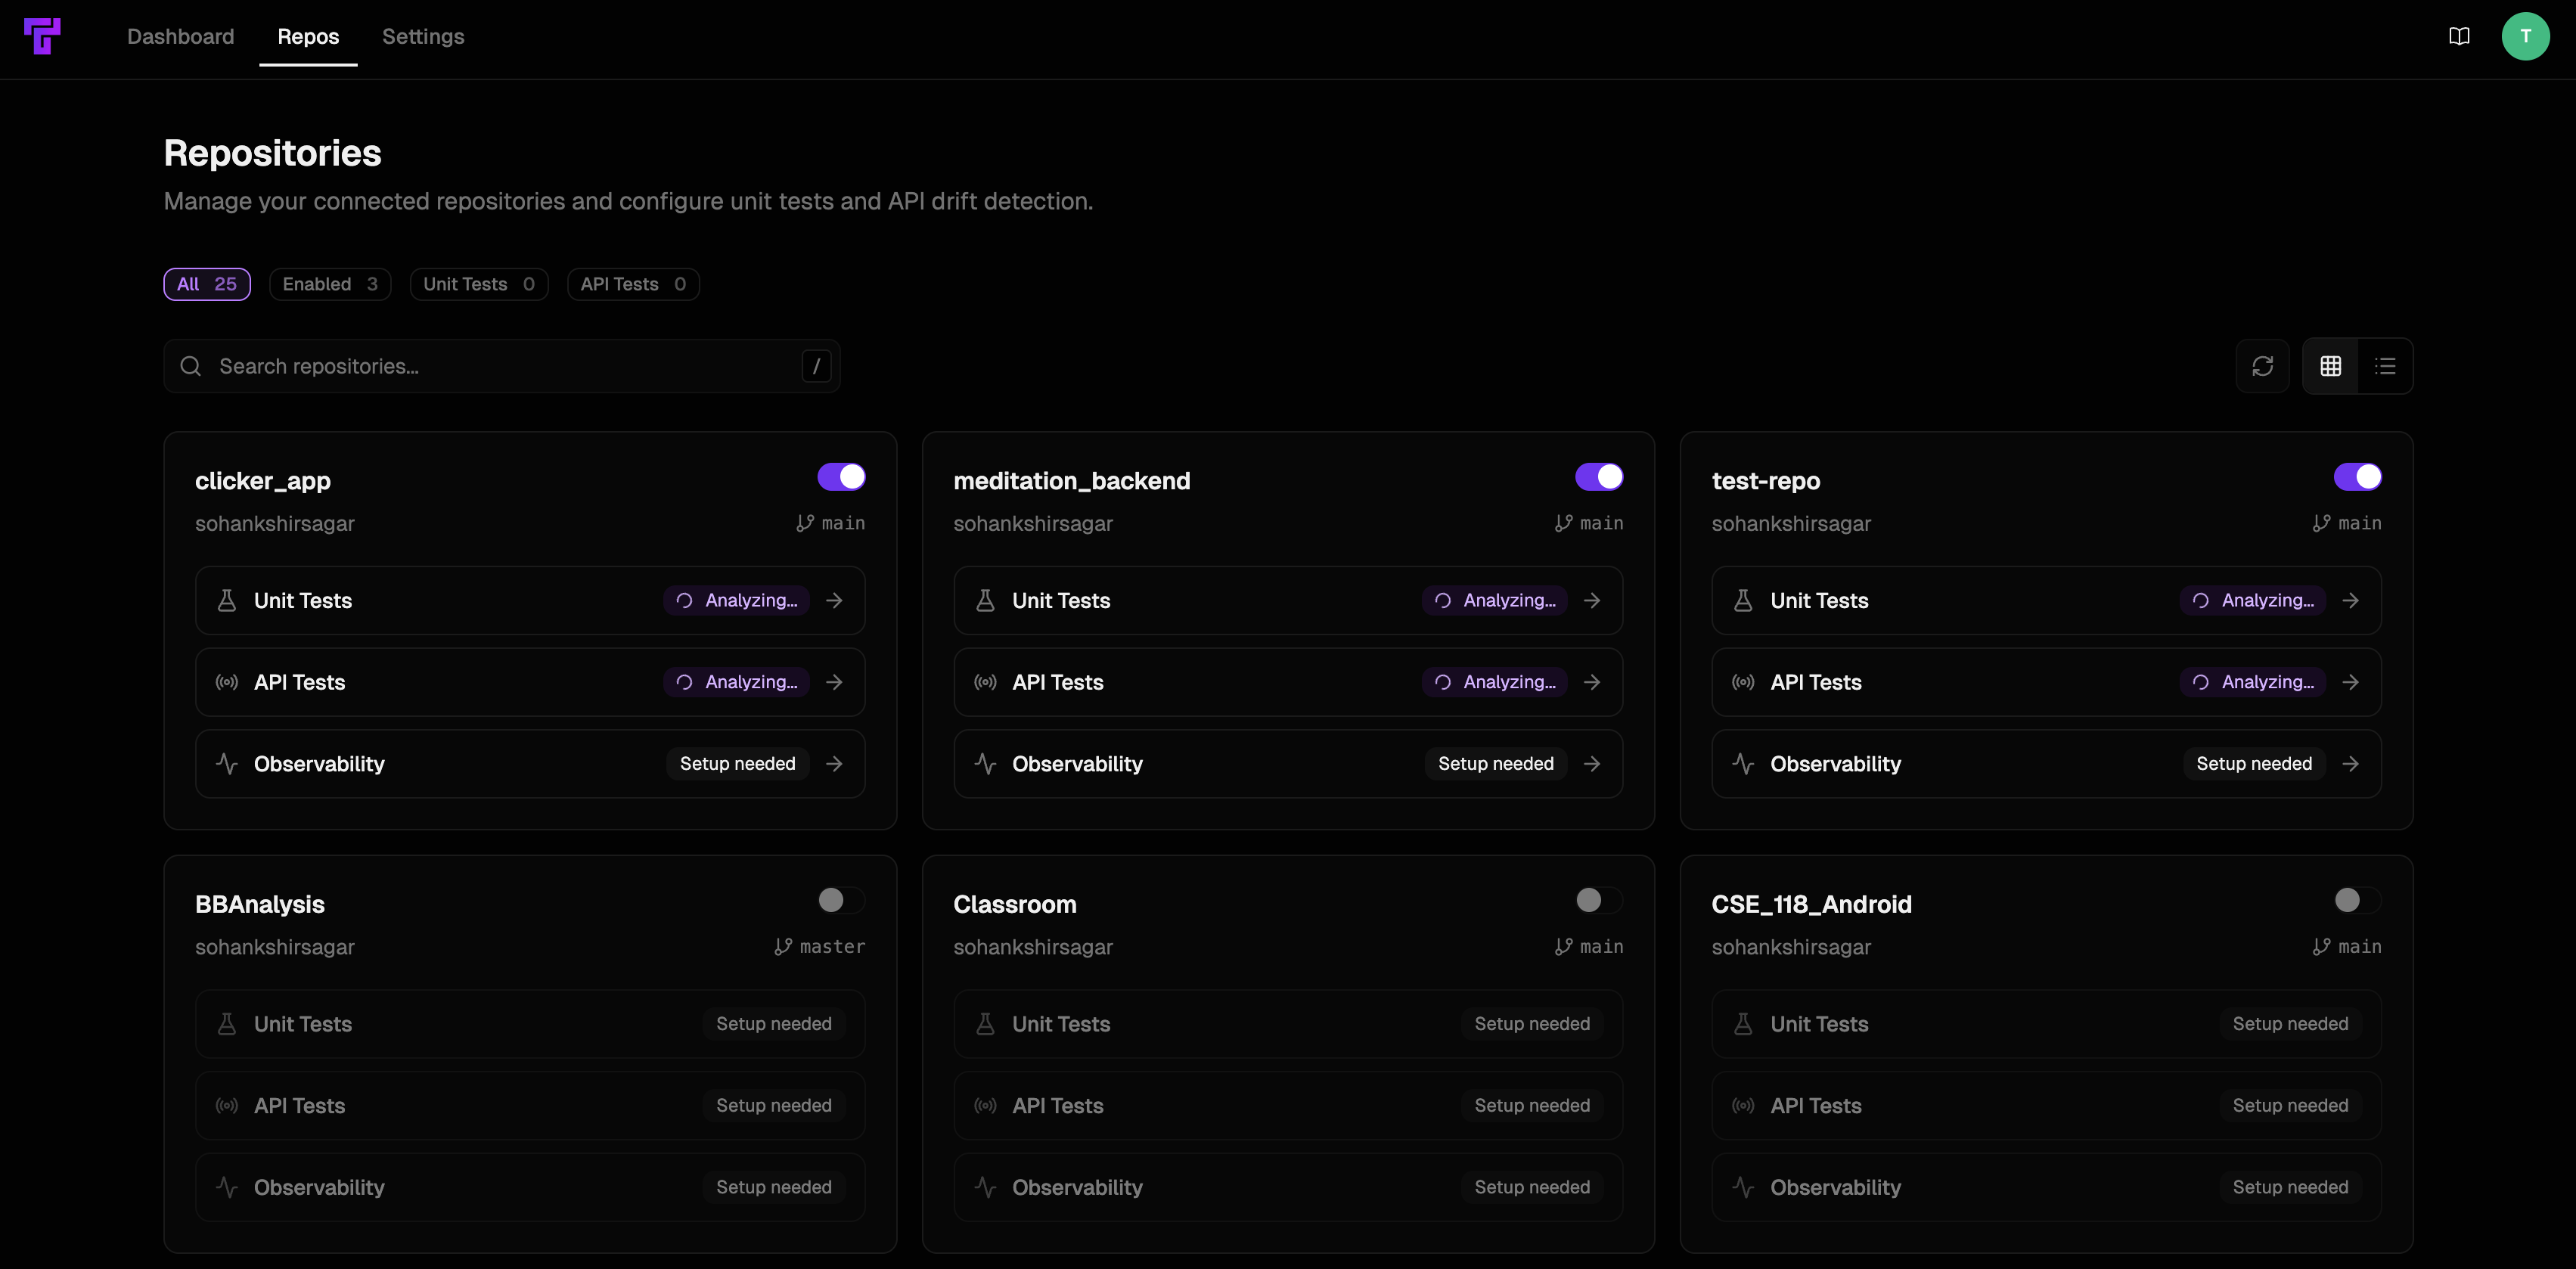
 You'll be directed to the Repos page where you'll see the selected repos be analyzed for their eligibility for unit test generation and API drift detection.
 Click the GitLab card in the onboarding wizard.
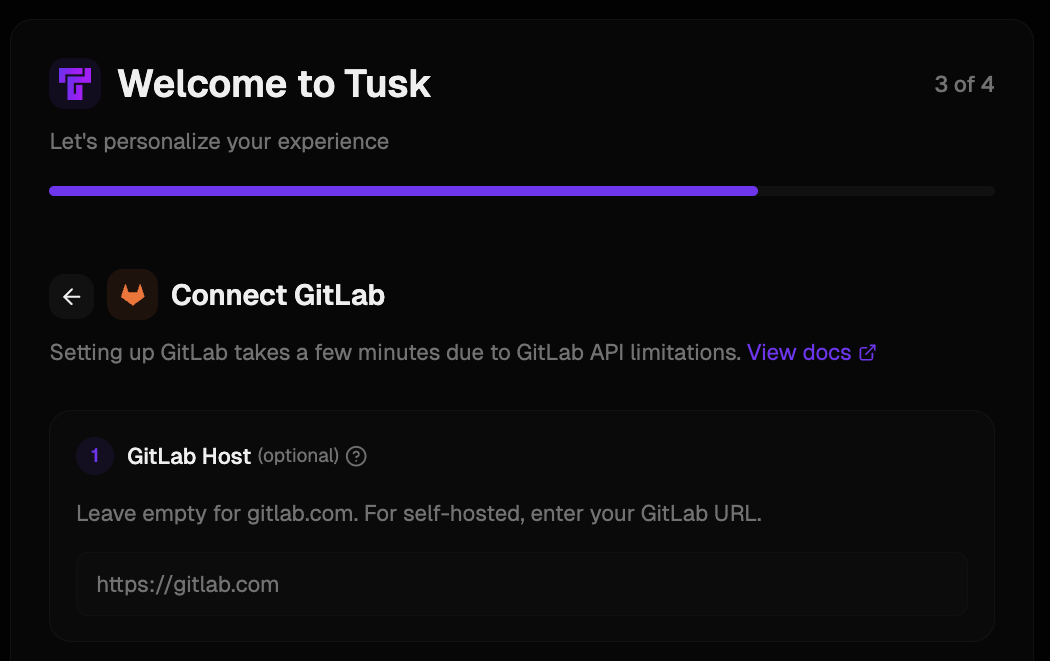
If you have a **self-hosted GitLab instance**, fill in the GitLab host URL as per the instructions. Otherwise, you can leave this field blank.
Click the GitLab card in the onboarding wizard.
If you have a **self-hosted GitLab instance**, fill in the GitLab host URL as per the instructions. Otherwise, you can leave this field blank.
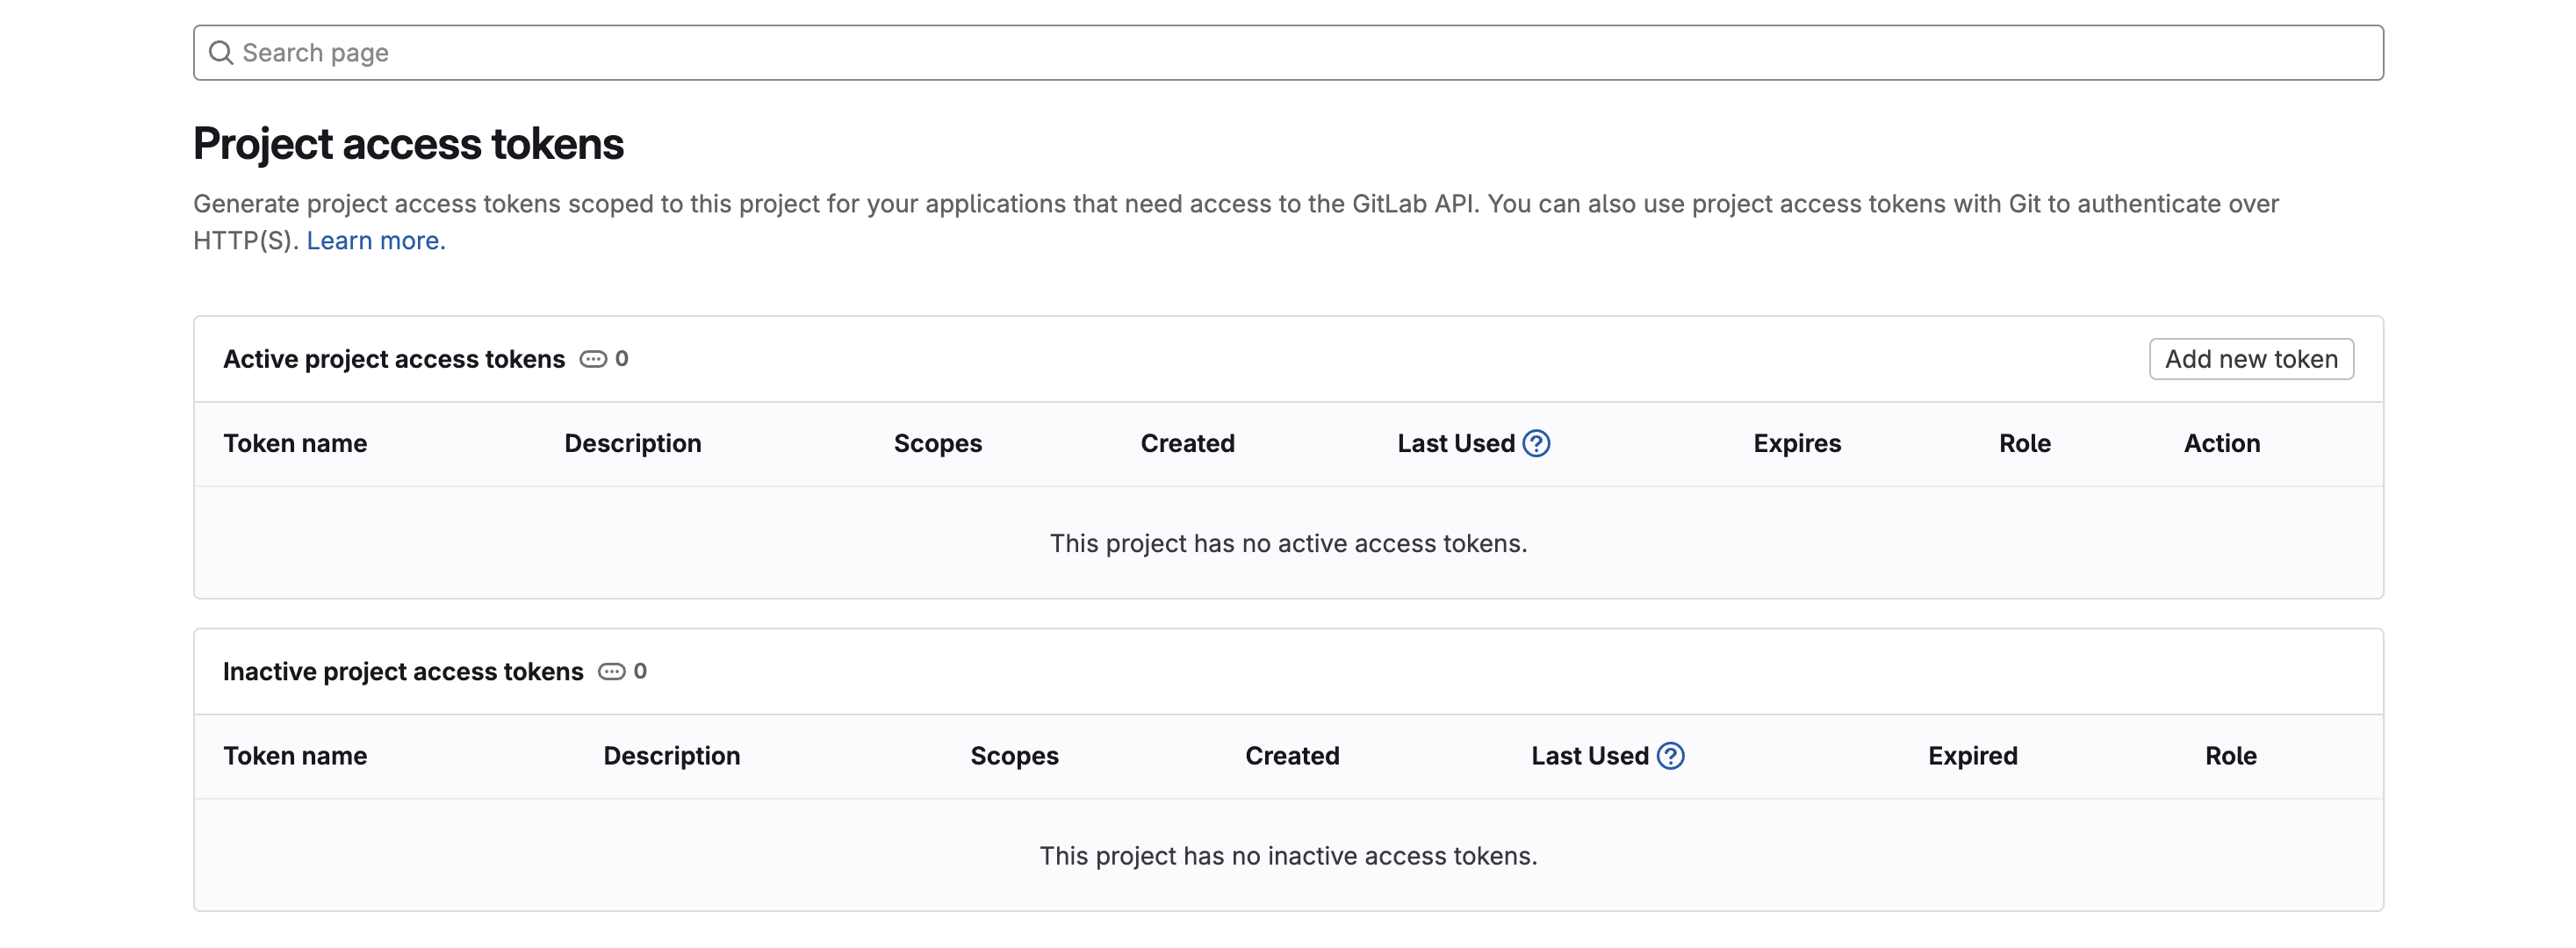
 Go to GitLab. In the left sidebar of your group or project, select Settings > Access tokens. Click **Add new token**.
We recommend using a Group Access Token so you don't need to repeat this setup when adding additional projects.
Go to GitLab. In the left sidebar of your group or project, select Settings > Access tokens. Click **Add new token**.
We recommend using a Group Access Token so you don't need to repeat this setup when adding additional projects.
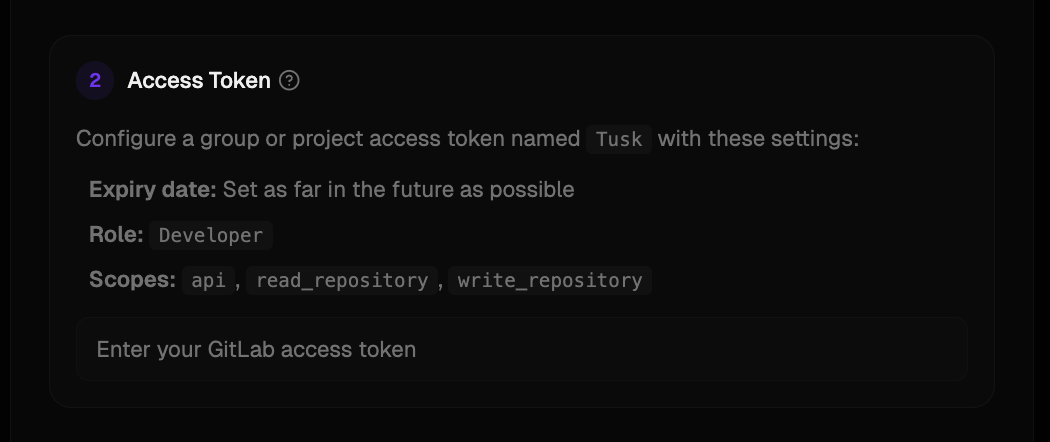
 Create a [Group Access Token](https://docs.gitlab.com/ee/user/group/settings/group_access_tokens.html#create-a-group-access-token-using-ui) or [Project Access Token](https://docs.gitlab.com/ee/user/project/settings/project_access_tokens.html#create-a-project-access-token) with the details below:
* **Name:** Tusk
* **Expiry date:** Set as far in the future as possible (max 1 year)
* **Role:** Developer
* **Scopes:** api, read\_repository, write\_repository
After creating the access token, **copy the access token** immediately.
You will not be able to access the token again once you leave this page.
Create a [Group Access Token](https://docs.gitlab.com/ee/user/group/settings/group_access_tokens.html#create-a-group-access-token-using-ui) or [Project Access Token](https://docs.gitlab.com/ee/user/project/settings/project_access_tokens.html#create-a-project-access-token) with the details below:
* **Name:** Tusk
* **Expiry date:** Set as far in the future as possible (max 1 year)
* **Role:** Developer
* **Scopes:** api, read\_repository, write\_repository
After creating the access token, **copy the access token** immediately.
You will not be able to access the token again once you leave this page.
 Go back into the Tusk and paste the access token into the **Access Token** field.
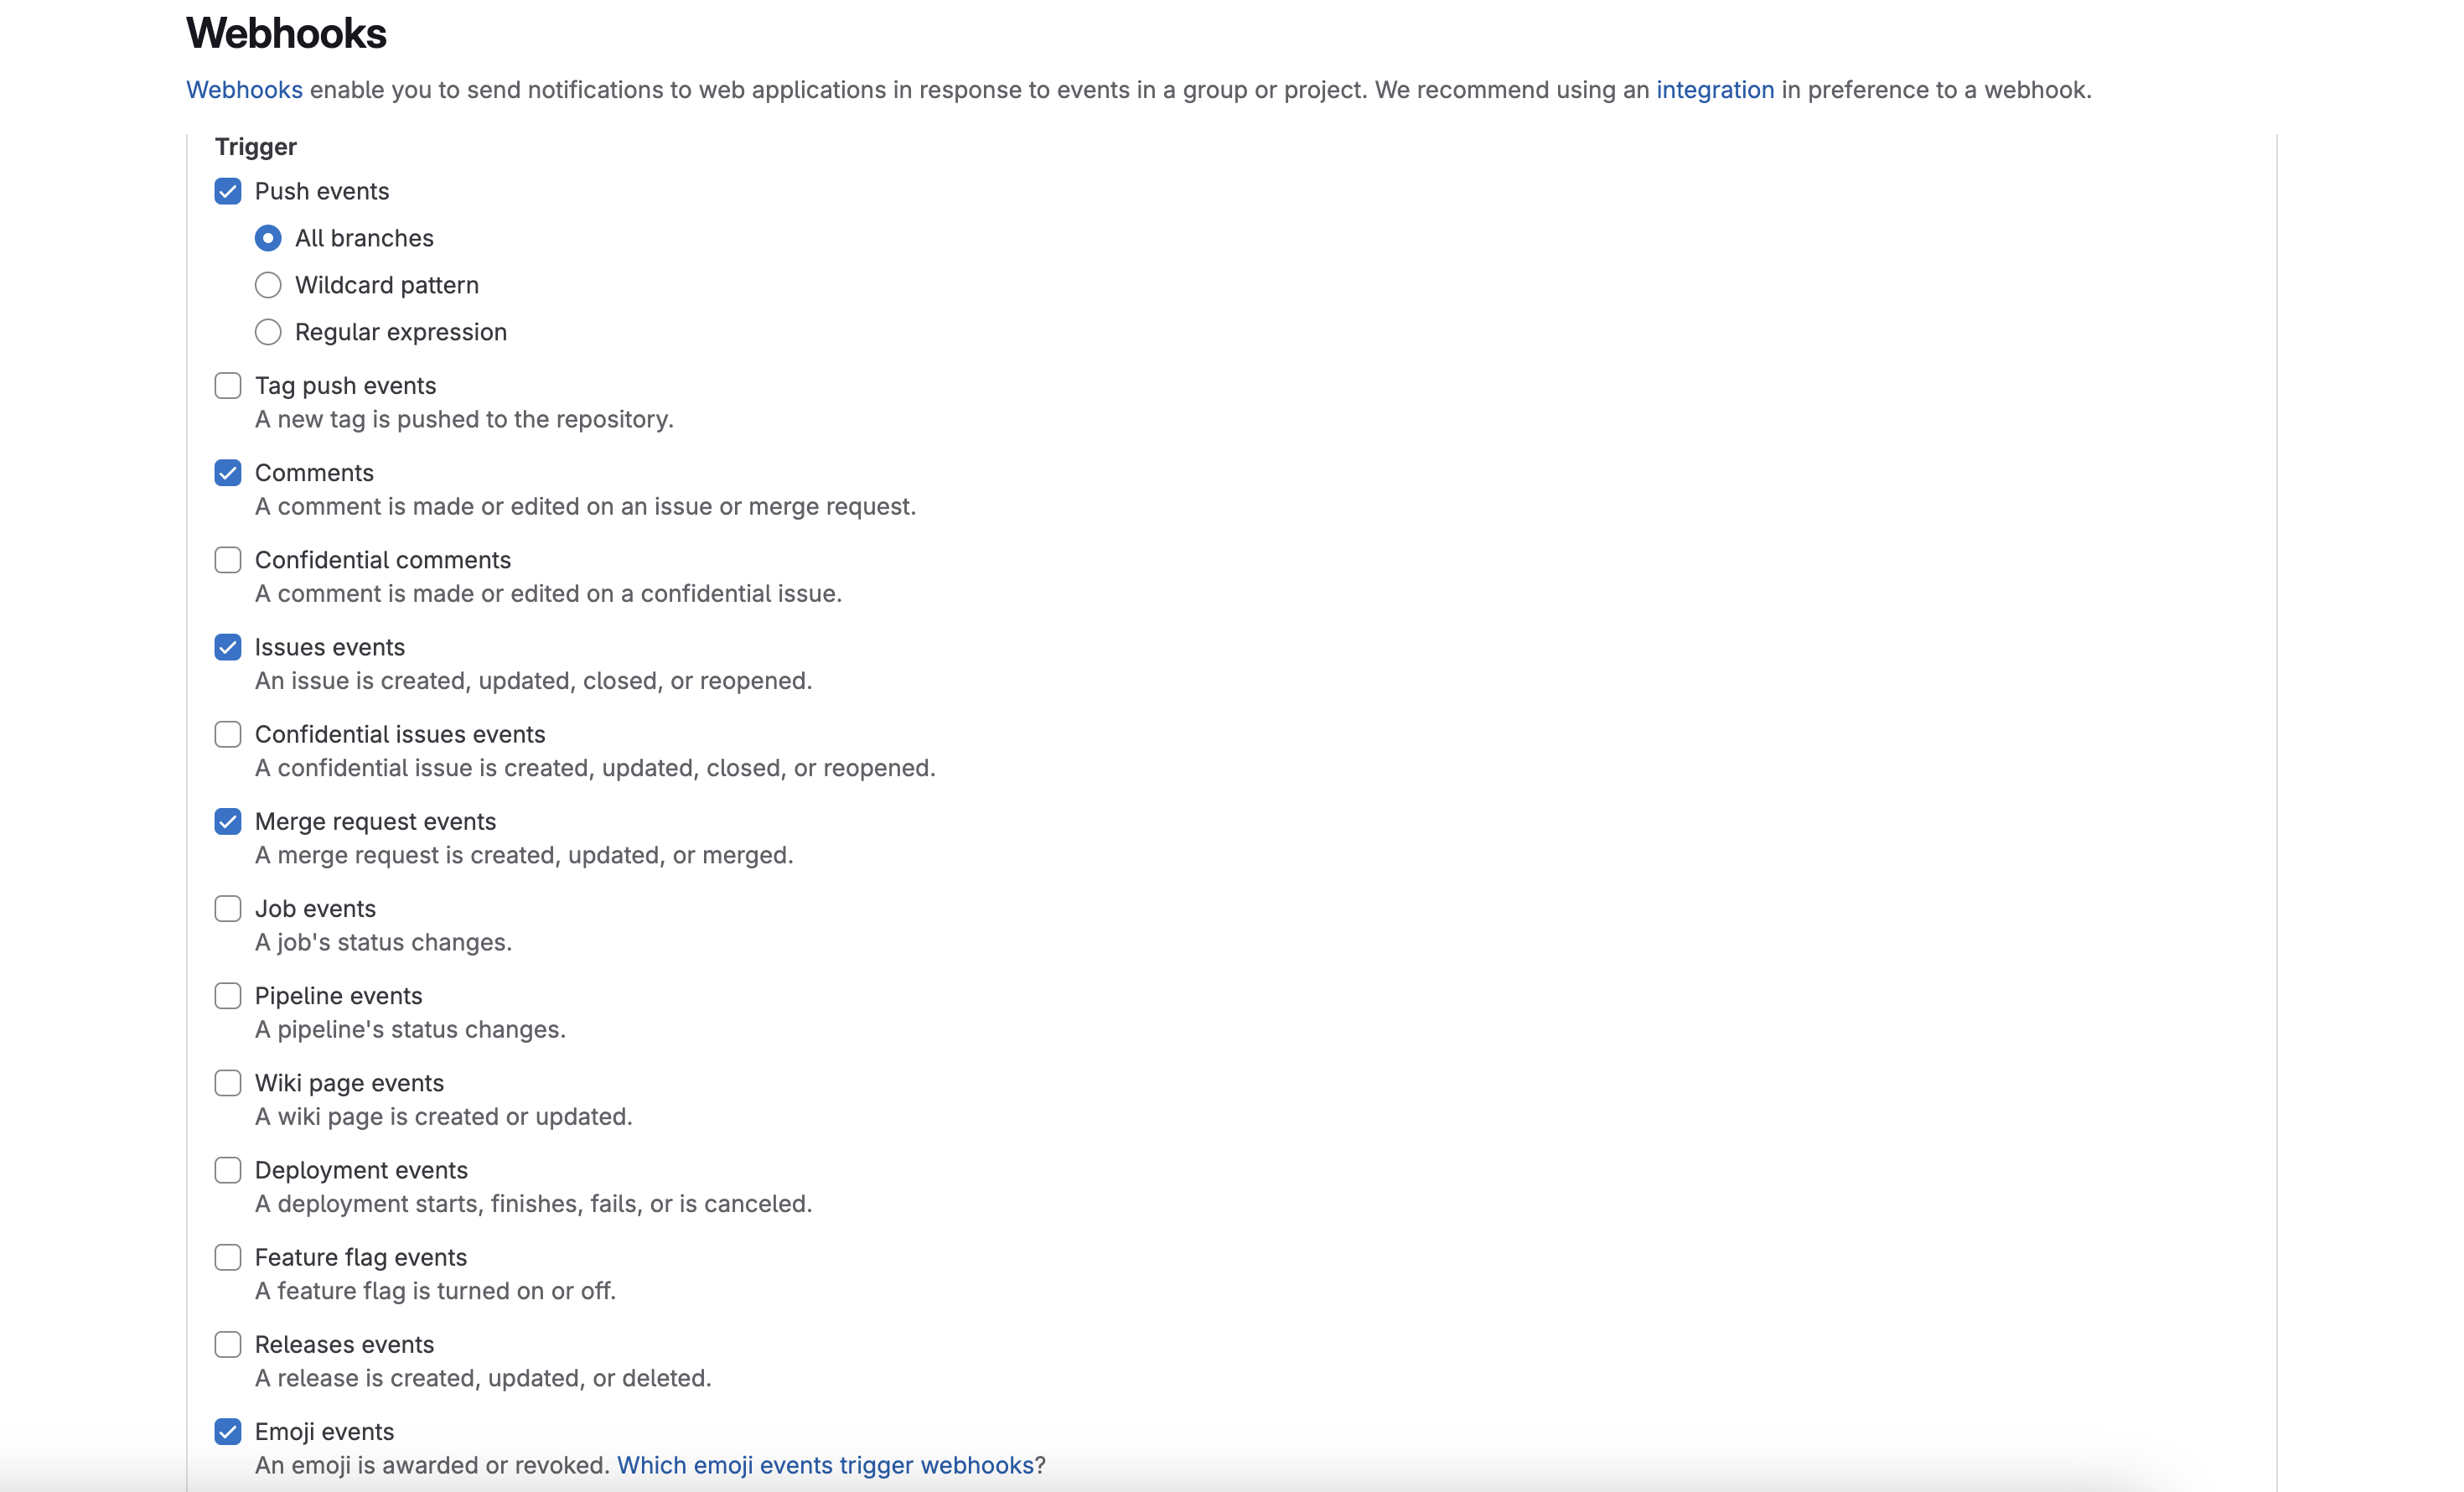
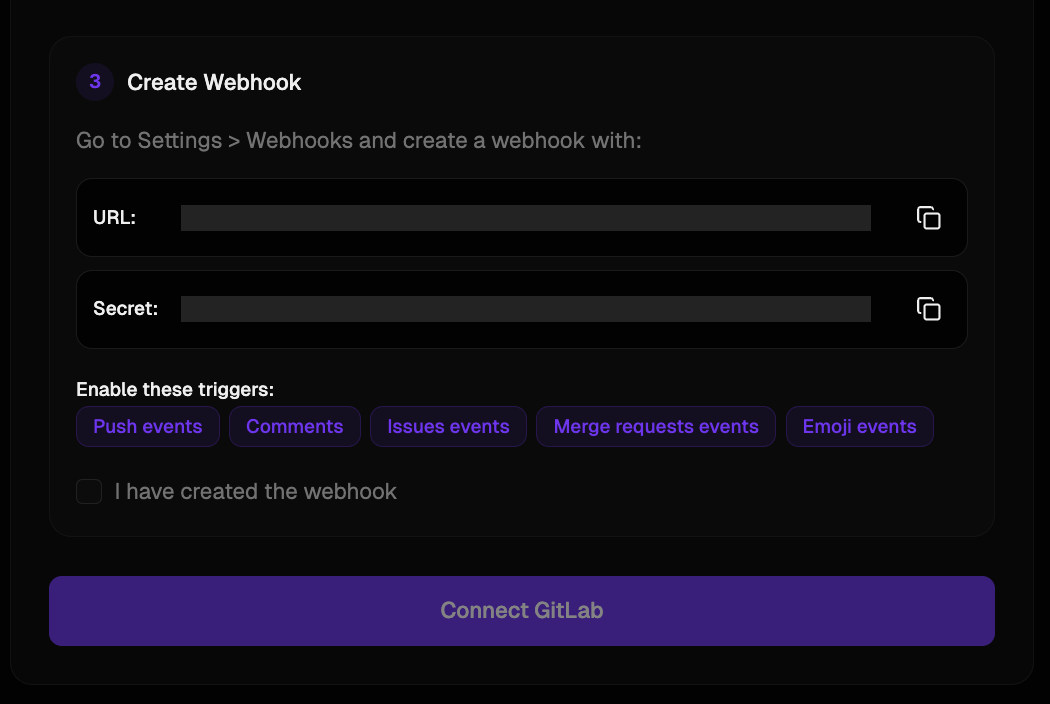
 Return to the GitLab group or project and go to Settings > Webhooks in the left sidebar. Click **Add new webhook**.
Create a [webhook in GitLab](https://docs.gitlab.com/ee/user/project/integrations/webhooks.html) with the details below:
* **URL:** `https://use-tusk.uc.r.appspot.com/api/webhook/gitlab`
* **Secret token:** Copy the auto-generated secret token from Tusk's GitLab flow and paste it in this field
* **Trigger:** `Push events` (all branches), `Comments`, `Issues events`, `Merge request events`, `Emoji events`
Return to the GitLab group or project and go to Settings > Webhooks in the left sidebar. Click **Add new webhook**.
Create a [webhook in GitLab](https://docs.gitlab.com/ee/user/project/integrations/webhooks.html) with the details below:
* **URL:** `https://use-tusk.uc.r.appspot.com/api/webhook/gitlab`
* **Secret token:** Copy the auto-generated secret token from Tusk's GitLab flow and paste it in this field
* **Trigger:** `Push events` (all branches), `Comments`, `Issues events`, `Merge request events`, `Emoji events`
 Return to Tusk and check the checkbox for "I have created a webhook with the above configuration". Click **Connect GitLab** to complete the integration.
 Choose up to 3 projects in your group you'd like Tusk to start the setup process for. Click **Continue**.
You'll be directed to the Repos page where you'll see the selected repos be analyzed for their eligibility for unit test generation and API drift detection.
## Connect project management platform (optional)
Tusk can use business context from tickets linked to your pull requests to generate more relevant unit tests and classify API deviations more accurately.
Choose up to 3 projects in your group you'd like Tusk to start the setup process for. Click **Continue**.
You'll be directed to the Repos page where you'll see the selected repos be analyzed for their eligibility for unit test generation and API drift detection.
## Connect project management platform (optional)
Tusk can use business context from tickets linked to your pull requests to generate more relevant unit tests and classify API deviations more accurately.
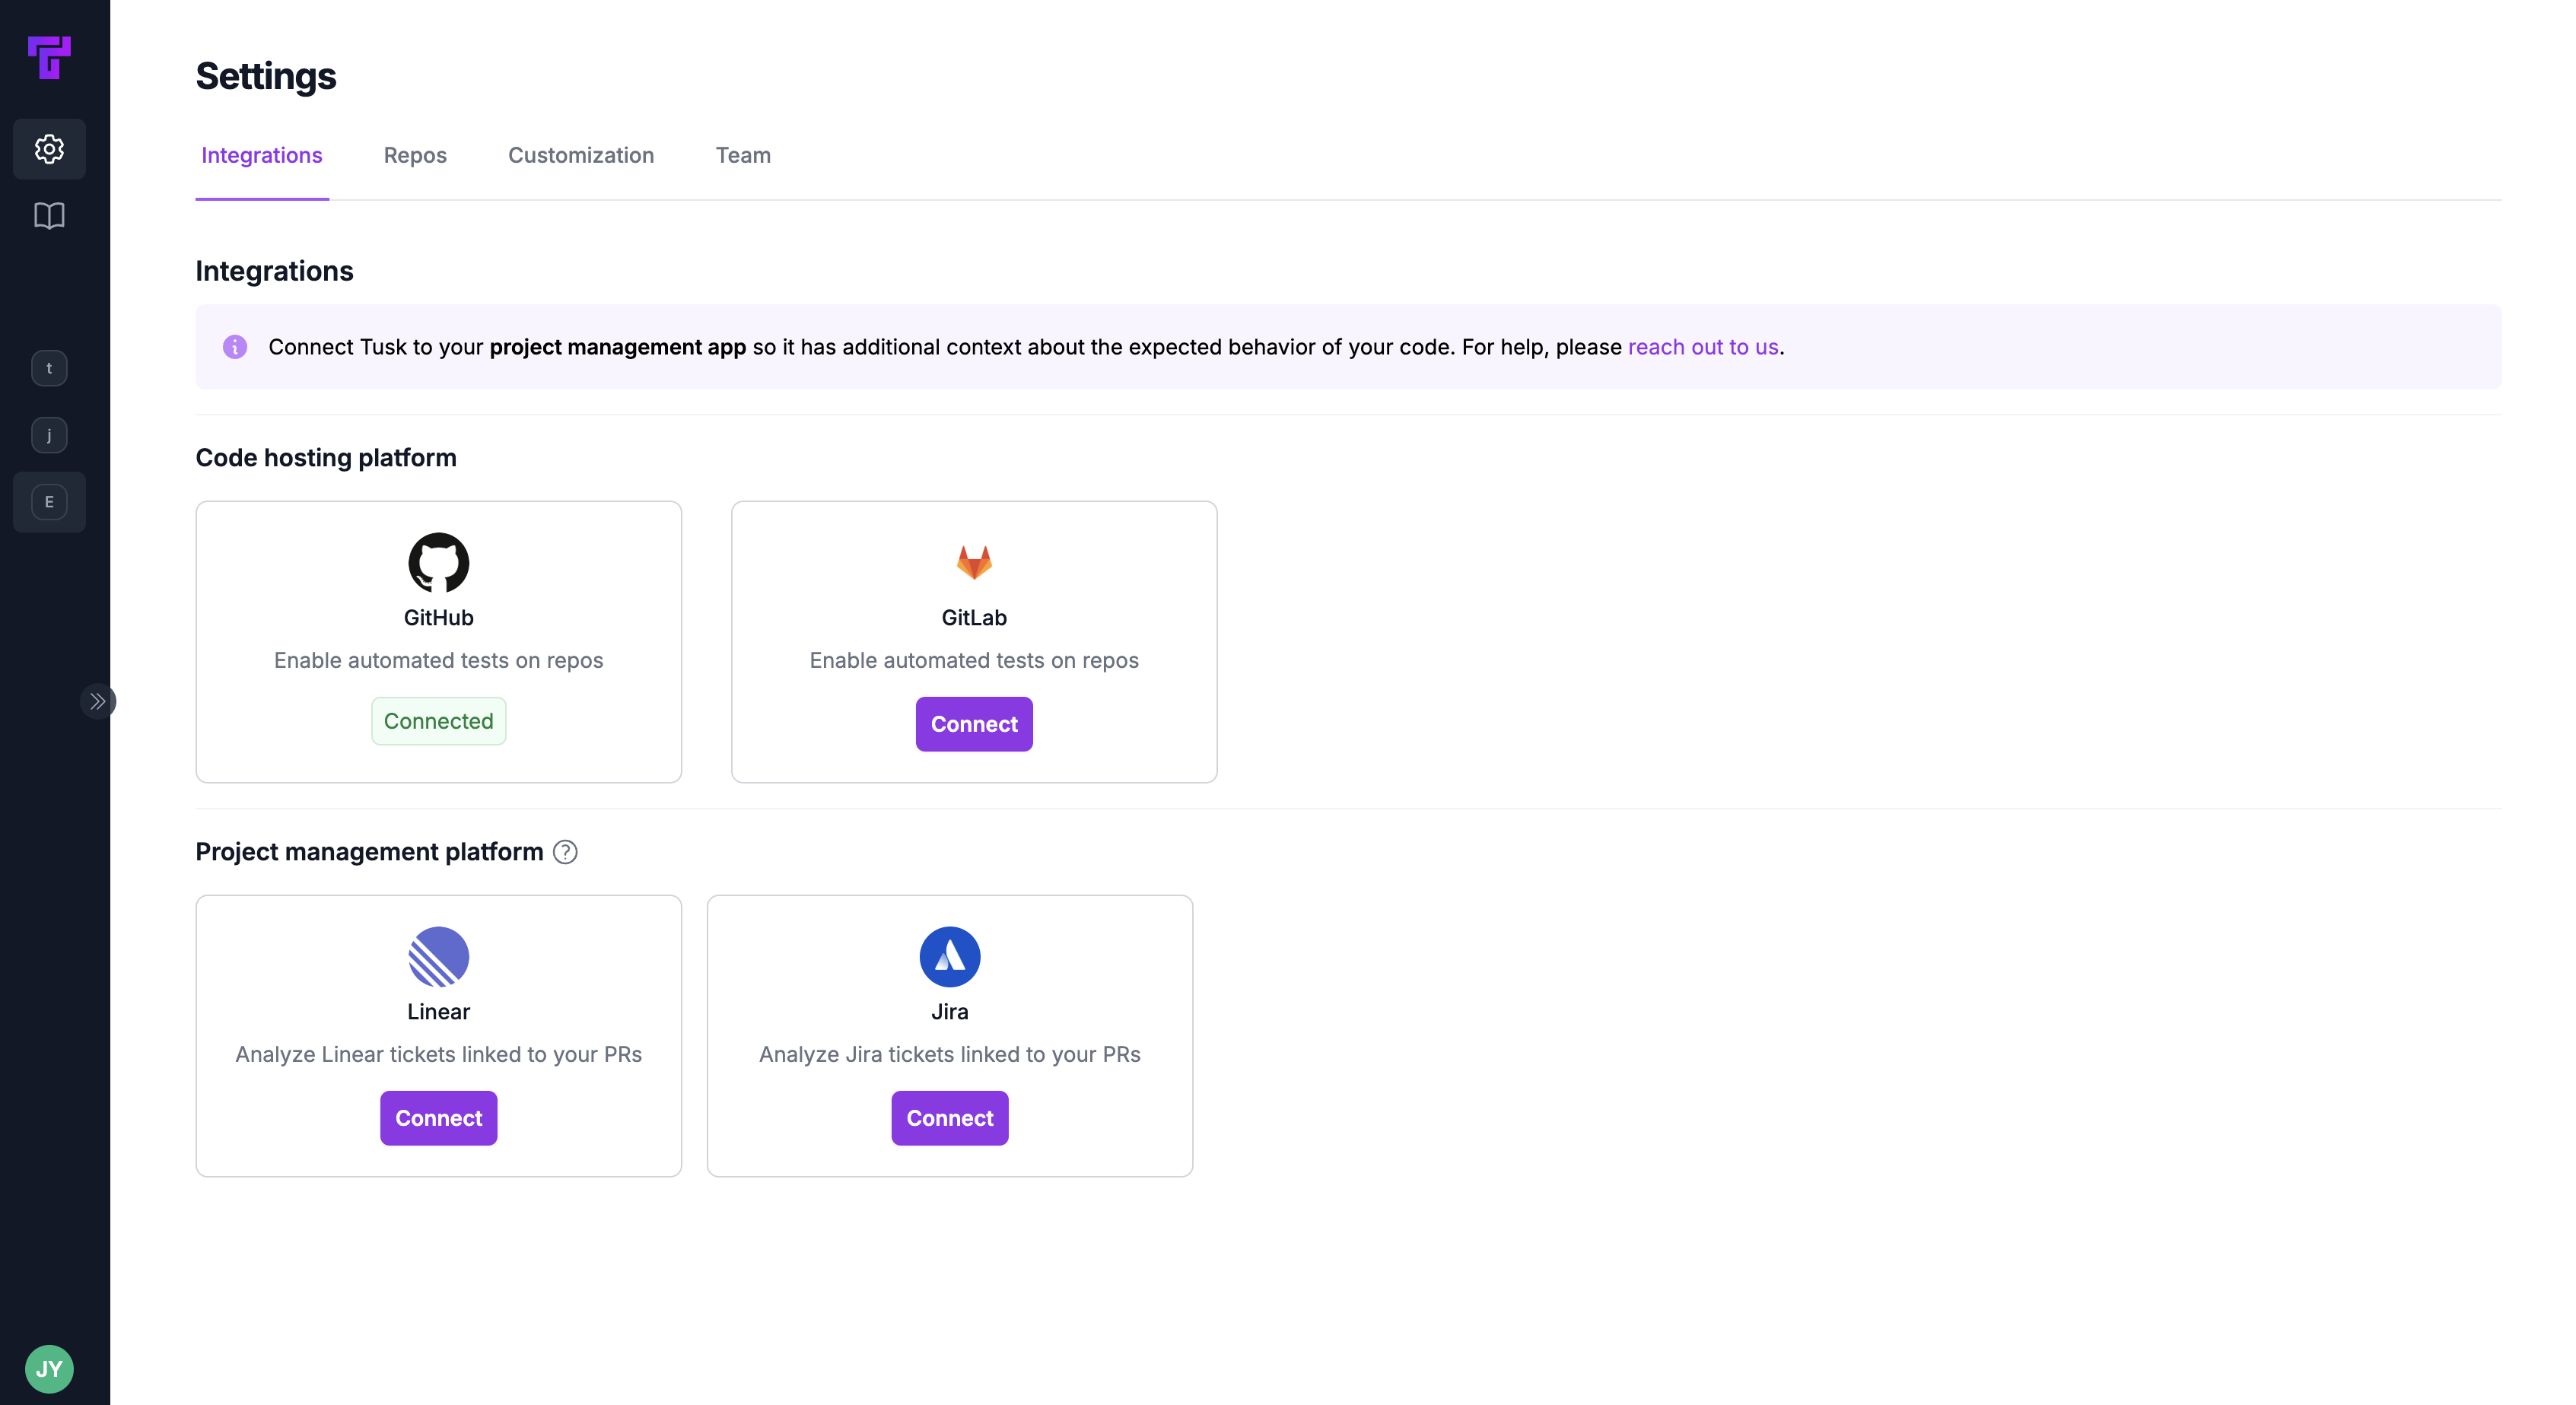
Under the **Integrations** tab, find the Linear integration card under "Project management platform." Click **Connect**.
You'll be redirected to the Linear app to grant Tusk access to your Linear workspace. Make sure to choose the correct workspace on the top left corner.
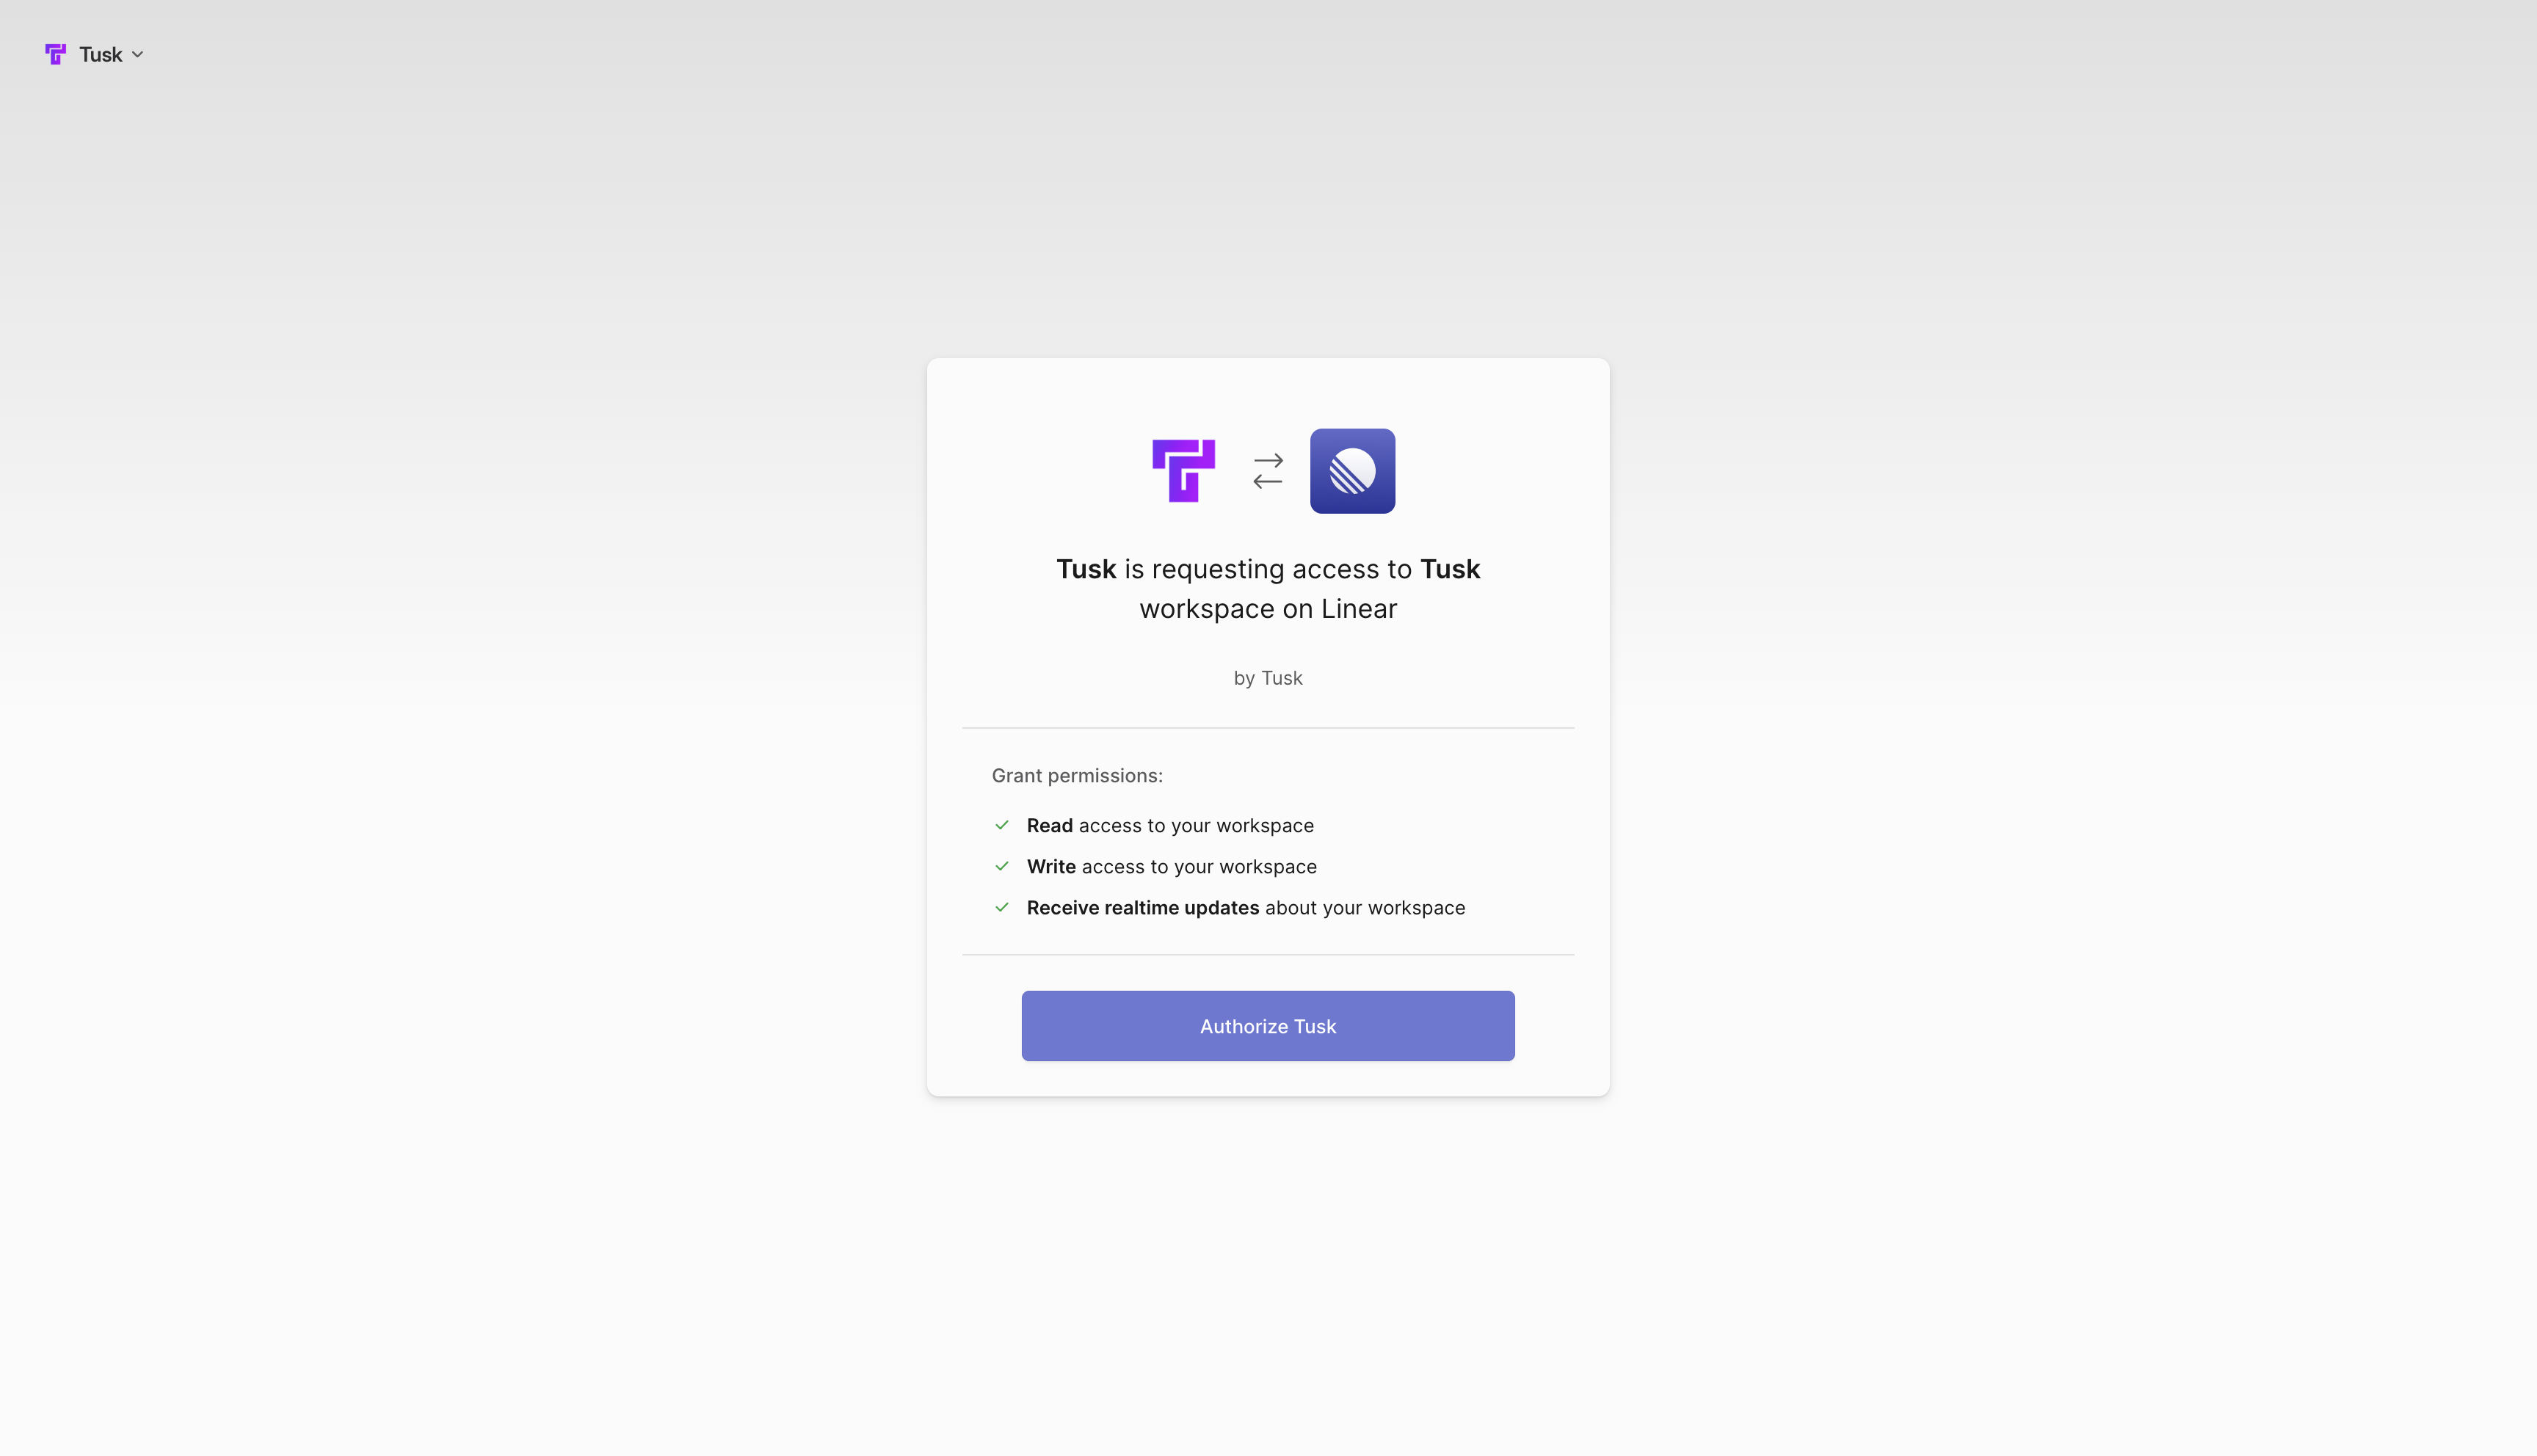 Click **Authorize Tusk** once you have confirmed that you're in the correct workspace.
You'll then be redirected back to the Tusk app, where you should now see a status badge displaying "Connected" on the Linear integration card.
Under the **Integrations** tab, find the Jira integration card under "Project management platform." Click **Connect**.
You'll be redirected to the Atlassian platform to grant Tusk access to your Jira site.
Click **Authorize Tusk** once you have confirmed that you're in the correct workspace.
You'll then be redirected back to the Tusk app, where you should now see a status badge displaying "Connected" on the Linear integration card.
Under the **Integrations** tab, find the Jira integration card under "Project management platform." Click **Connect**.
You'll be redirected to the Atlassian platform to grant Tusk access to your Jira site.
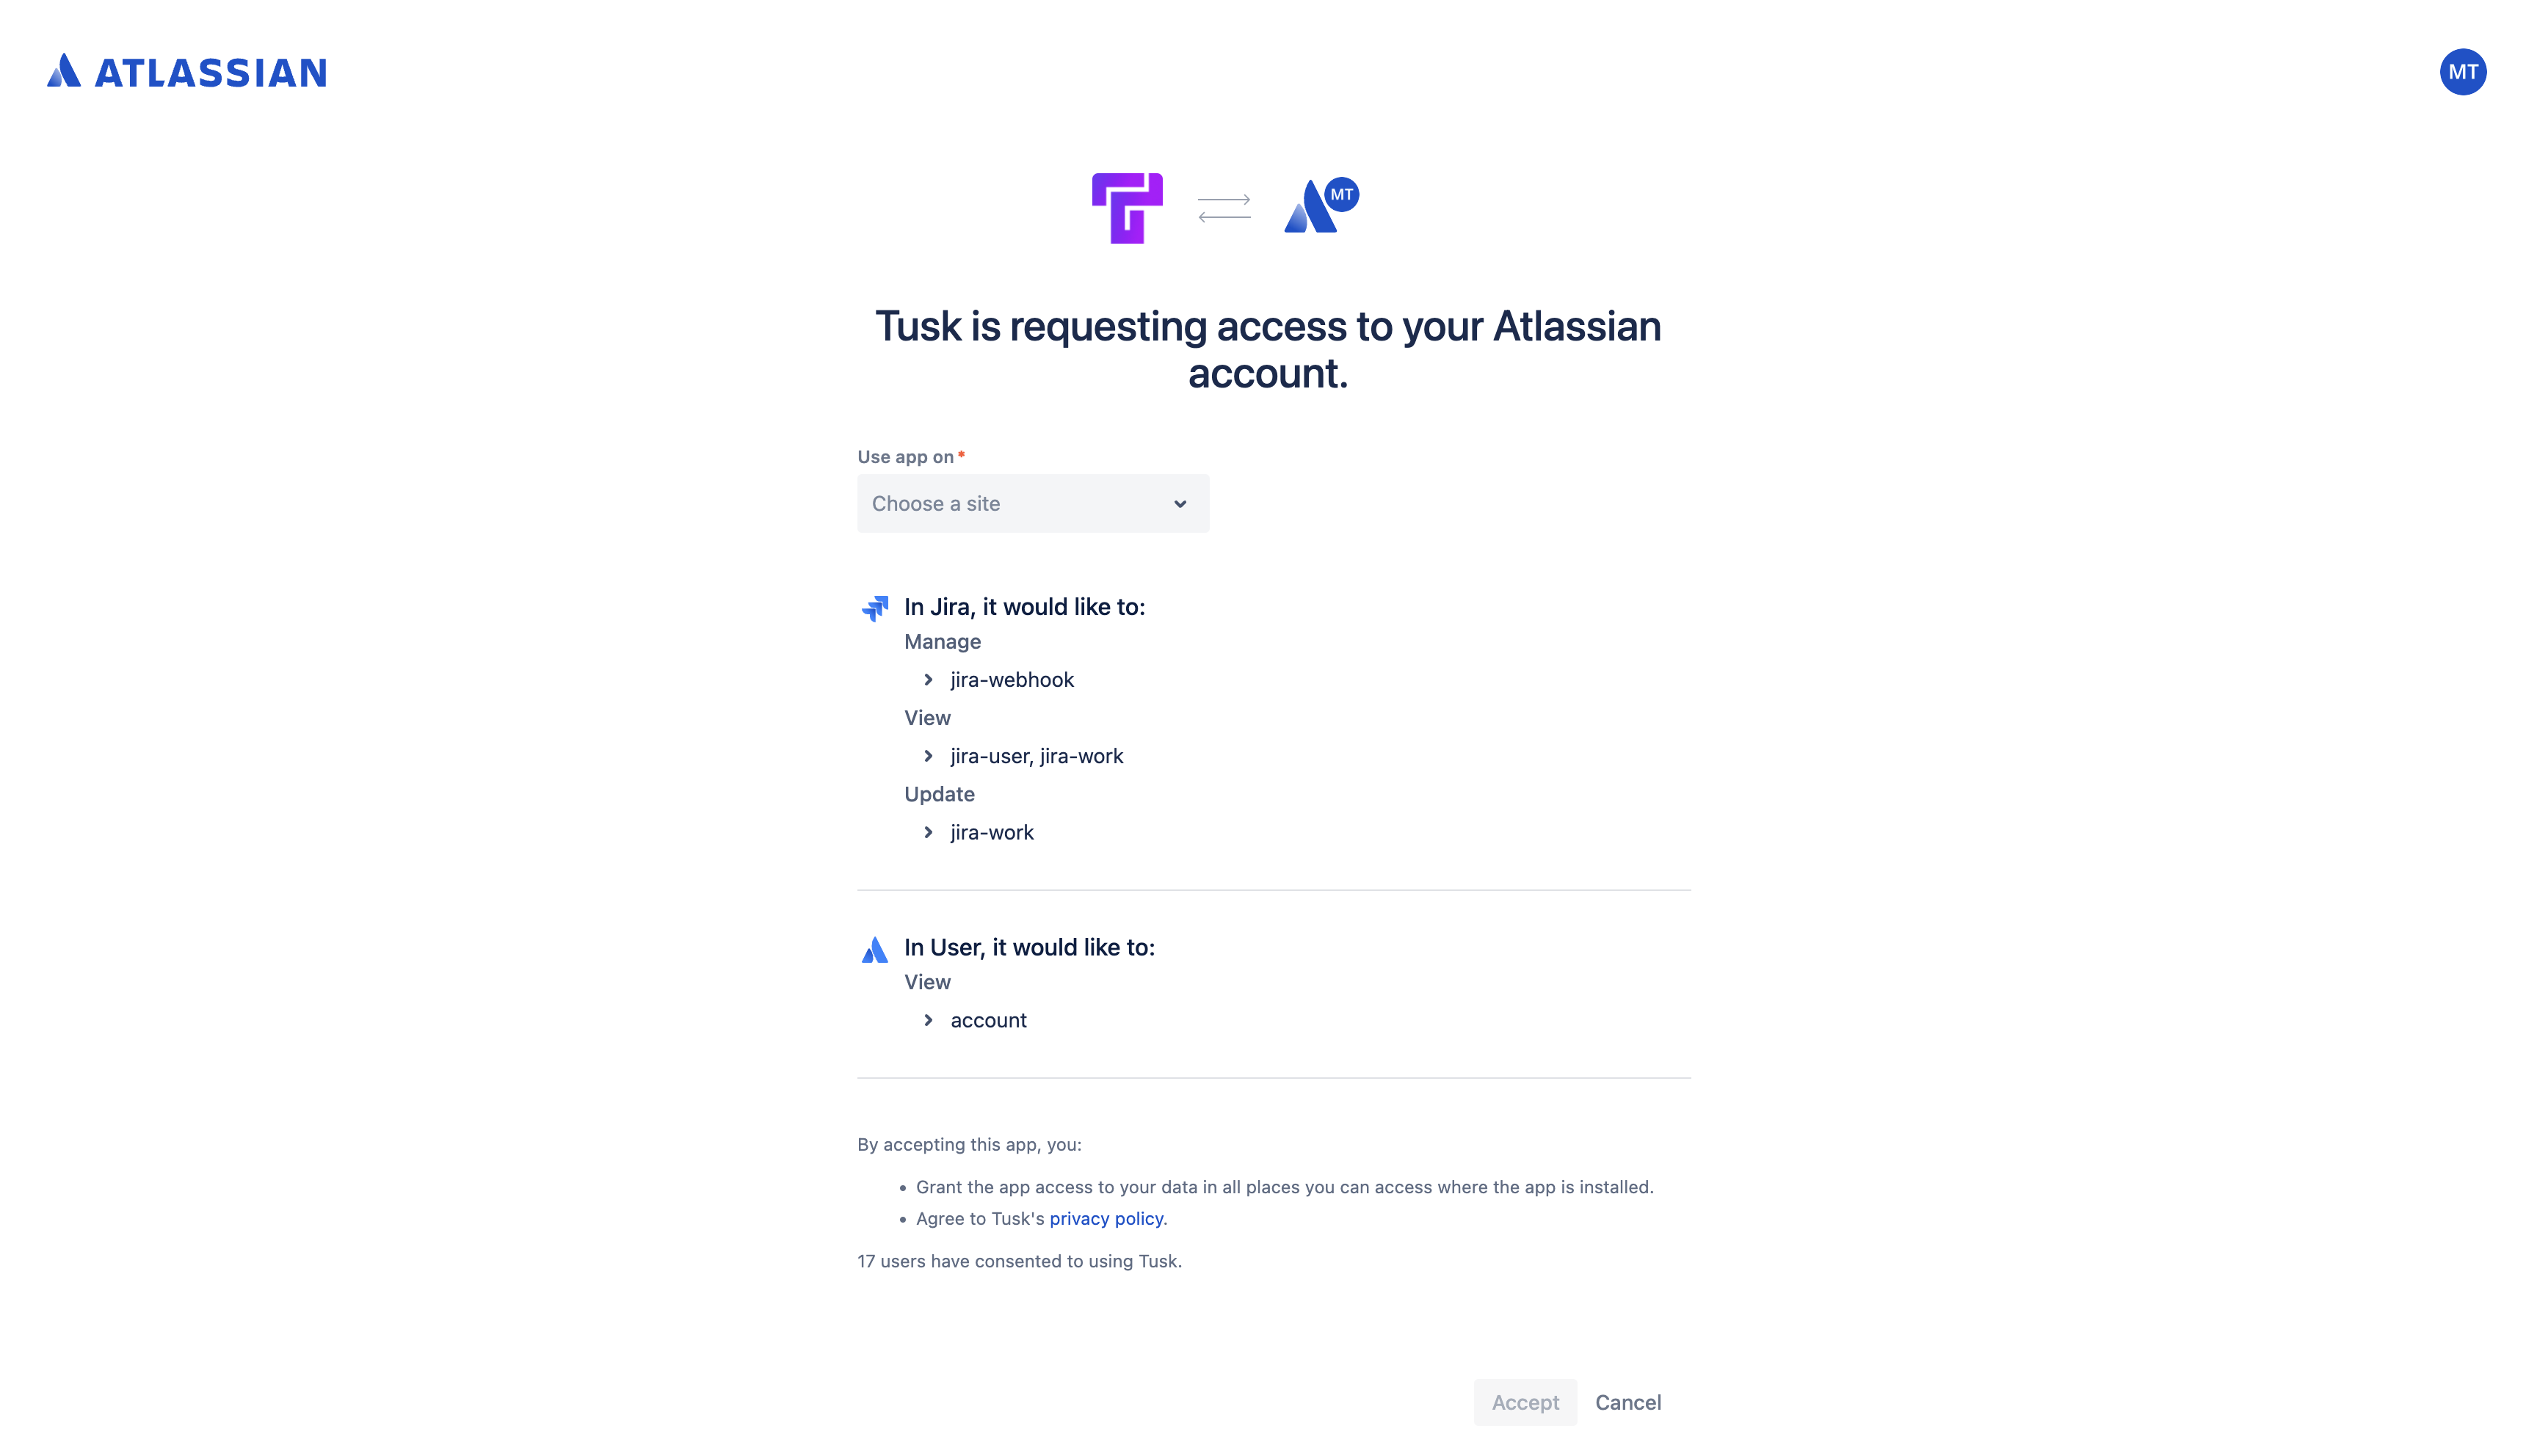 Choose the correct Jira site under "Authorize for site" and click **Accept**.
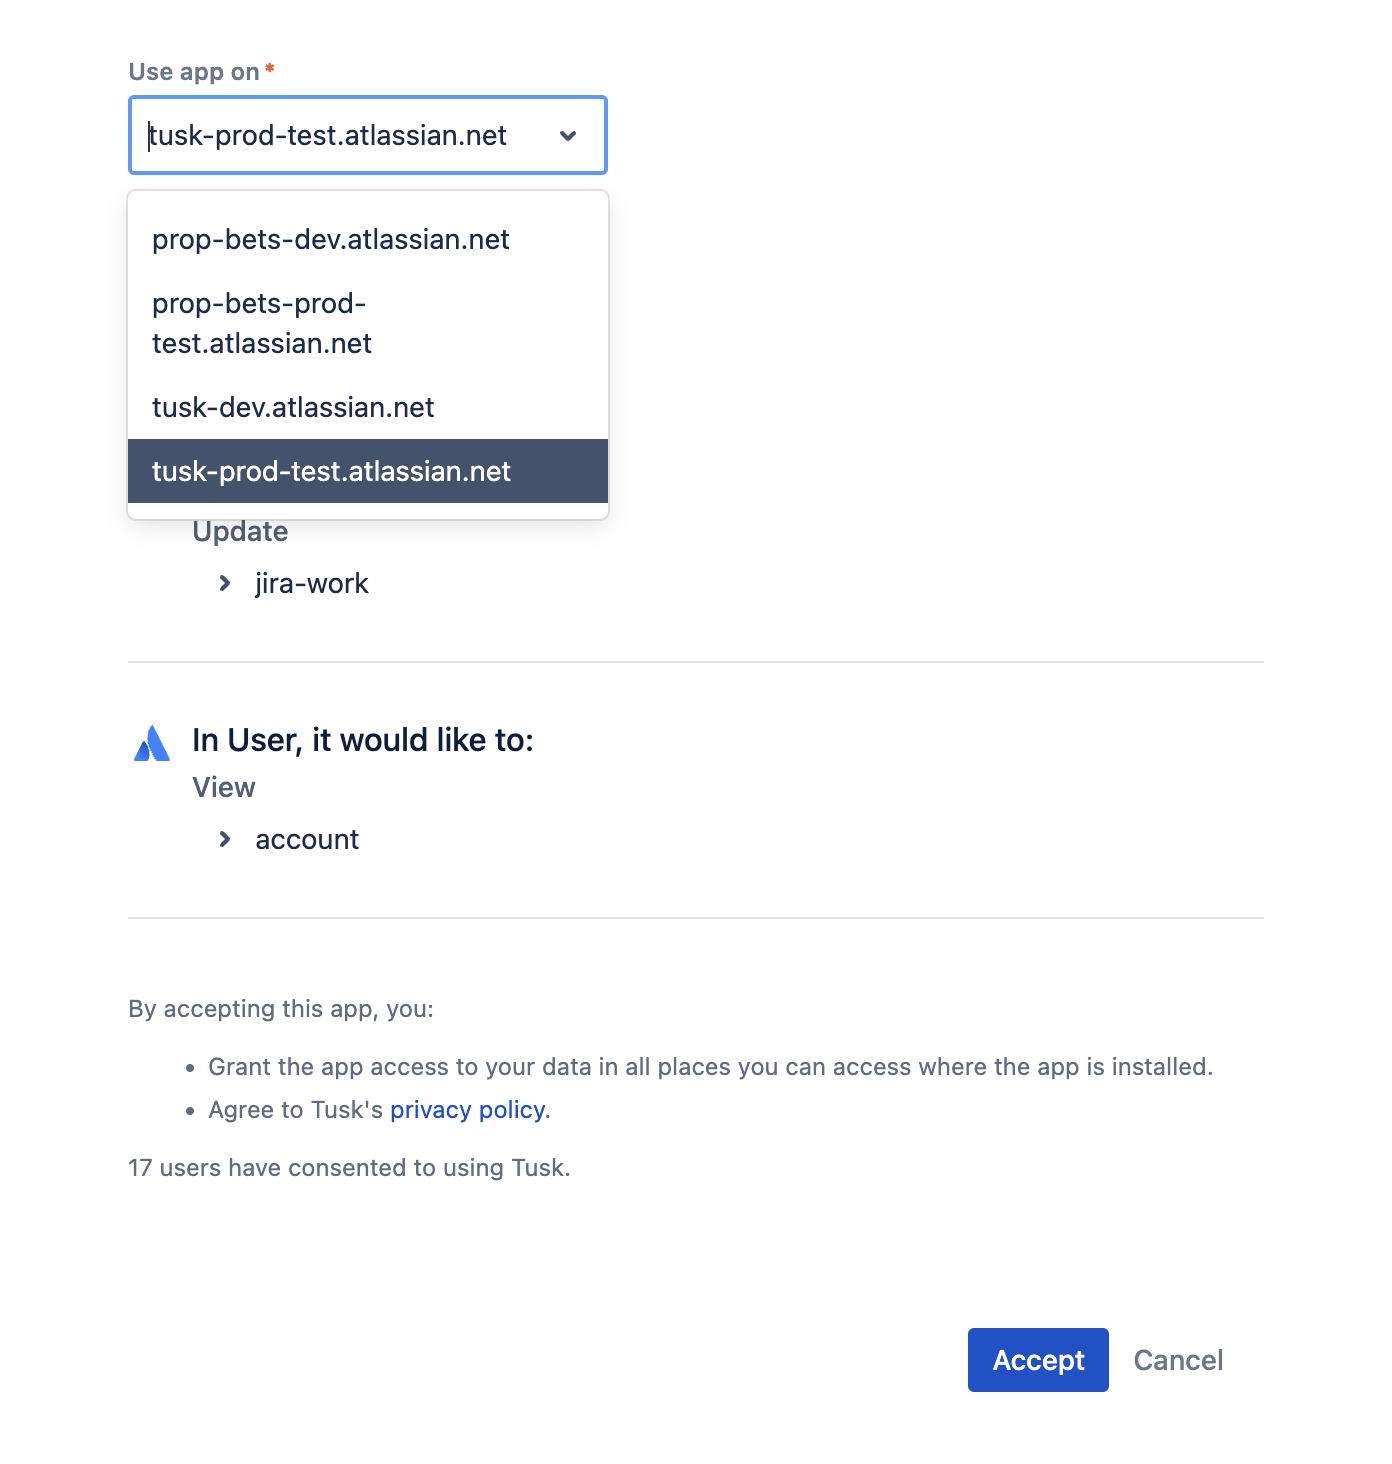 You'll then be redirected back to the Tusk app, where you should now see a status badge displaying "Connected" on the Jira integration card.
## Next Steps
* **API Drift Detection:** follow [this guide](/api-tests/setup-agent) to install the Tusk Drift CLI and SDK in two commands to record/replay traces as API tests.
* **Unit Test Generation:** follow [this guide](/automated-tests/test-execution-environments) to set up a test execution environment to generate and run unit tests in your PRs.
## FAQs
Make sure the additional repo(s) are in the same GitHub organization. If not, see the frequently asked question below this one.
If you've already given Tusk access to the repo in GitHub, follow these steps:
1. Go to [Connected Repos](https://app.usetusk.ai/app/settings/repos) in the Tusk web app
2. Click **Sync connected repos**
*If also enabling unit test generation on the new repo(s):*
3. Go to the [Unit Tests](https://app.usetusk.ai/app/unit-tests/repos) page
4. Click **Enable** to sync the additional repo(s)
You most likely gave Tusk access to "Only select repositories" on initial GitHub connection.
1. In GitHub itself, go to **Settings > GitHub Apps** for the current organization (github.com/organizations/your-org-name/settings/installations)
2. Click **Configure** for "Use Tusk"
3. Under Repository access, click **Select repositories**
4. Select the additional repo(s) from the dropdown menu
5. Click **Save**
6. In Tusk, go to [Connected Repos](https://app.usetusk.ai/app/settings/repos) and click **Sync connected repos**
*If also enabling unit test generation on the new repo(s):*
7. Go to the [Unit Tests](https://app.usetusk.ai/app/unit-tests/repos) page
8. Click **Enable** to sync the additional repo(s)
1. In GitHub itself, go to **Settings > GitHub Apps** for the current organization (github.com/organizations/your-org-name/settings/installations)
2. Click **Configure** for "Use Tusk"
3. Click **Uninstall** in the "Danger zone"
4. Return to the Tusk web app's settings
5. Click **Connect** on the GitHub integration
6. Select the new GitHub organization to authorize Tusk on
1. In GitHub itself, go to **Settings > GitHub Apps** for the current organization (github.com/organizations/your-org-name/settings/installations)
2. Click **Configure** for "Use Tusk"
3. Click **Uninstall** in the "Danger zone"
Tusk runs generated tests in isolated, ephemeral sandboxes using your test execution environment configuration. When you set up a test environment, Tusk creates a Docker-based sandbox specifically configured for your project's dependencies and testing framework.
This allows Tusk to:
* Verify that generated tests actually pass
* Auto-iterate on test cases if errors are encountered
* Show you test results before you incorporate them into your codebase
See [Test Execution Environments](/automated-tests/test-execution-environments) for more details on how this works.
You'll then be redirected back to the Tusk app, where you should now see a status badge displaying "Connected" on the Jira integration card.
## Next Steps
* **API Drift Detection:** follow [this guide](/api-tests/setup-agent) to install the Tusk Drift CLI and SDK in two commands to record/replay traces as API tests.
* **Unit Test Generation:** follow [this guide](/automated-tests/test-execution-environments) to set up a test execution environment to generate and run unit tests in your PRs.
## FAQs
Make sure the additional repo(s) are in the same GitHub organization. If not, see the frequently asked question below this one.
If you've already given Tusk access to the repo in GitHub, follow these steps:
1. Go to [Connected Repos](https://app.usetusk.ai/app/settings/repos) in the Tusk web app
2. Click **Sync connected repos**
*If also enabling unit test generation on the new repo(s):*
3. Go to the [Unit Tests](https://app.usetusk.ai/app/unit-tests/repos) page
4. Click **Enable** to sync the additional repo(s)
You most likely gave Tusk access to "Only select repositories" on initial GitHub connection.
1. In GitHub itself, go to **Settings > GitHub Apps** for the current organization (github.com/organizations/your-org-name/settings/installations)
2. Click **Configure** for "Use Tusk"
3. Under Repository access, click **Select repositories**
4. Select the additional repo(s) from the dropdown menu
5. Click **Save**
6. In Tusk, go to [Connected Repos](https://app.usetusk.ai/app/settings/repos) and click **Sync connected repos**
*If also enabling unit test generation on the new repo(s):*
7. Go to the [Unit Tests](https://app.usetusk.ai/app/unit-tests/repos) page
8. Click **Enable** to sync the additional repo(s)
1. In GitHub itself, go to **Settings > GitHub Apps** for the current organization (github.com/organizations/your-org-name/settings/installations)
2. Click **Configure** for "Use Tusk"
3. Click **Uninstall** in the "Danger zone"
4. Return to the Tusk web app's settings
5. Click **Connect** on the GitHub integration
6. Select the new GitHub organization to authorize Tusk on
1. In GitHub itself, go to **Settings > GitHub Apps** for the current organization (github.com/organizations/your-org-name/settings/installations)
2. Click **Configure** for "Use Tusk"
3. Click **Uninstall** in the "Danger zone"
Tusk runs generated tests in isolated, ephemeral sandboxes using your test execution environment configuration. When you set up a test environment, Tusk creates a Docker-based sandbox specifically configured for your project's dependencies and testing framework.
This allows Tusk to:
* Verify that generated tests actually pass
* Auto-iterate on test cases if errors are encountered
* Show you test results before you incorporate them into your codebase
See [Test Execution Environments](/automated-tests/test-execution-environments) for more details on how this works.