> ## Documentation Index
> Fetch the complete documentation index at: https://docs.usetusk.ai/llms.txt
> Use this file to discover all available pages before exploring further.
# Ticketing Integrations
> Use Tusk from within your project management apps
## Overview
We know that many product teams use project management software as their single source of truth for product development tasks.
Tusk integrates with popular project management platforms like Linear, Jira, Notion, and GitHub issues. Our app embeds directly into your current project management workflow, so you don’t have to change how you work.
You can assign a ticket to Tusk in one click. Just add one of the following labels to a ticket:
* "Tusk" label (to create a PR)
* "Tusk Investigator" label (Tusk will investigate the issue and provide advice on the ticket without creating a PR)
After reading this, we recommend that you read [Best Practices for Using Tusk](https://docs.usetusk.ai/best-practices).
***
Before you begin, make sure that you have permissions to connect external apps to your project management app. This typically means being an admin user in your project management app.
## Connecting to Linear
1. Log into Tusk and go to the **Settings** page.
2. Under the **Integrations** tab, find the Linear integration card under "Project management platform.” Click **Connect**.
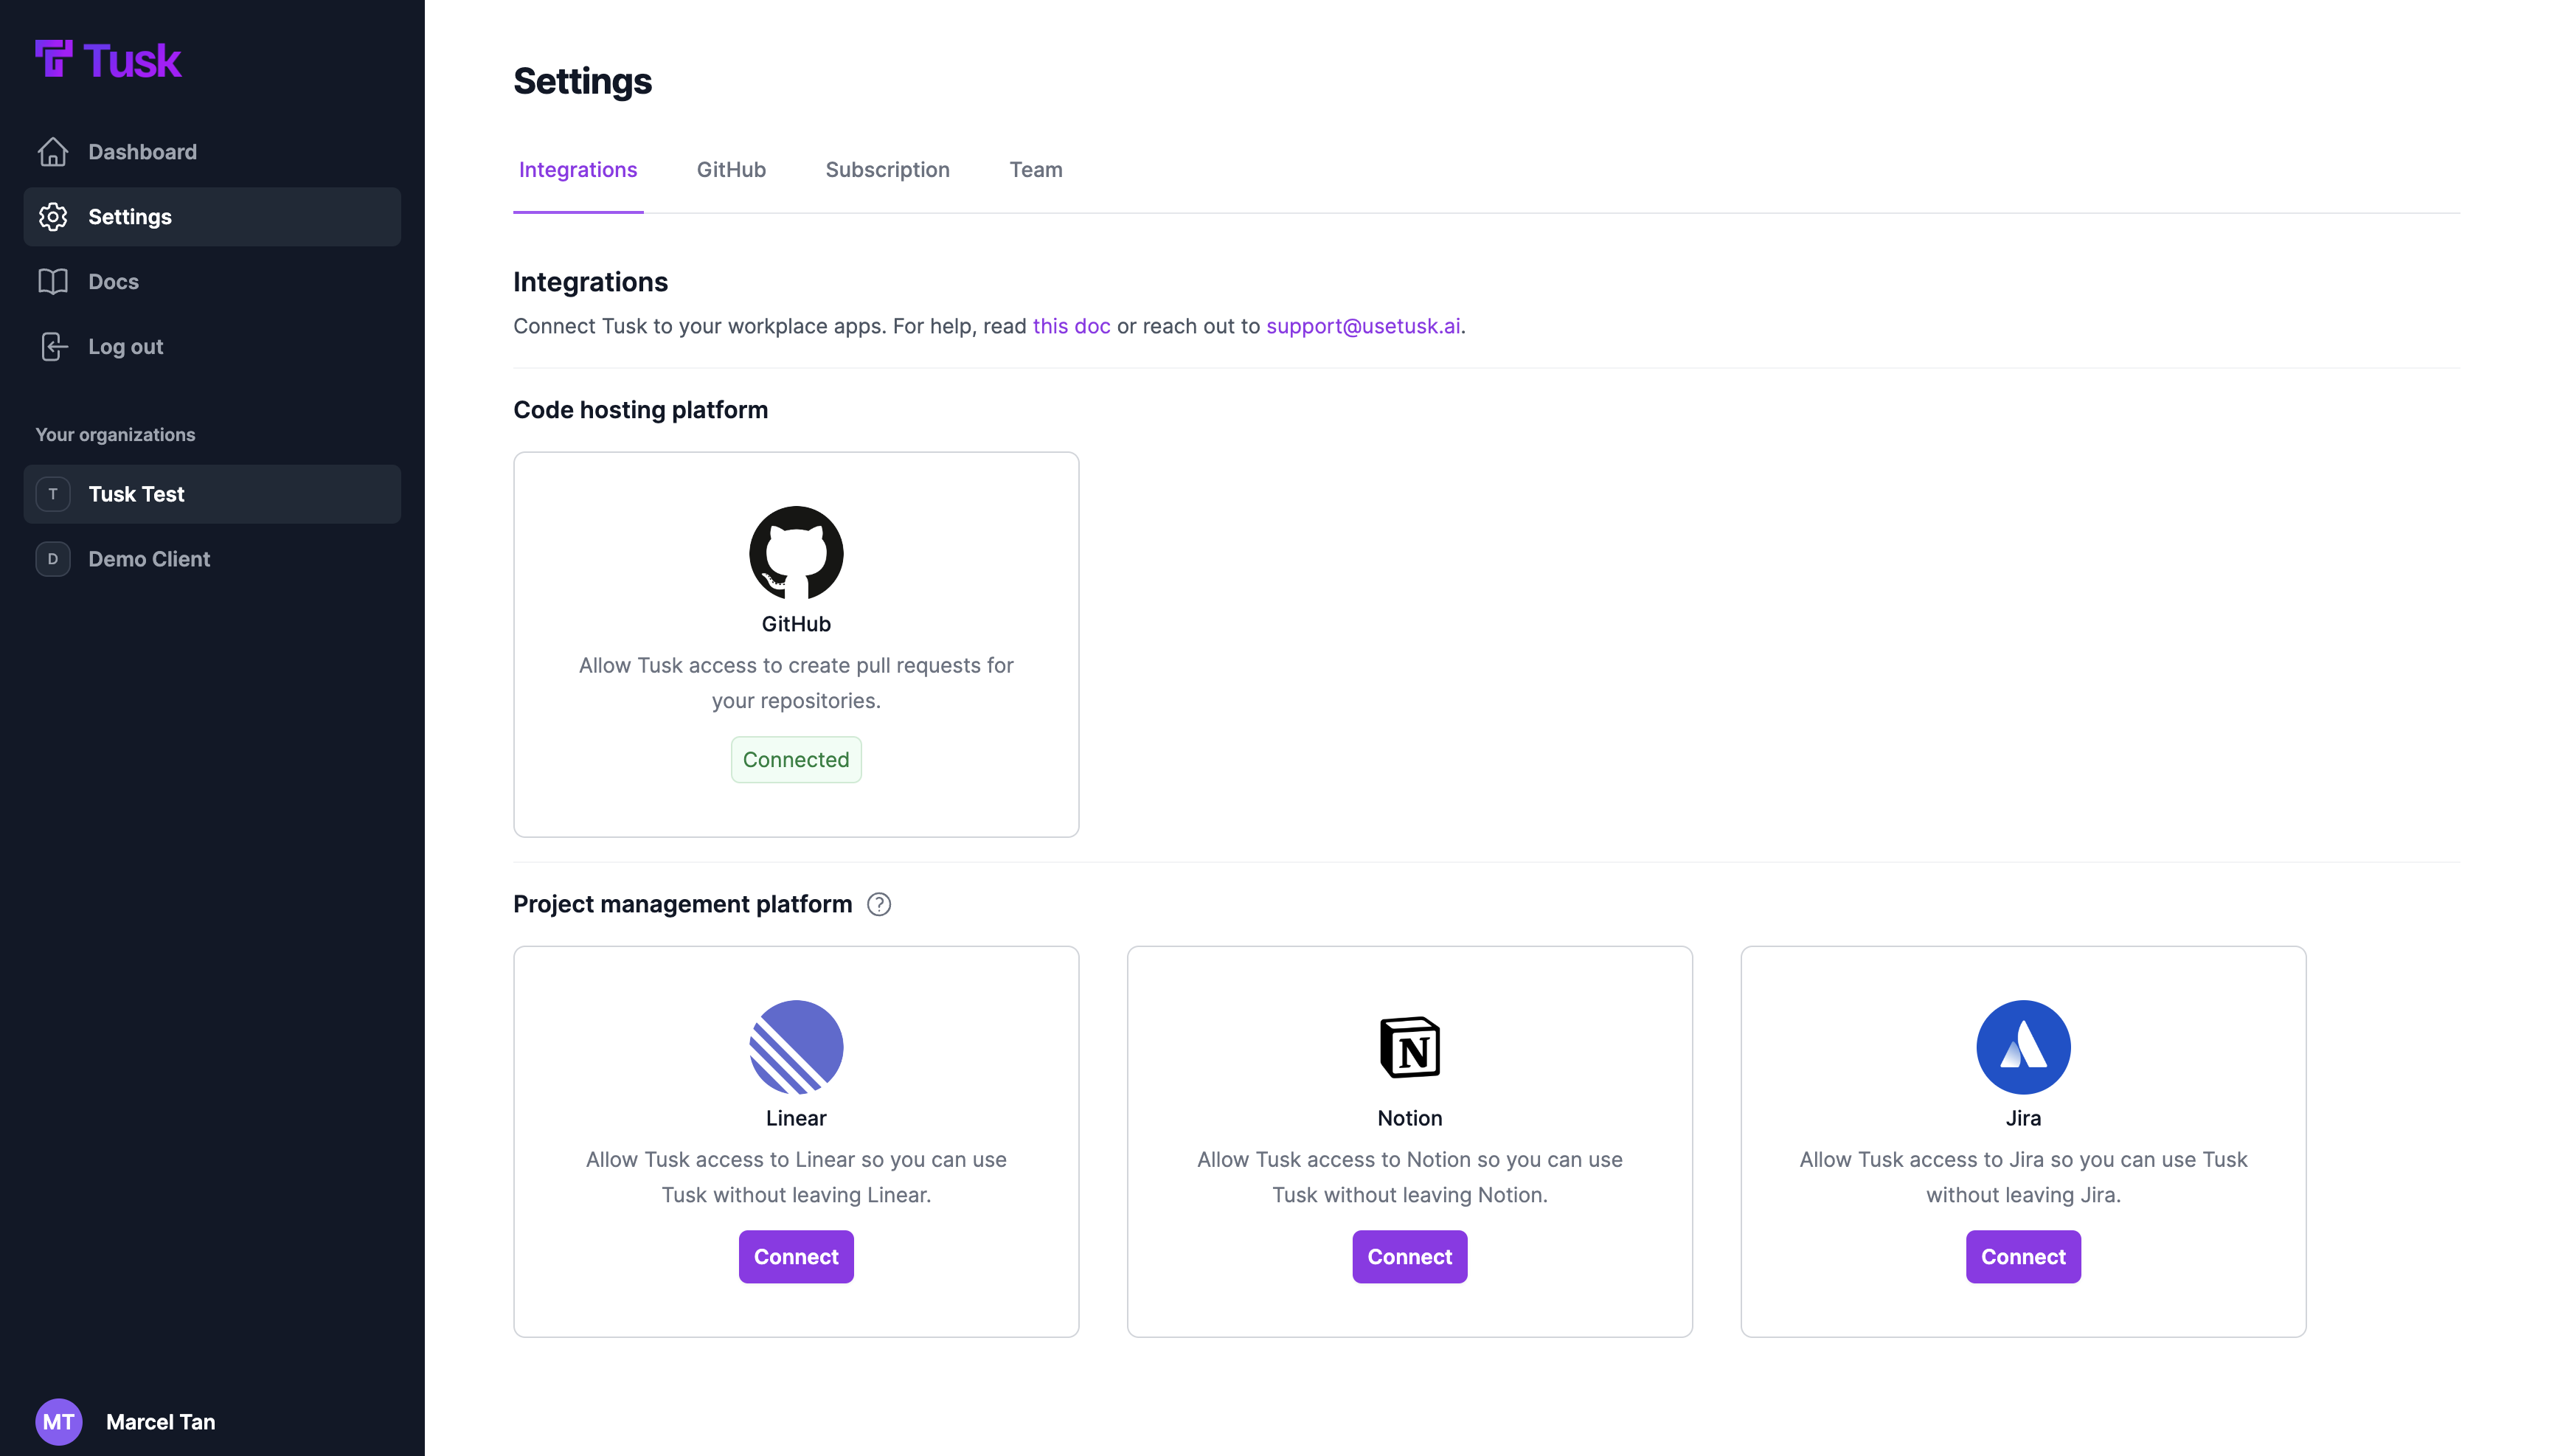 3. You’ll be redirected to the Linear app to grant Tusk access to your Linear workspace. Make sure to choose the correct workspace on the top left corner.
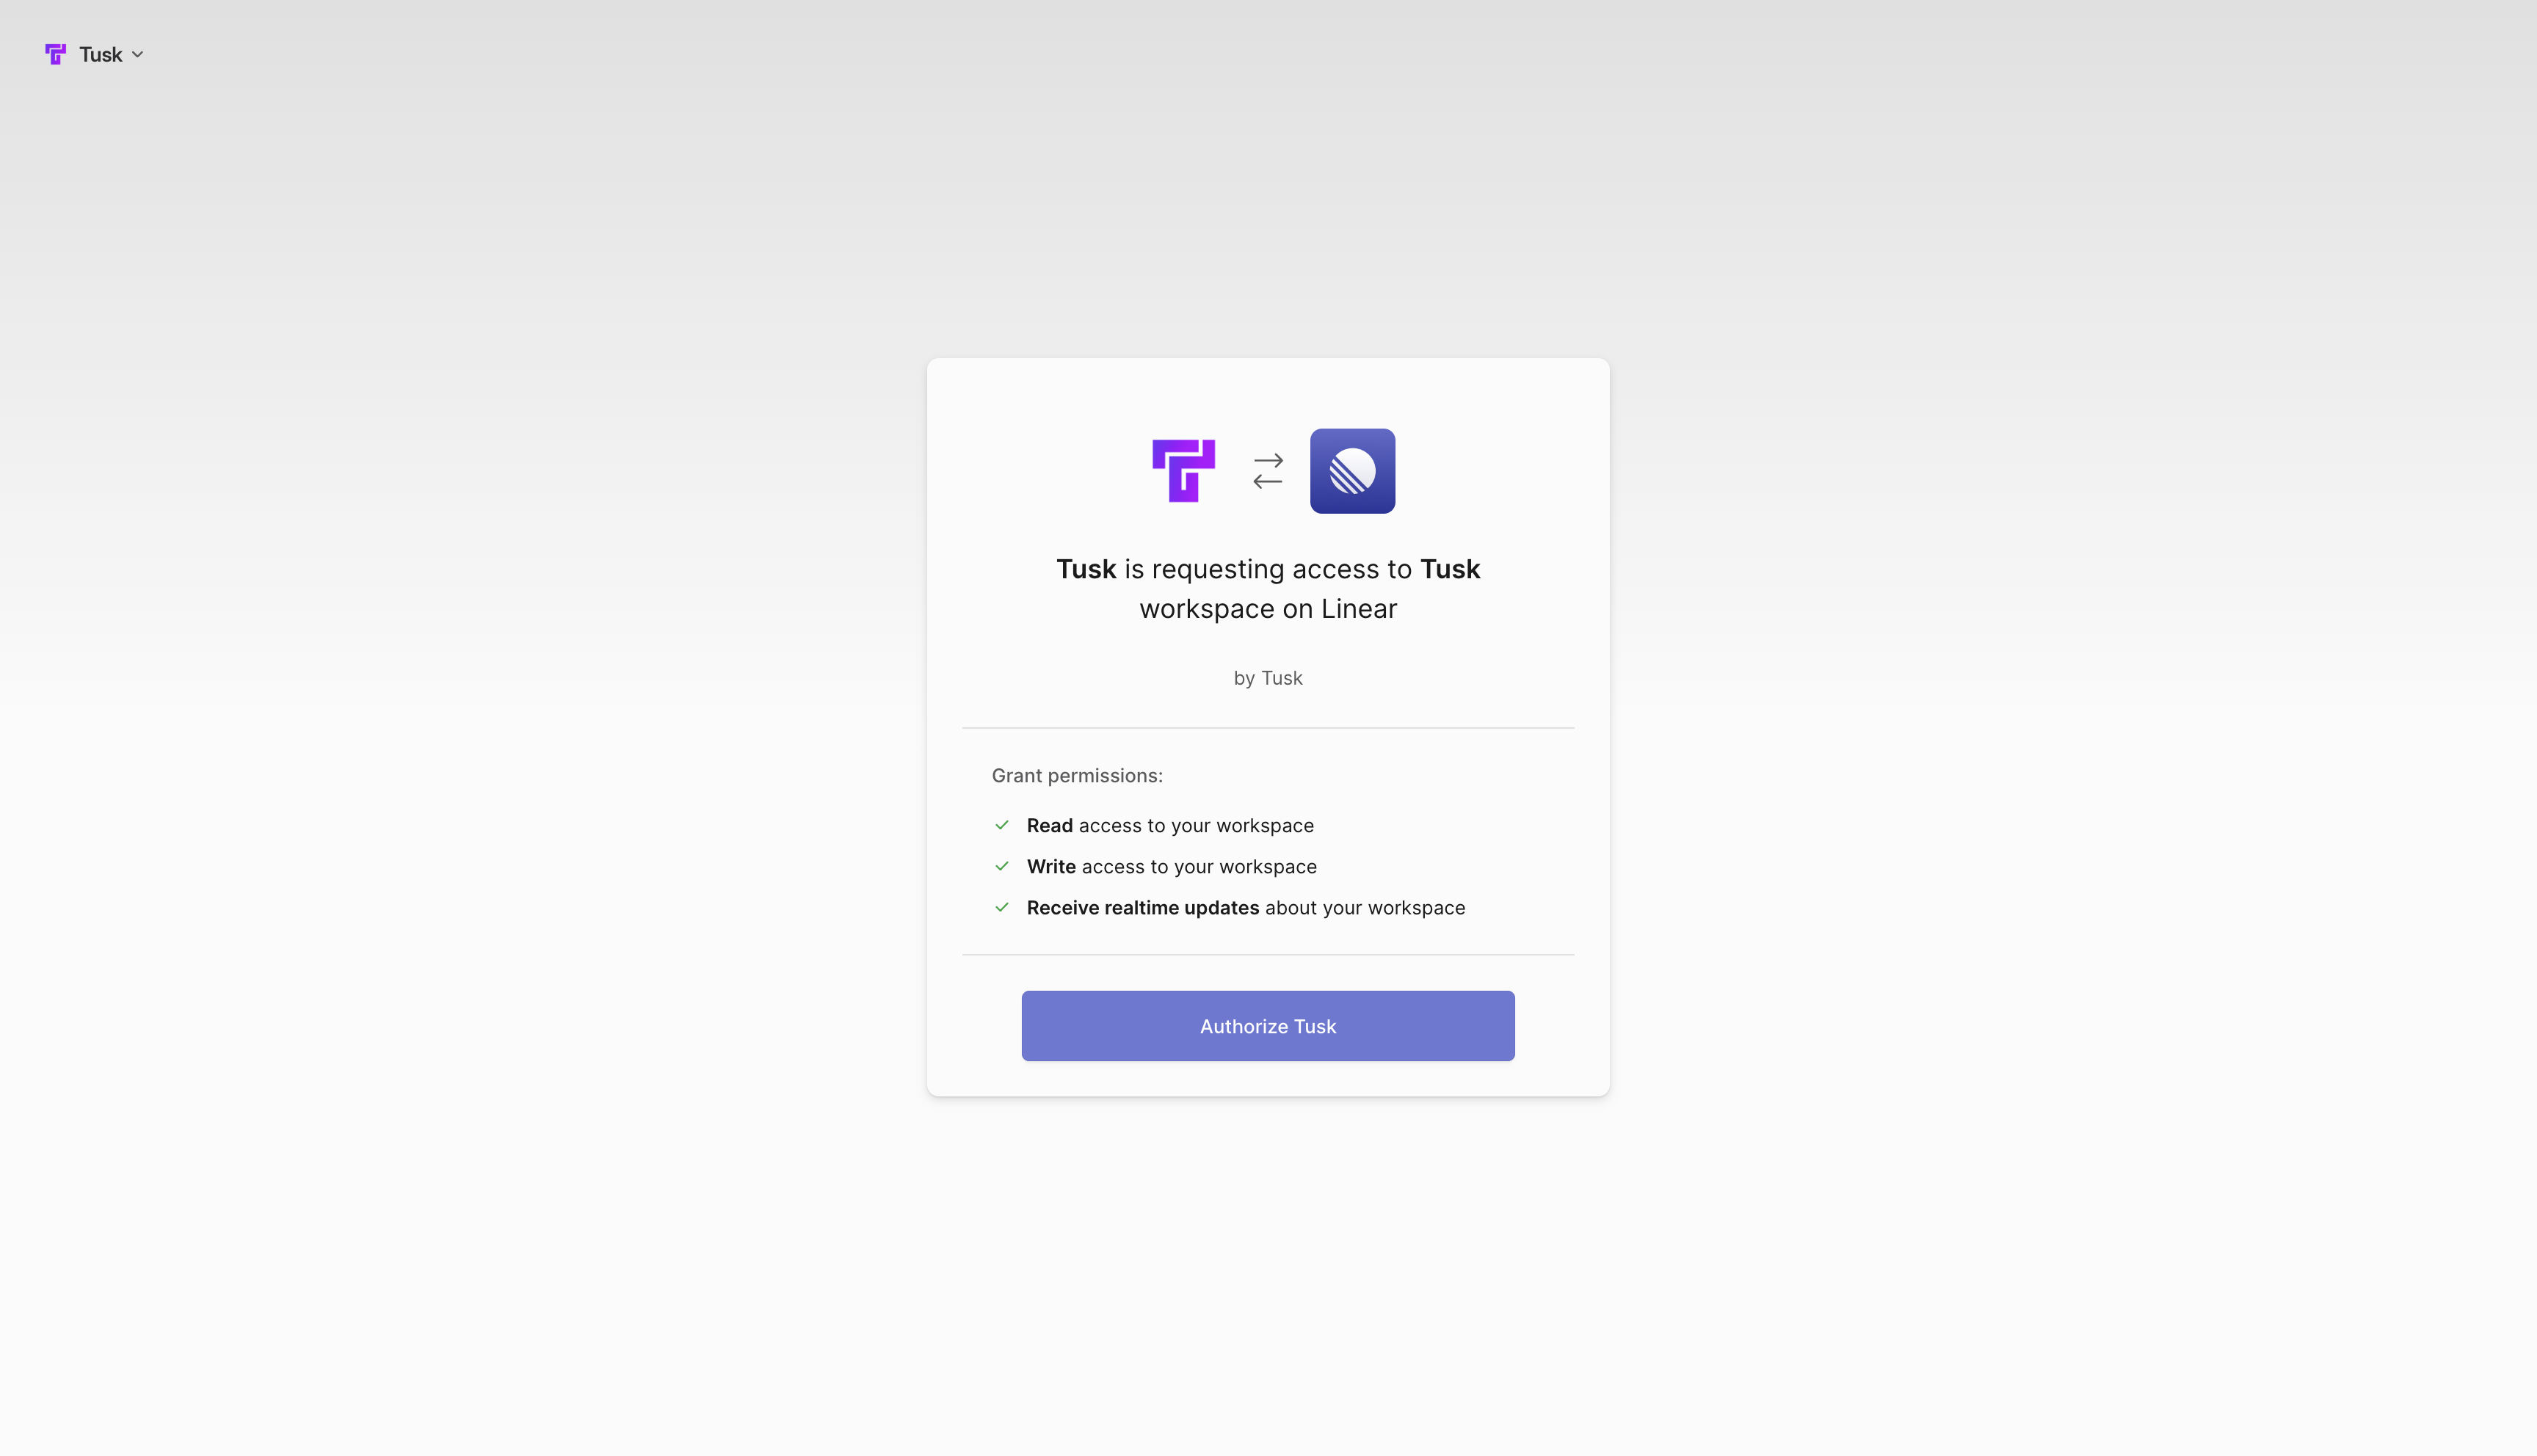 4. Click **Authorize Tusk** once you have confirmed that you’re in the correct workspace.
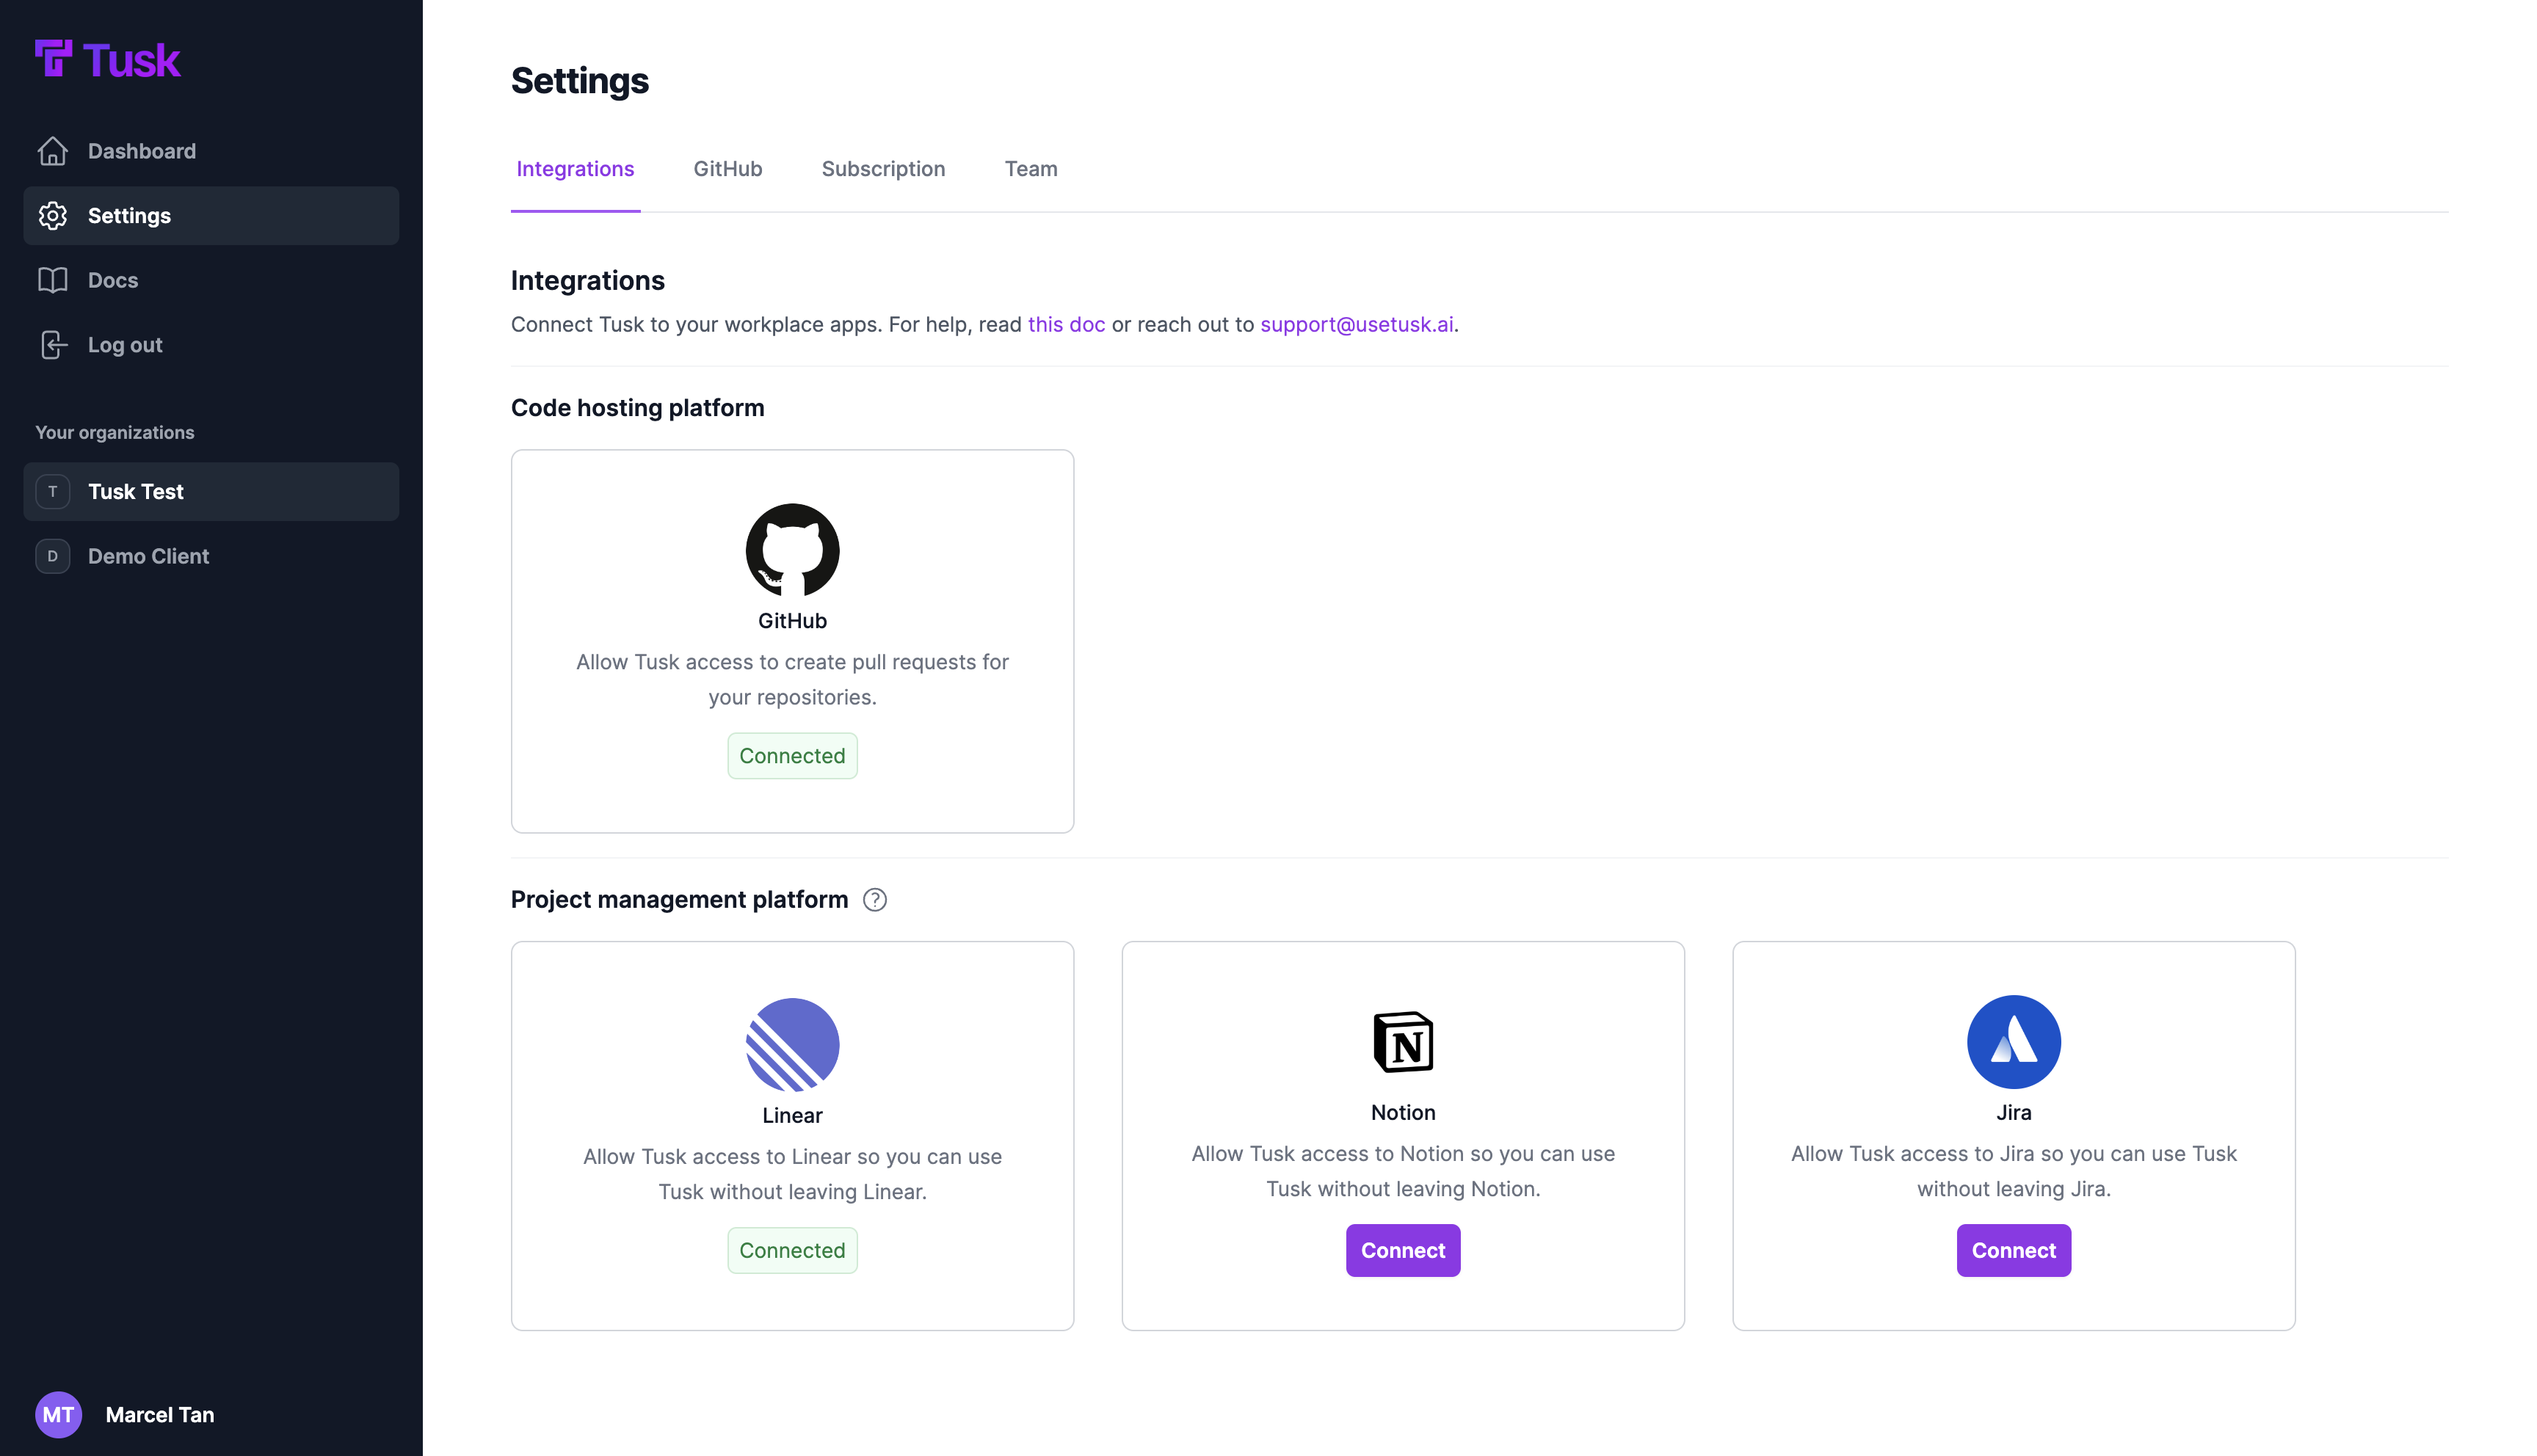
5. You will be redirected back to the Tusk app, where you should see a status badge saying “Connected” on the Linear integration card.
4. Click **Authorize Tusk** once you have confirmed that you’re in the correct workspace.
5. You will be redirected back to the Tusk app, where you should see a status badge saying “Connected” on the Linear integration card.
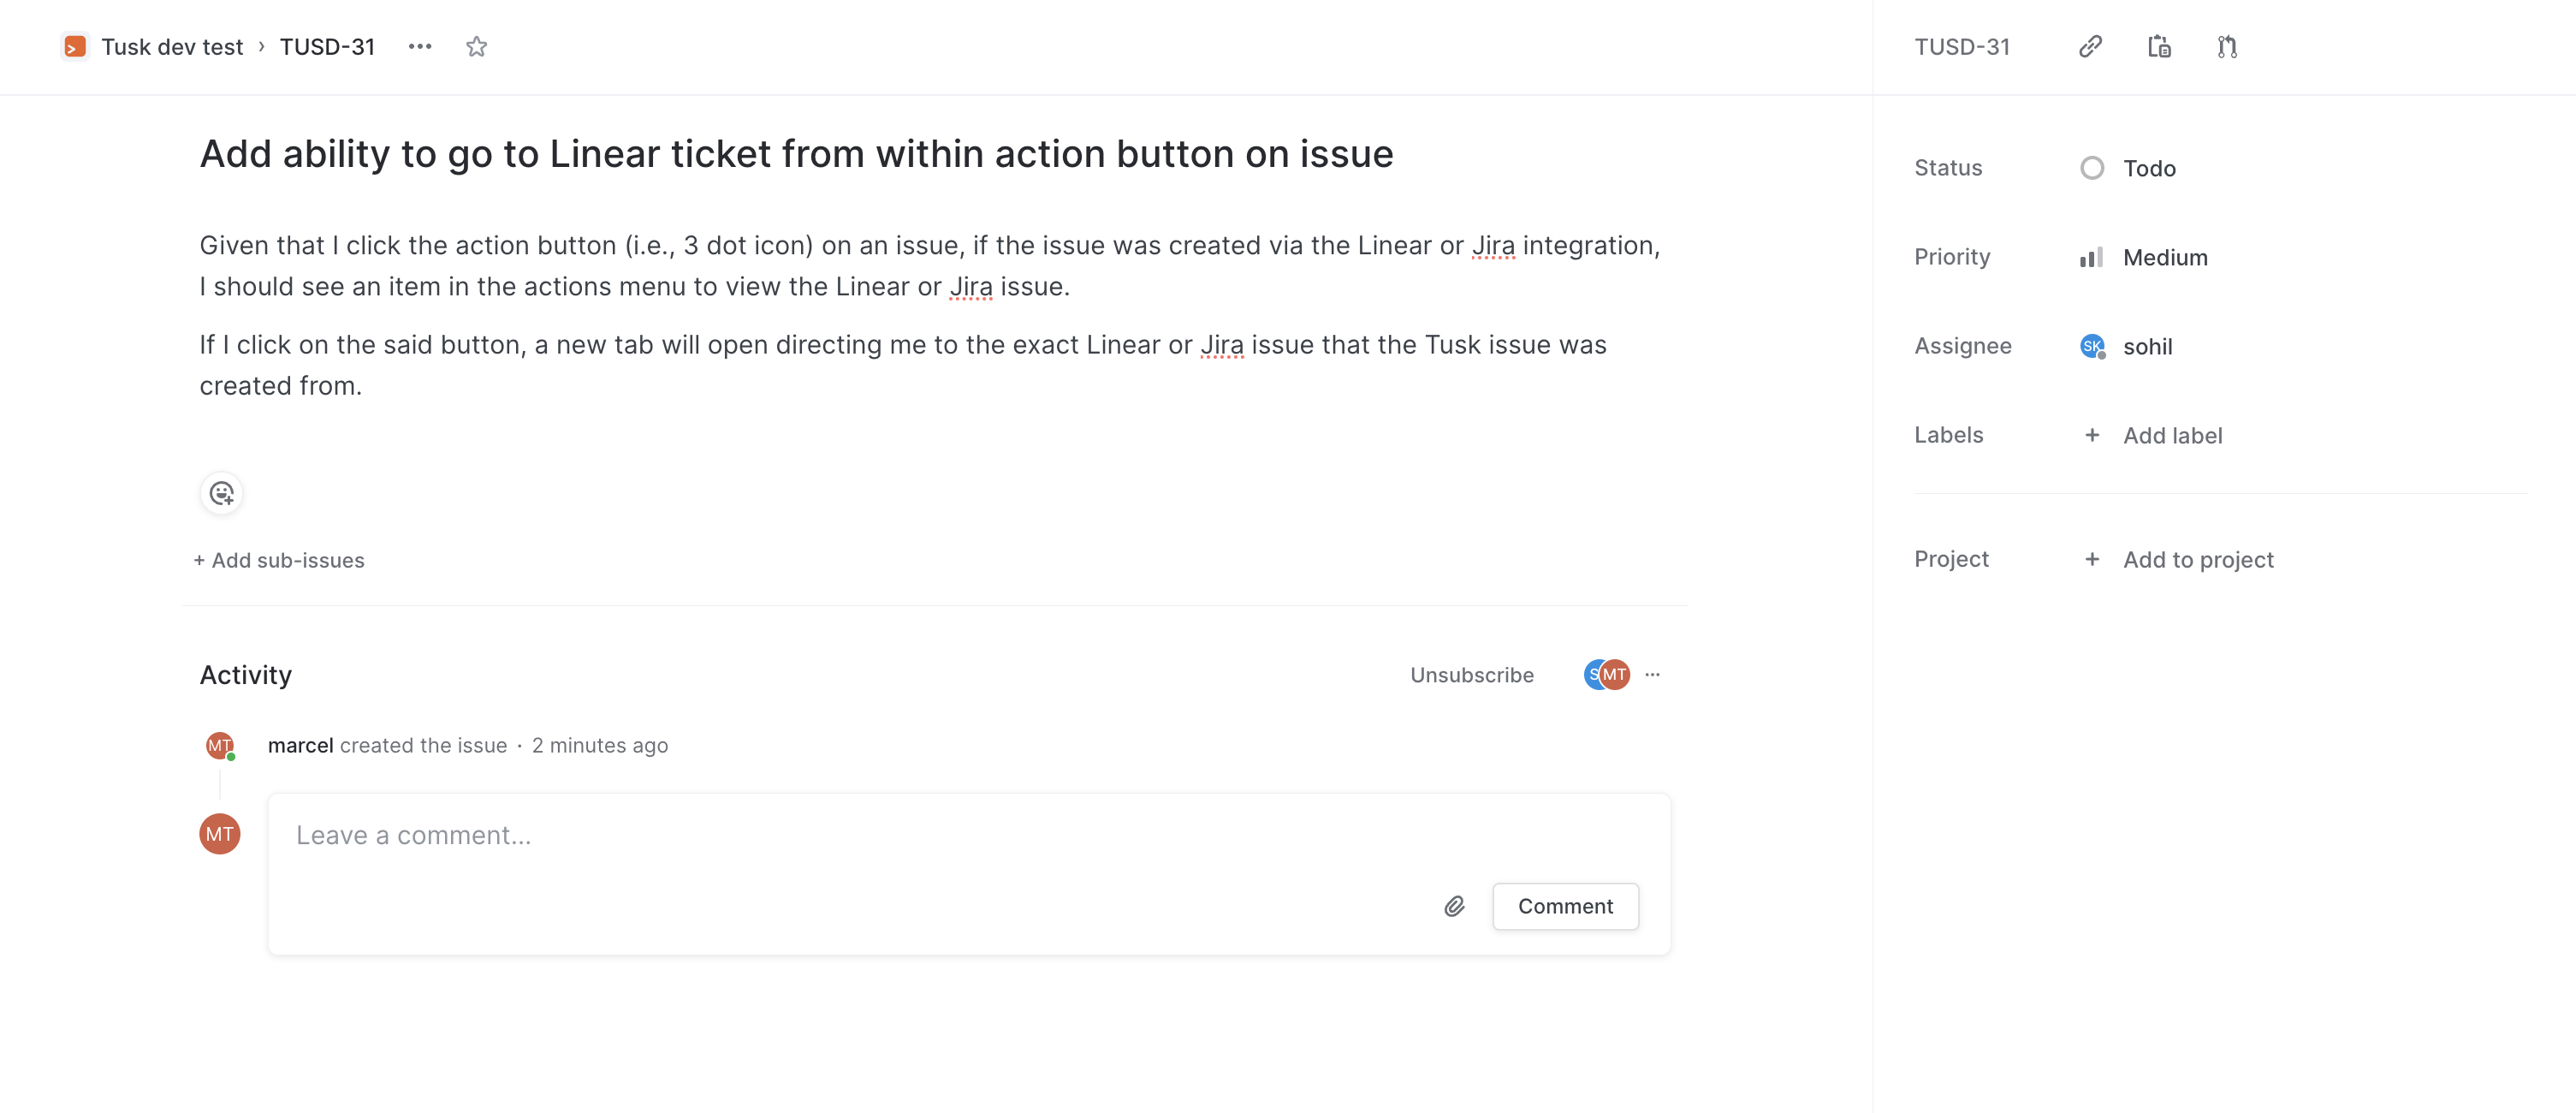
 6. To assign tickets to Tusk in your Linear workspace, go to any issue in Linear.
 7. There will be a “Tusk” label in your Linear workspace. **Add the “Tusk” label** to any issue to assign it to our AI agent.
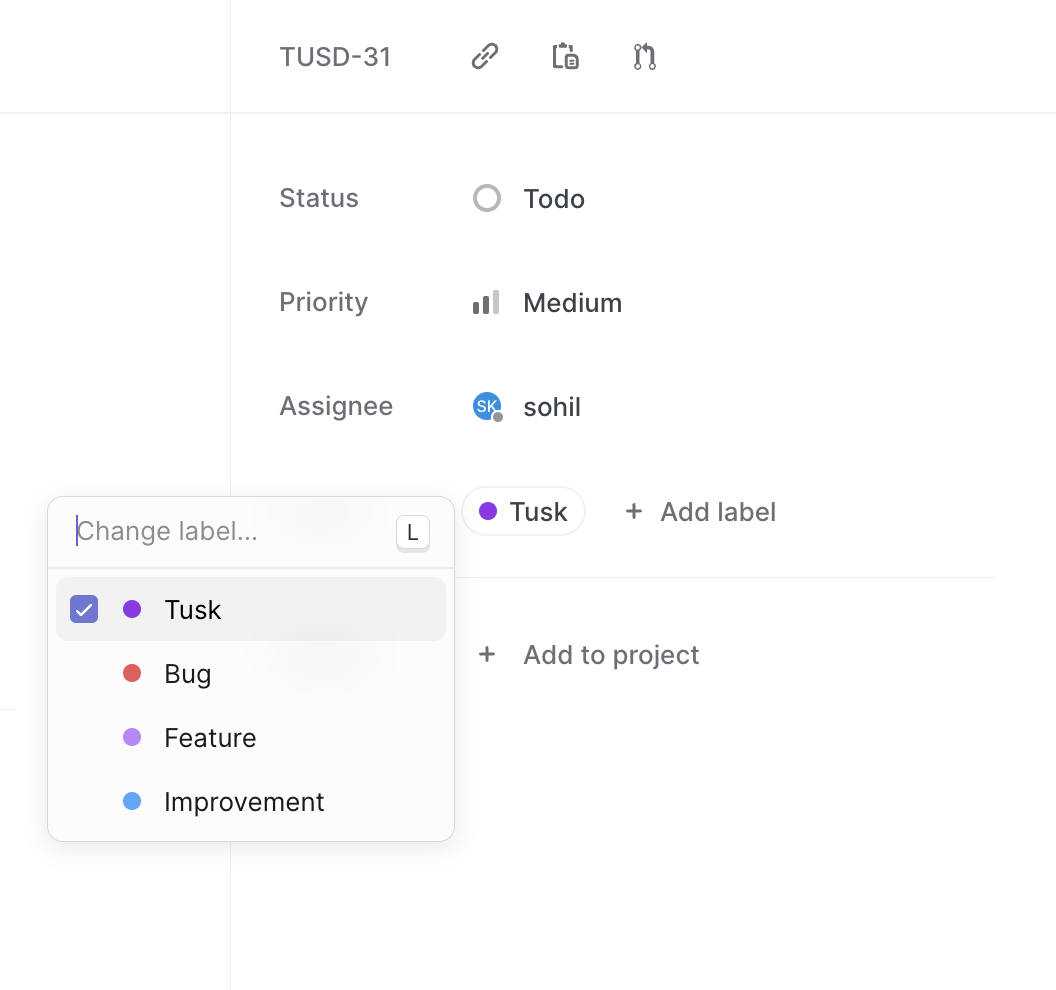 If you already have a “Tusk” label created before setting up the integration,
the same label will still work for assigning issues to Tusk.
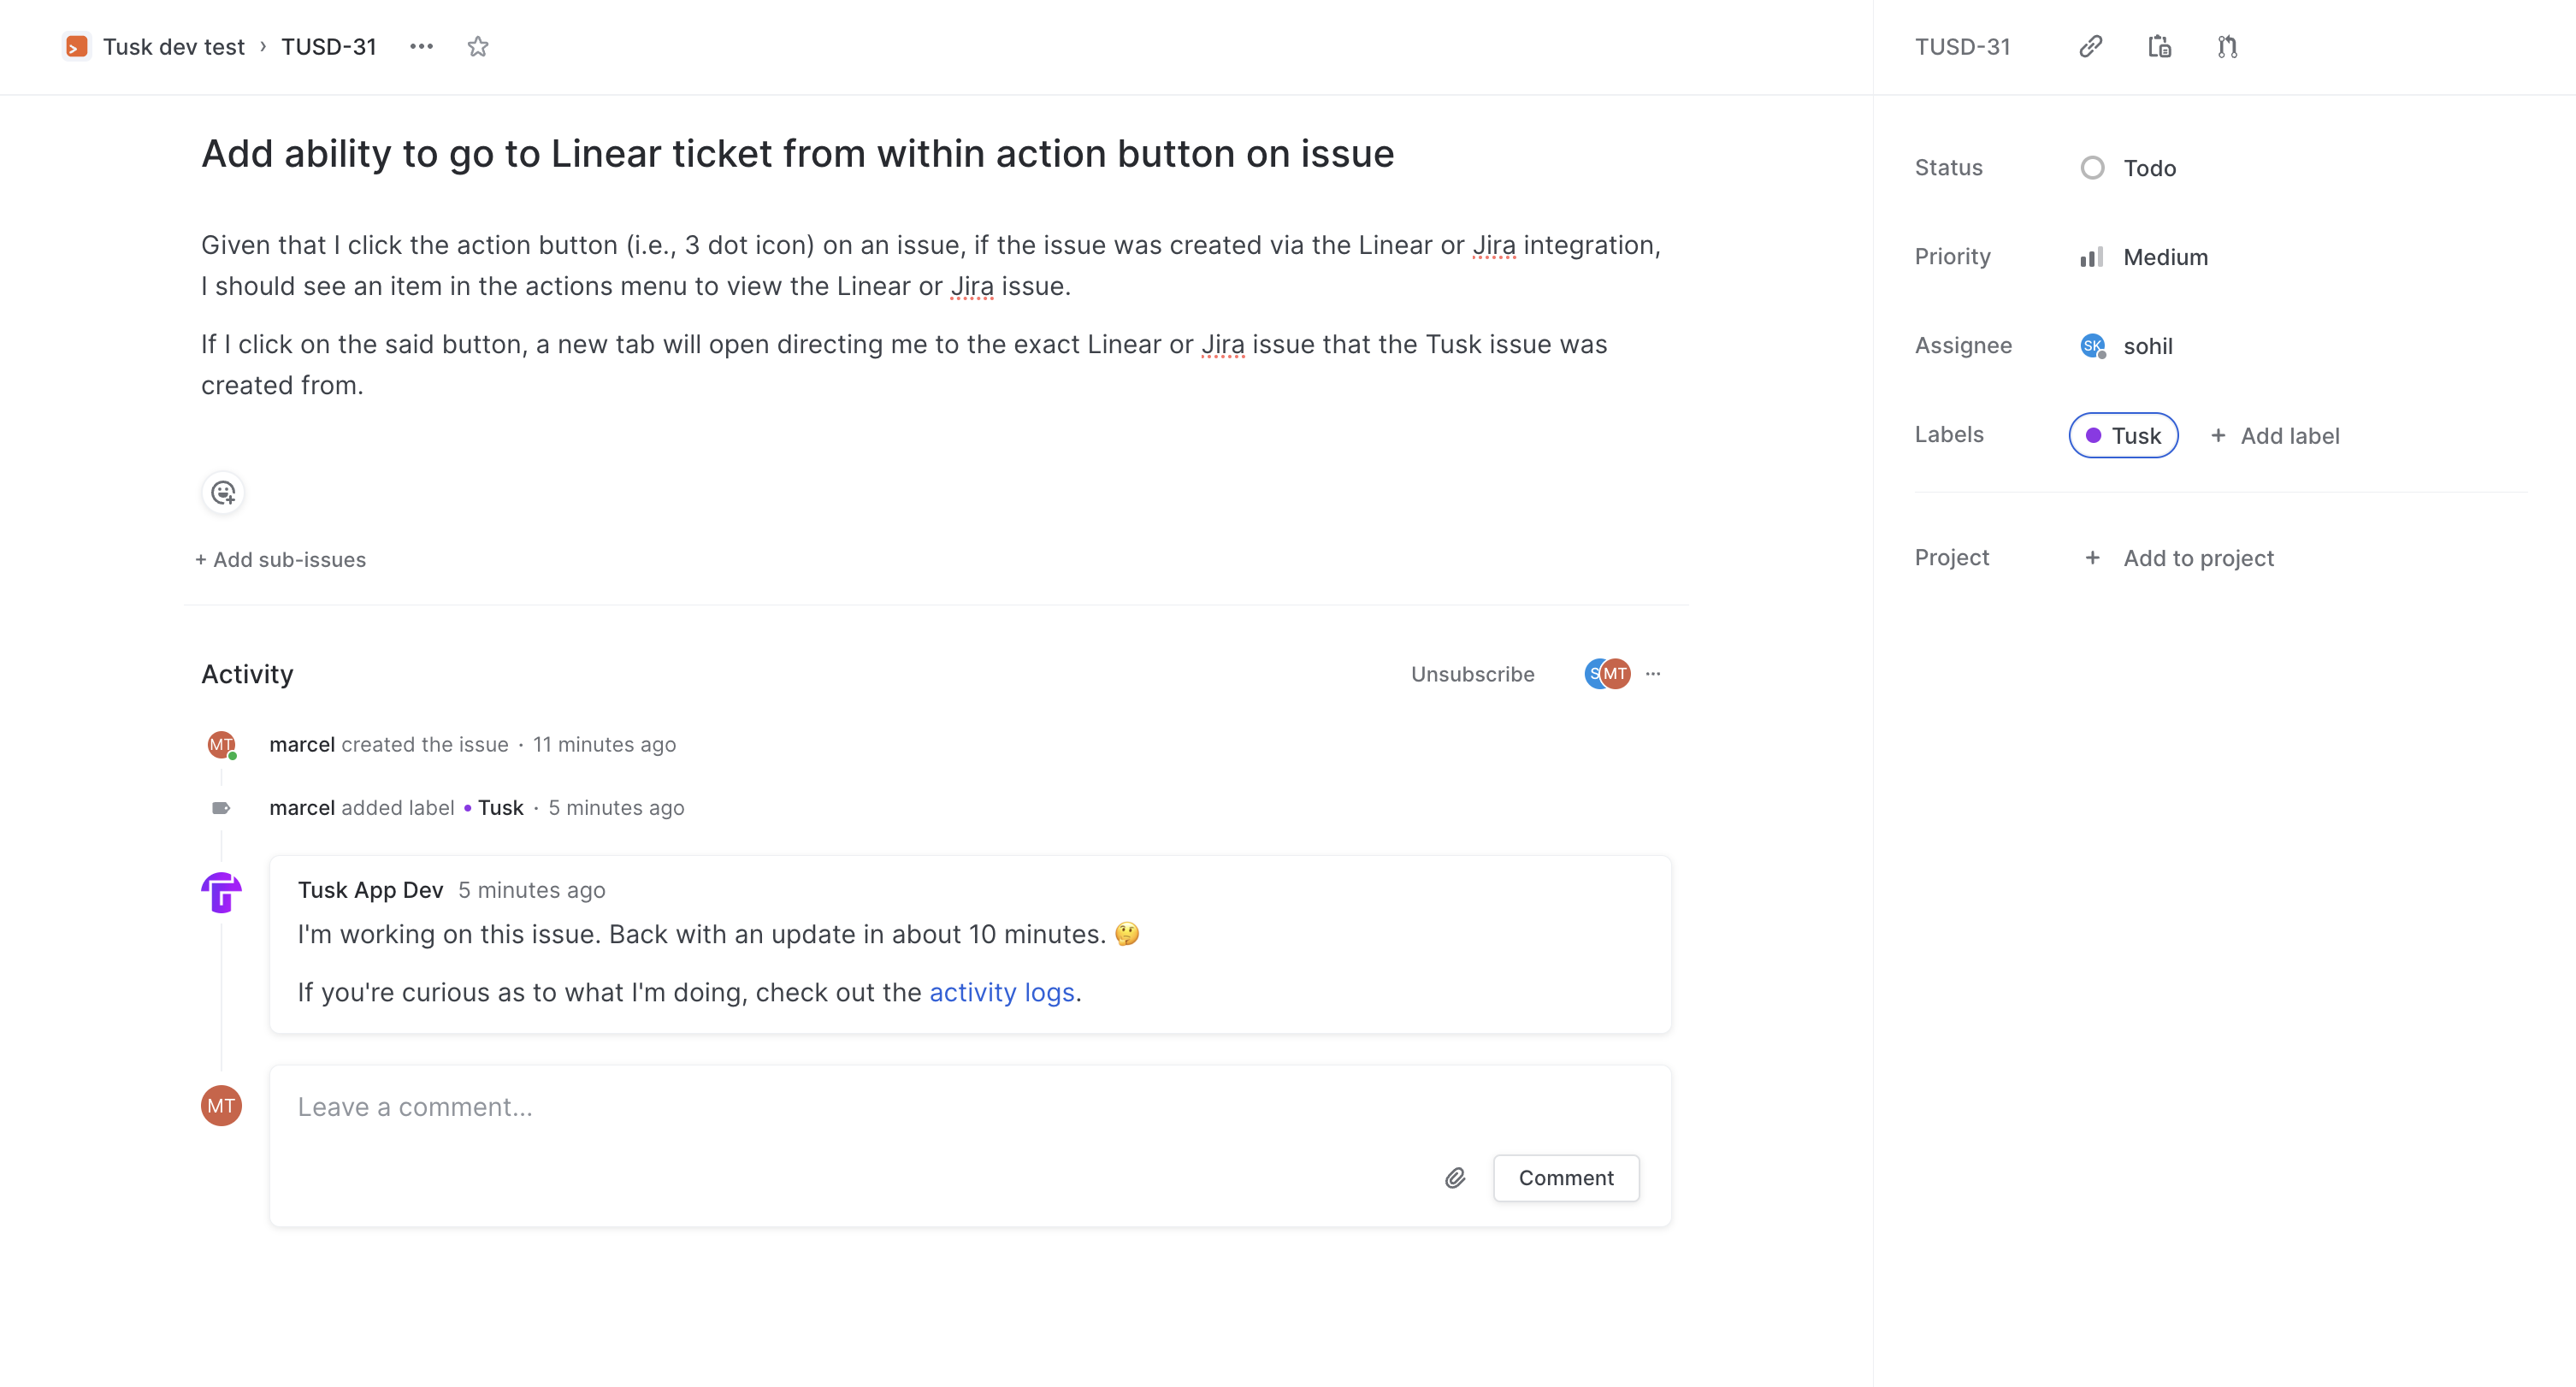
8. Tusk will comment on the issue telling you that it’s working on it. You can check the activity logs for the issue in the Tusk web app.
If you already have a “Tusk” label created before setting up the integration,
the same label will still work for assigning issues to Tusk.
8. Tusk will comment on the issue telling you that it’s working on it. You can check the activity logs for the issue in the Tusk web app.
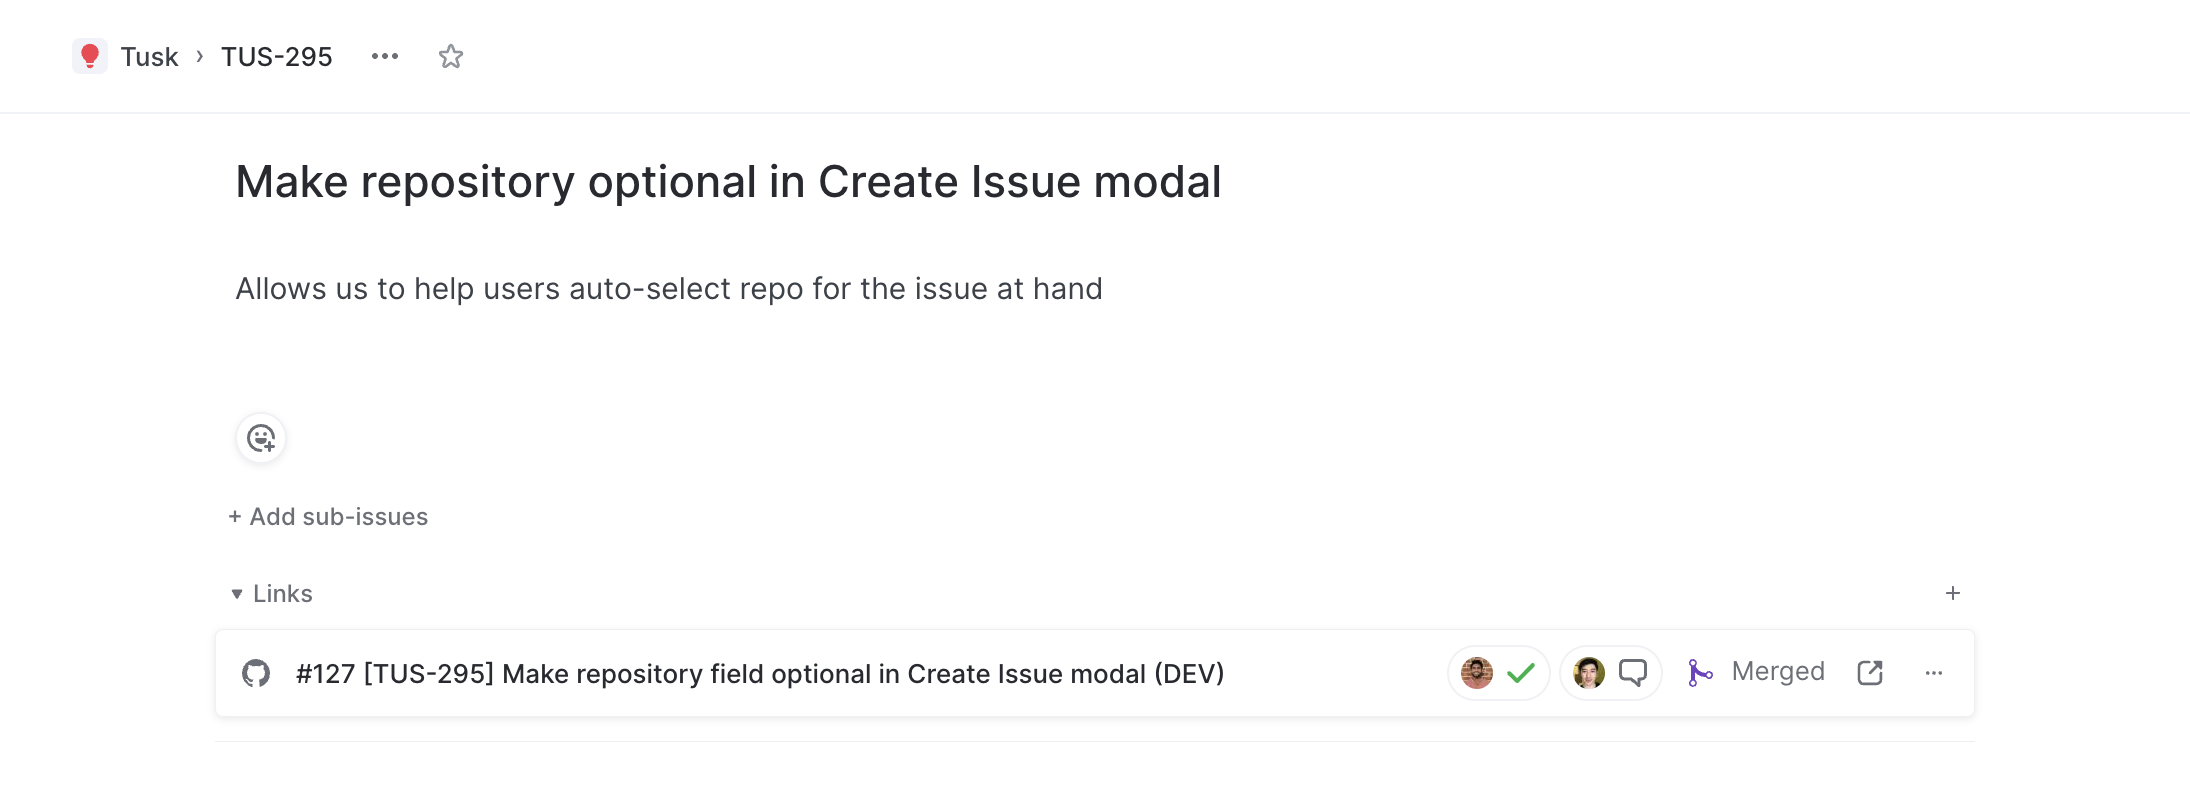
 9. Recommended: [Integrate GitHub with your Linear workspace](https://linear.app/docs/github) to link the Linear issue you assigned to Tusk with the corresponding Tusk-created PR. Tusk automatically adds the issue ID at the beginning of the PR’s title so that the PR shows up in the issue under “Links”.
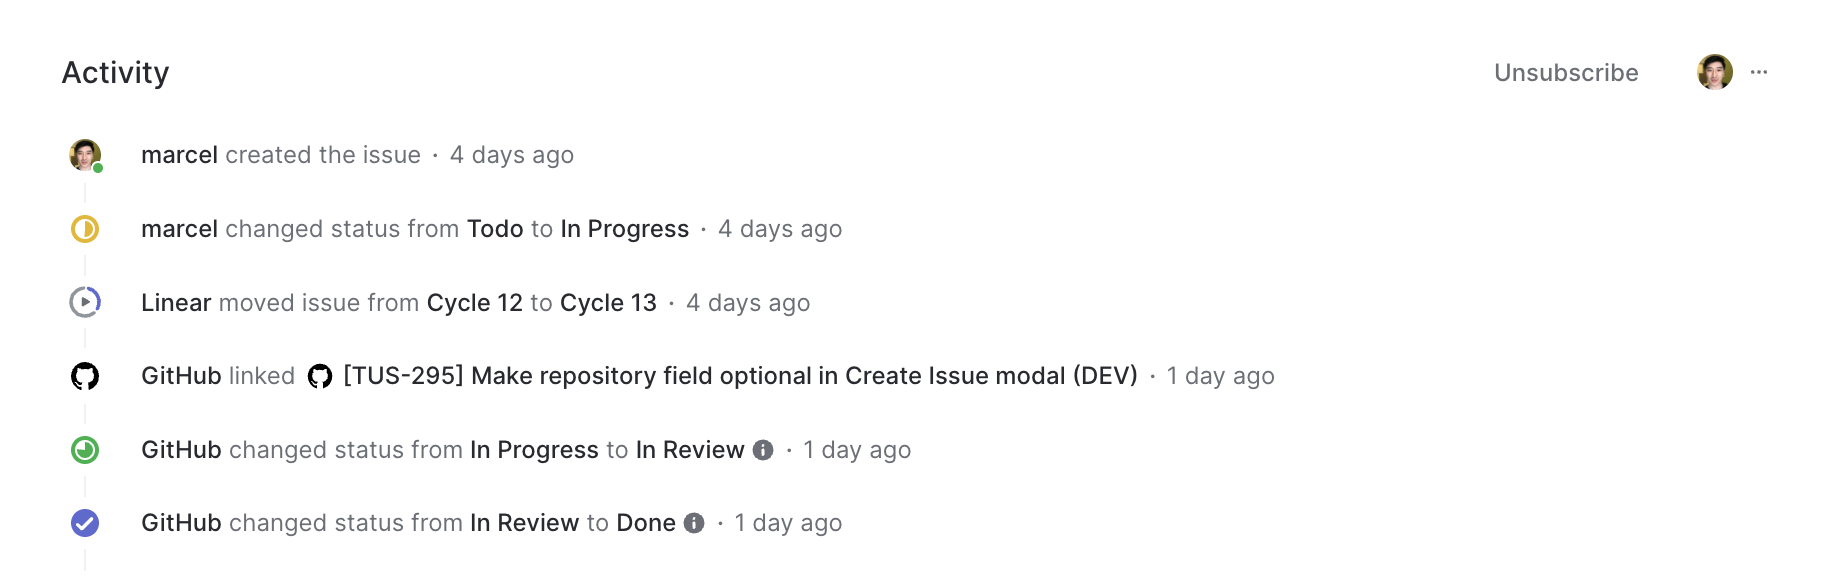
 10. Once the Linear issue is linked to the Tusk-created PR, Linear automatically changes the status of the issue according to the status of the linked PR.
 ***
## Connecting to Jira
1. Log into Tusk and go to the **Settings** page.
2. Under the **Integrations** tab, find the Jira integration card under "Project management platform.” Click **Connect**.
3. You’ll be redirected to the Atlassian platform to grant Tusk access to your Jira site.
***
## Connecting to Jira
1. Log into Tusk and go to the **Settings** page.
2. Under the **Integrations** tab, find the Jira integration card under "Project management platform.” Click **Connect**.
3. You’ll be redirected to the Atlassian platform to grant Tusk access to your Jira site.
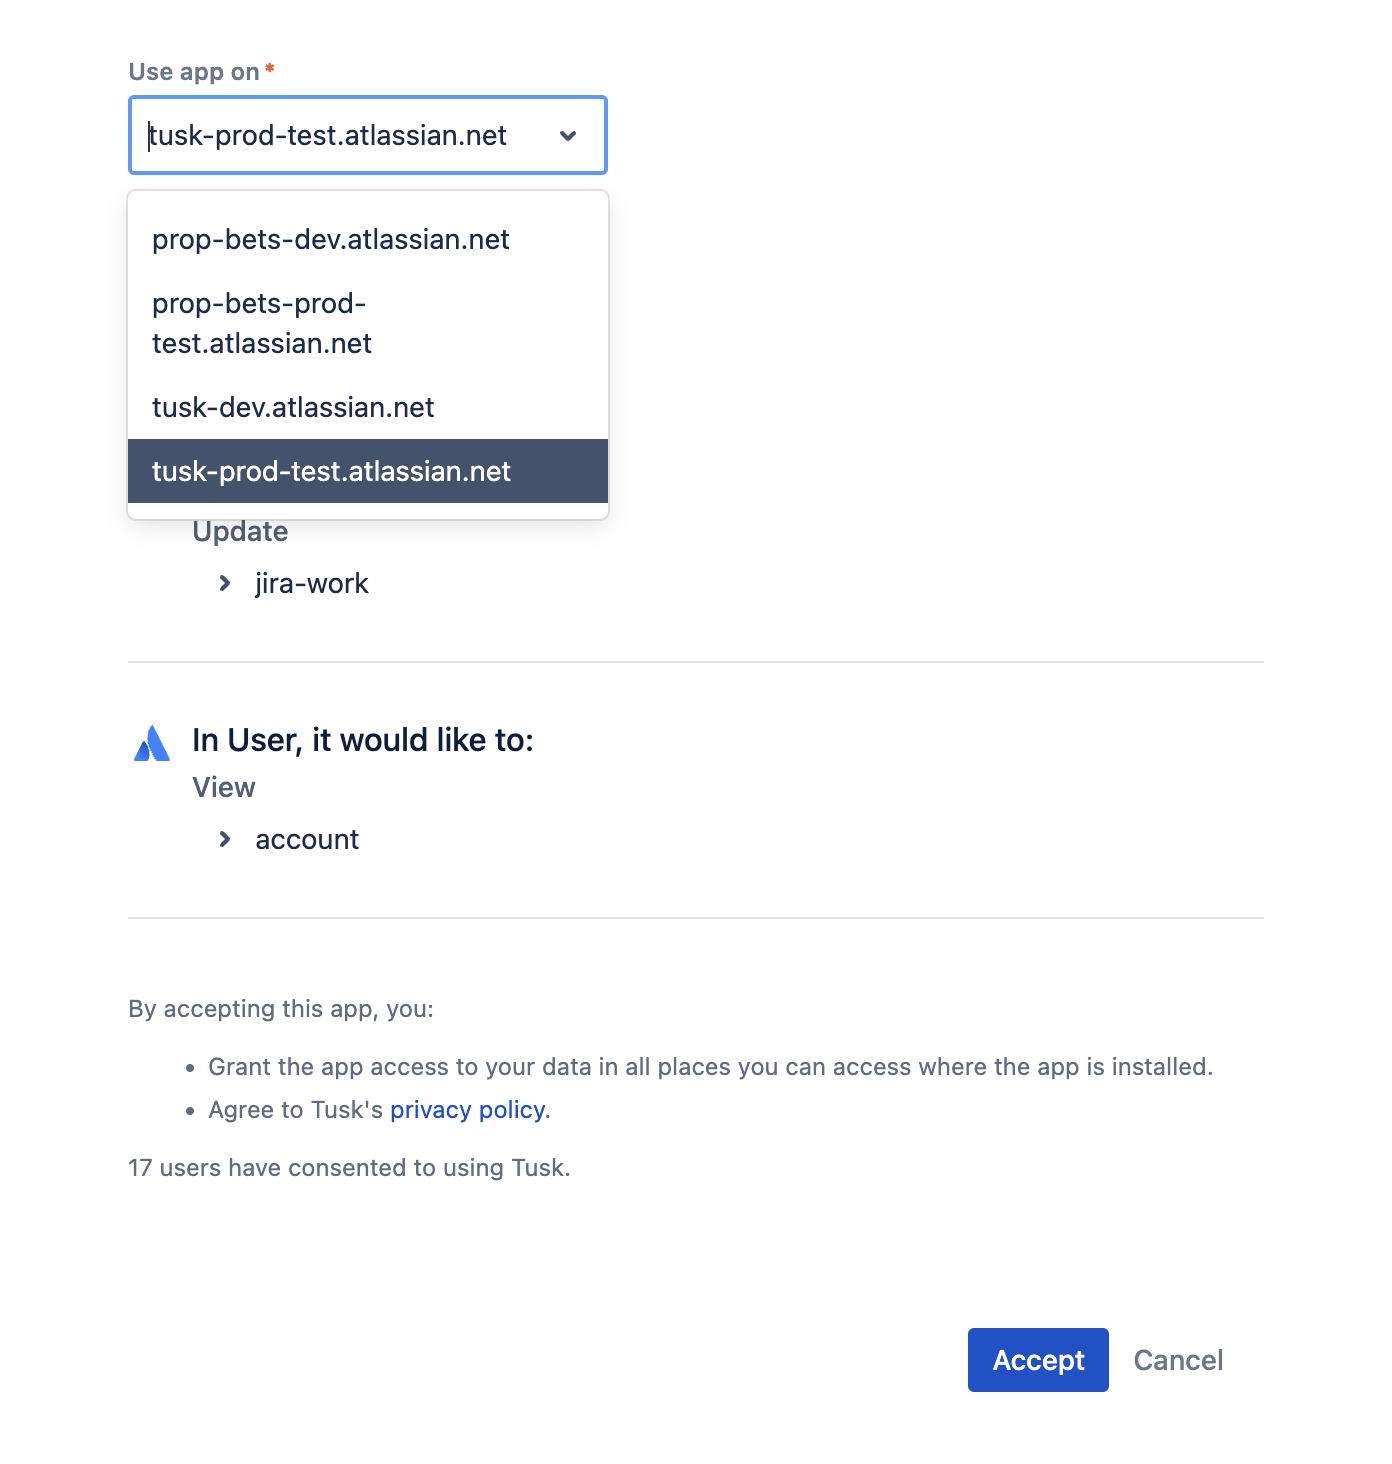
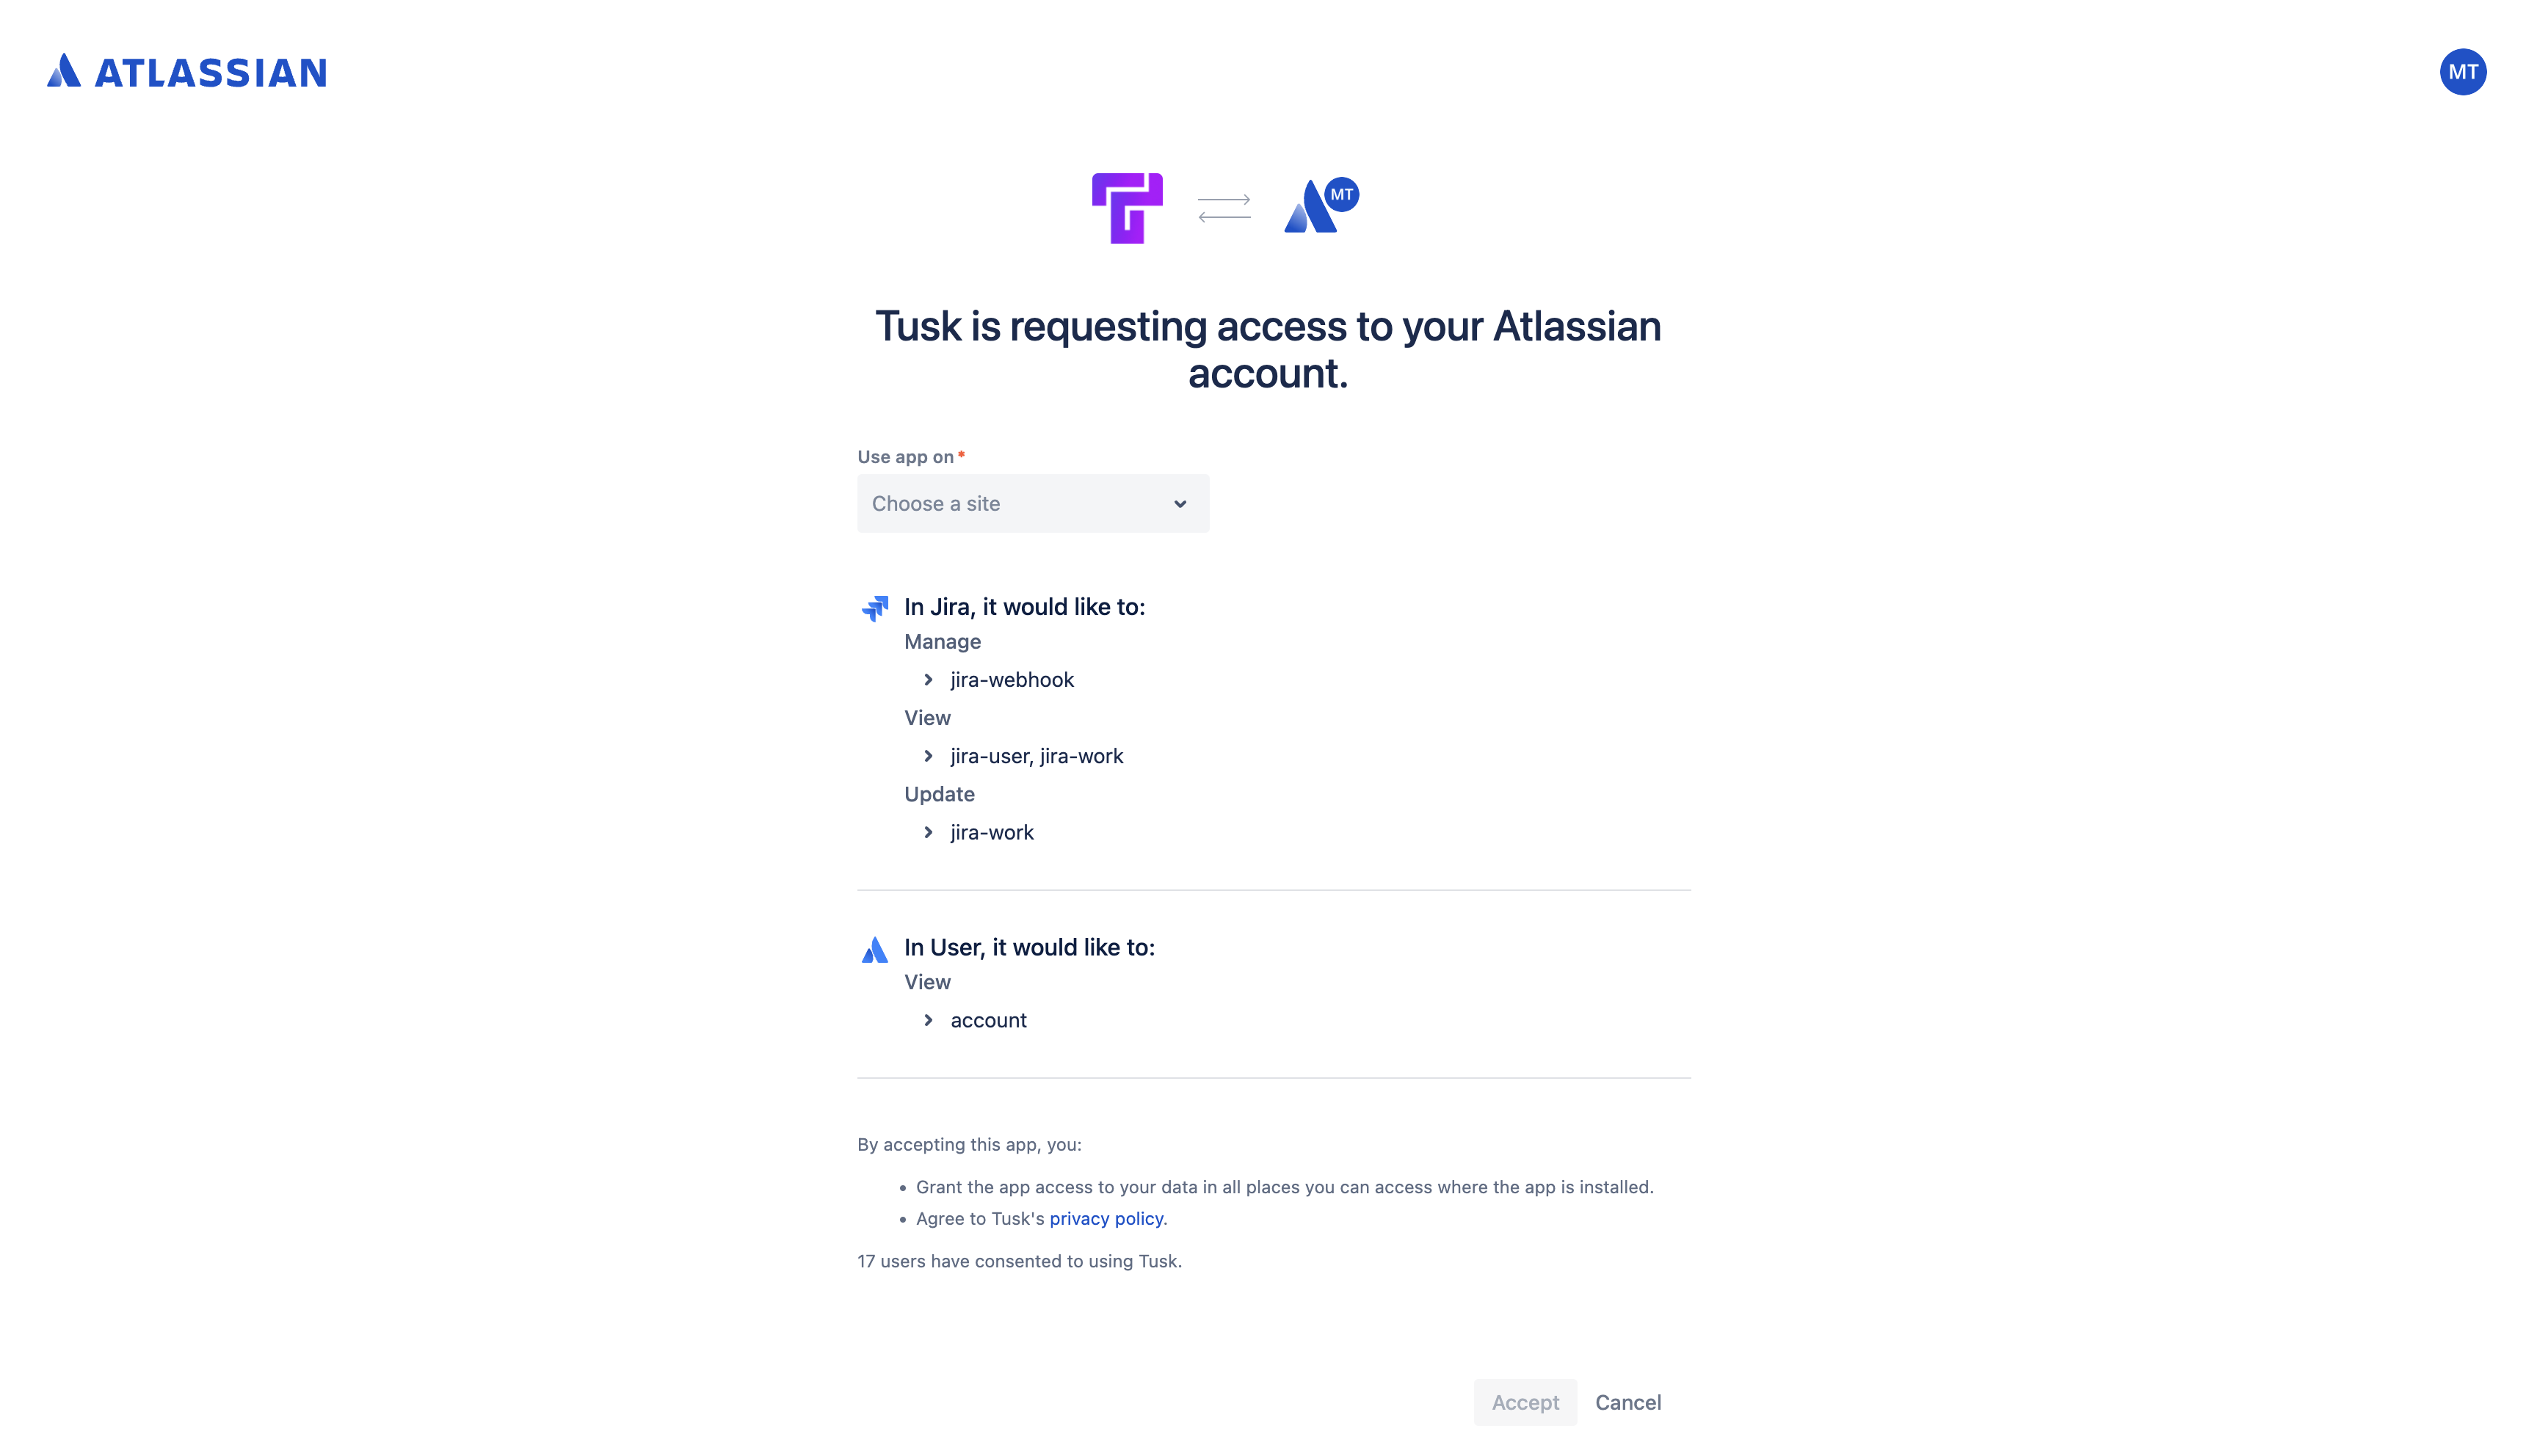 4. Choose the correct Jira site under “Authorize for site” and click **Accept**.
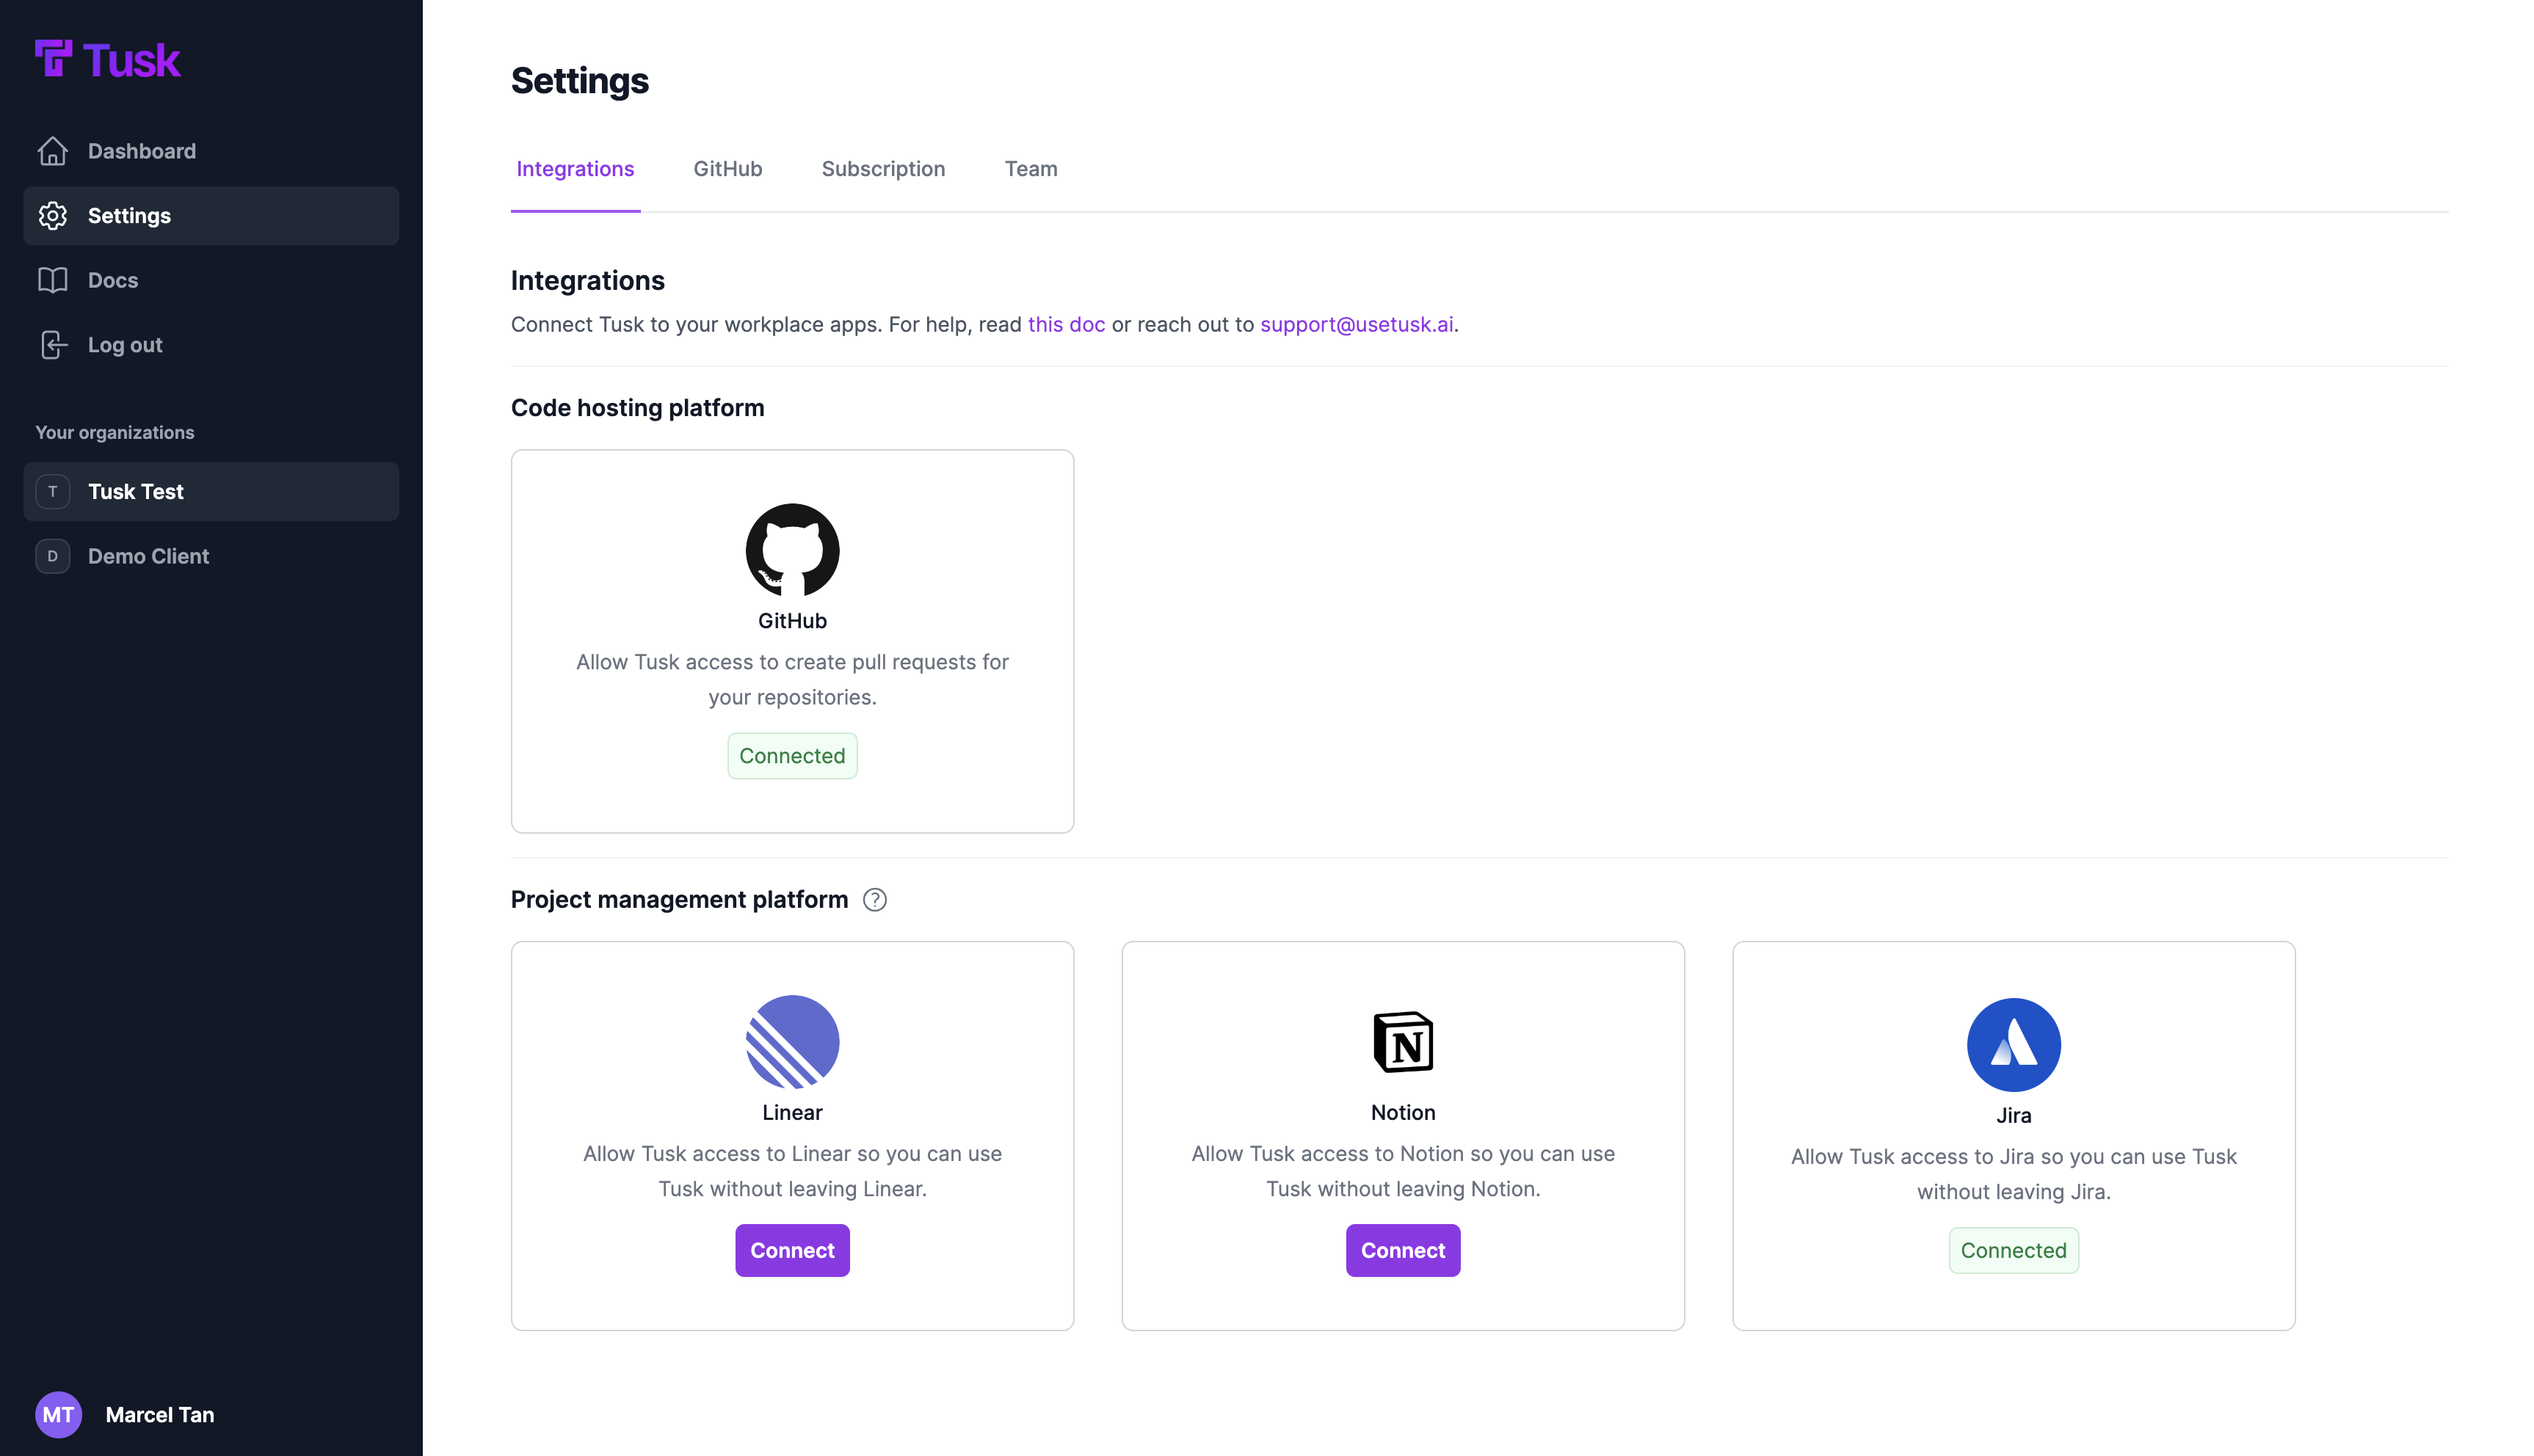
 5. You’ll then be redirected back to the Tusk app, where you should now see a status badge displaying “Connected” on the Jira integration card.
 6. To assign tickets to Tusk in your Linear workspace, go to any issue in Jira.
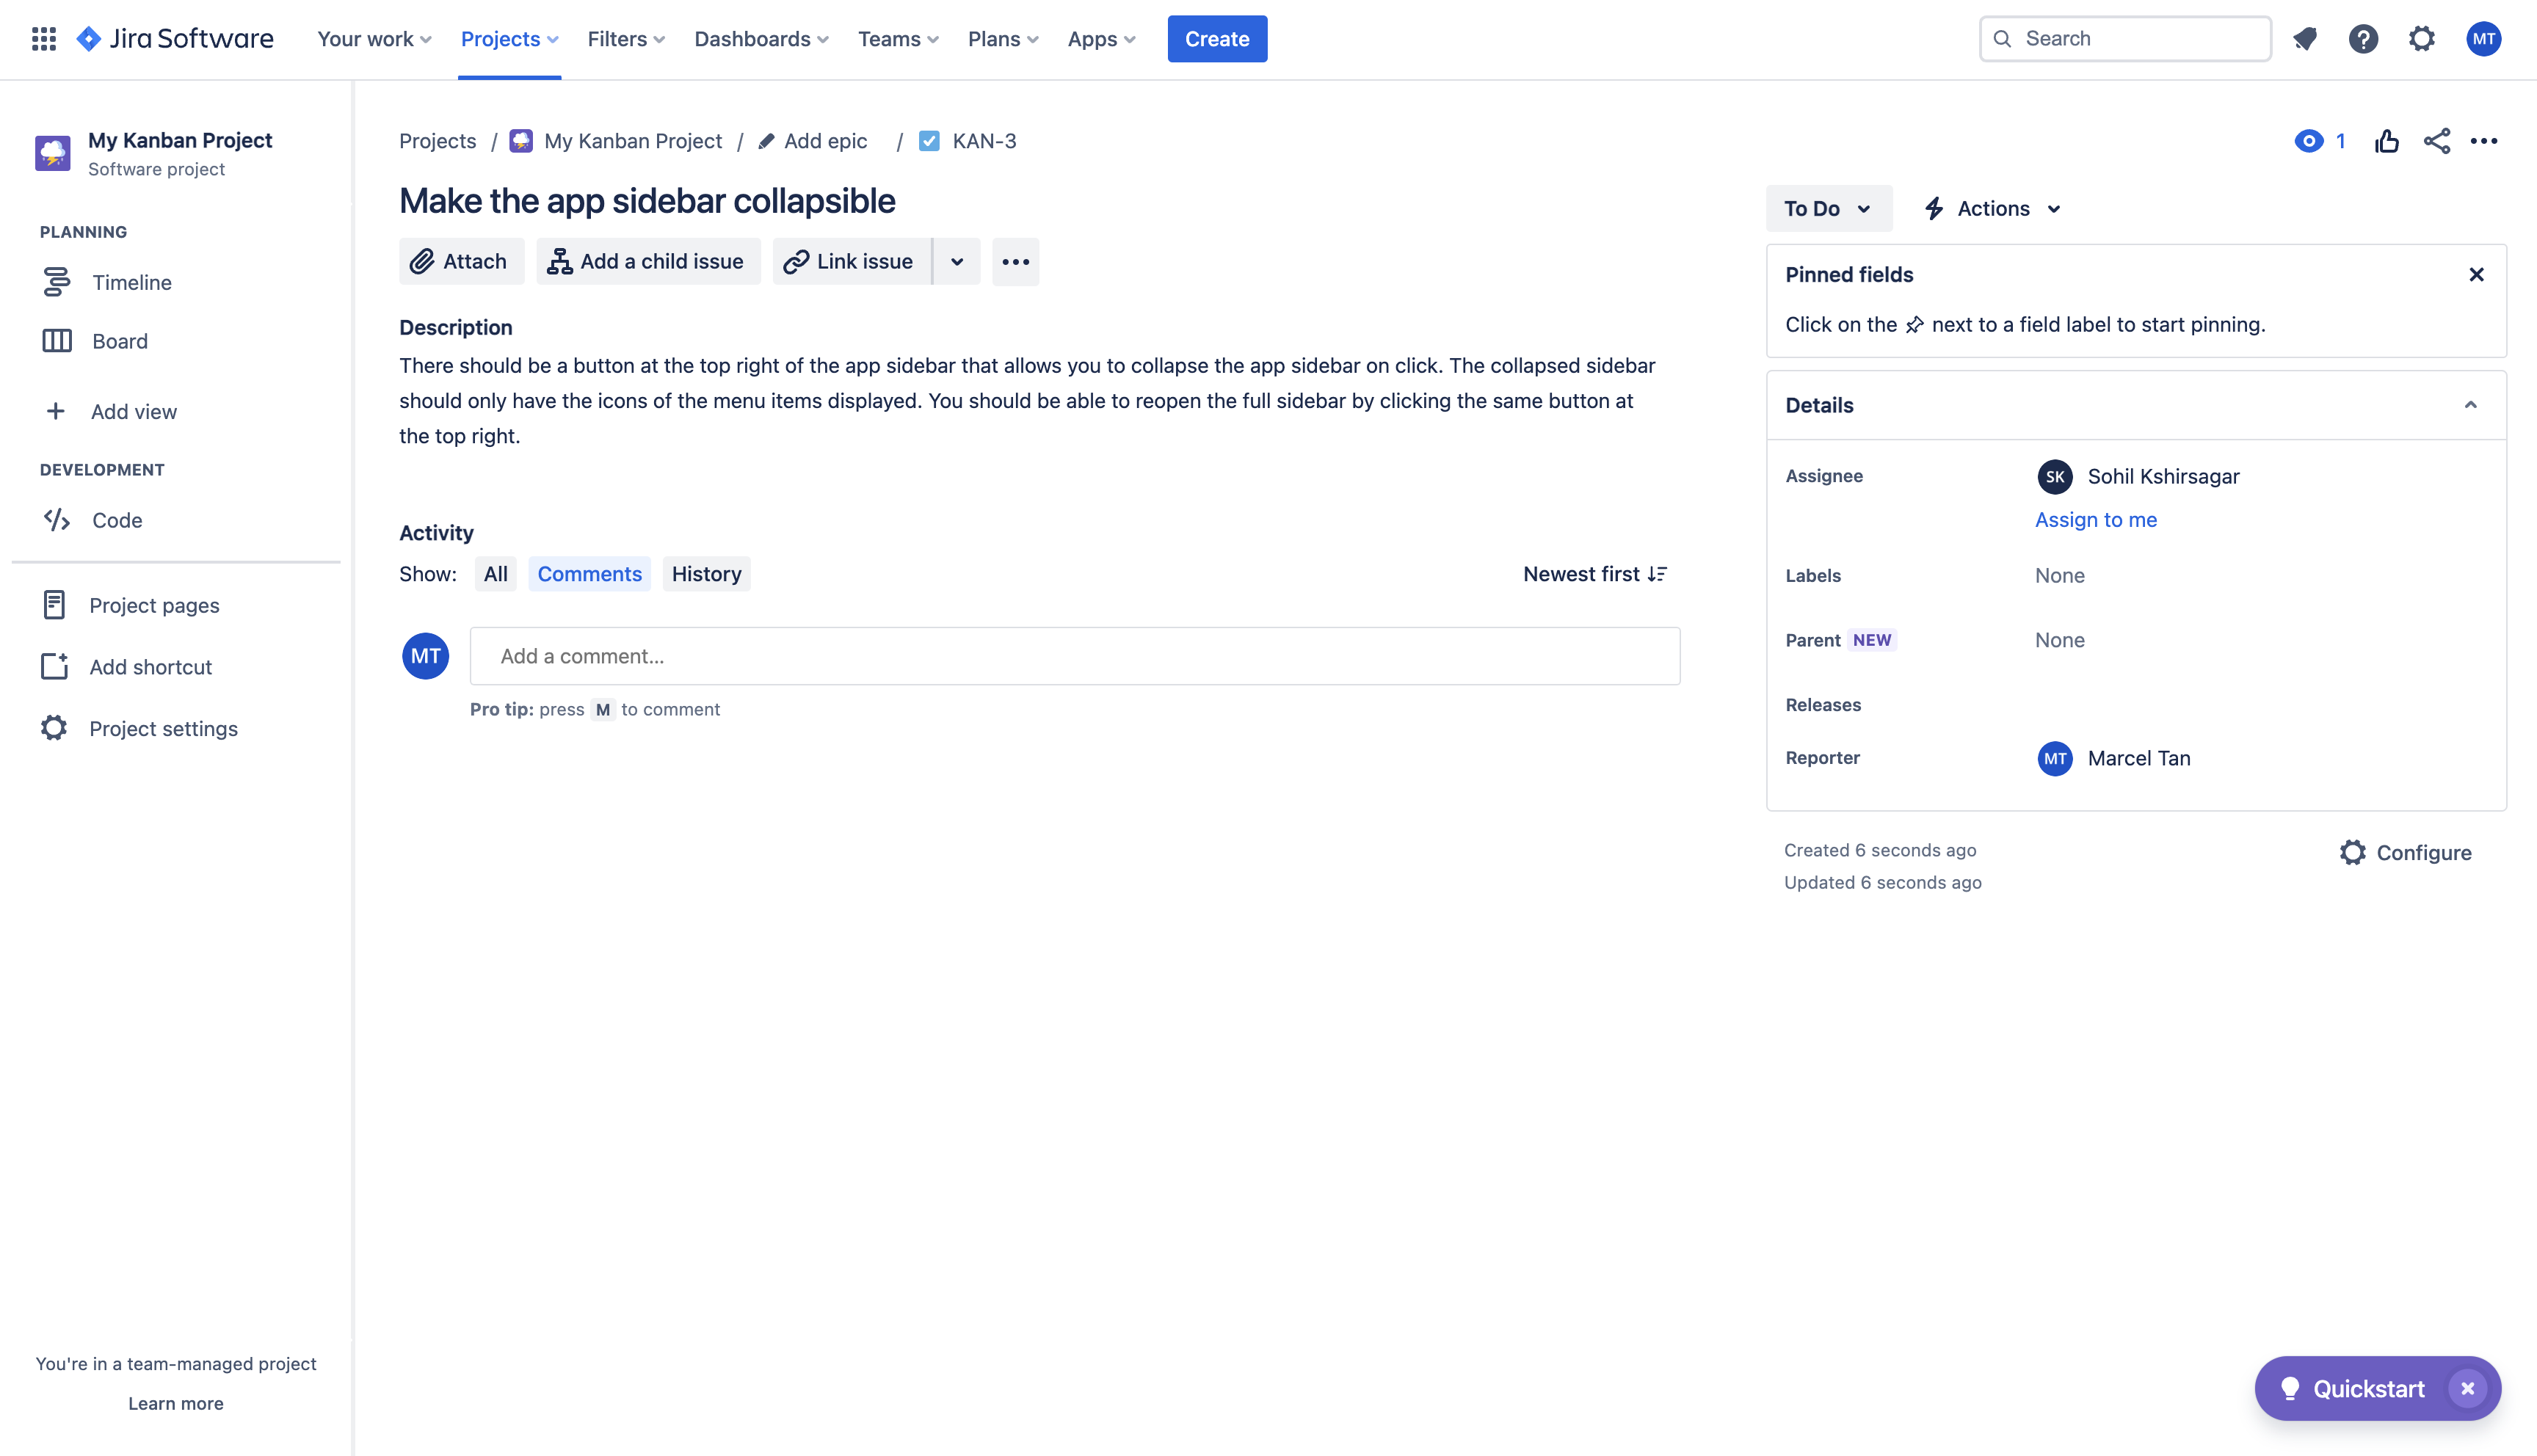 7. Create a new label for “Tusk”.
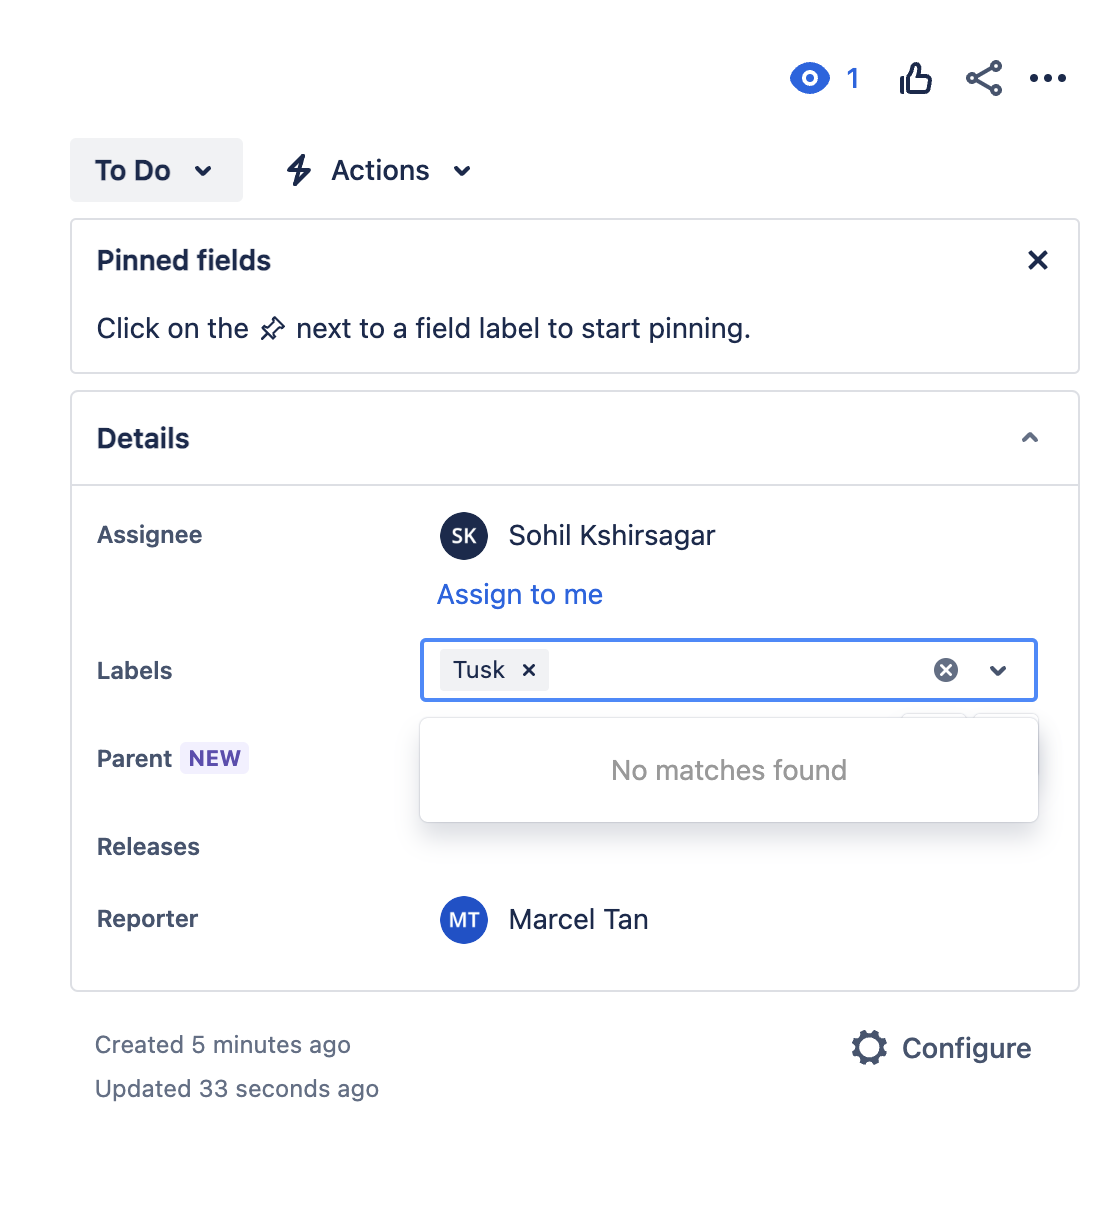
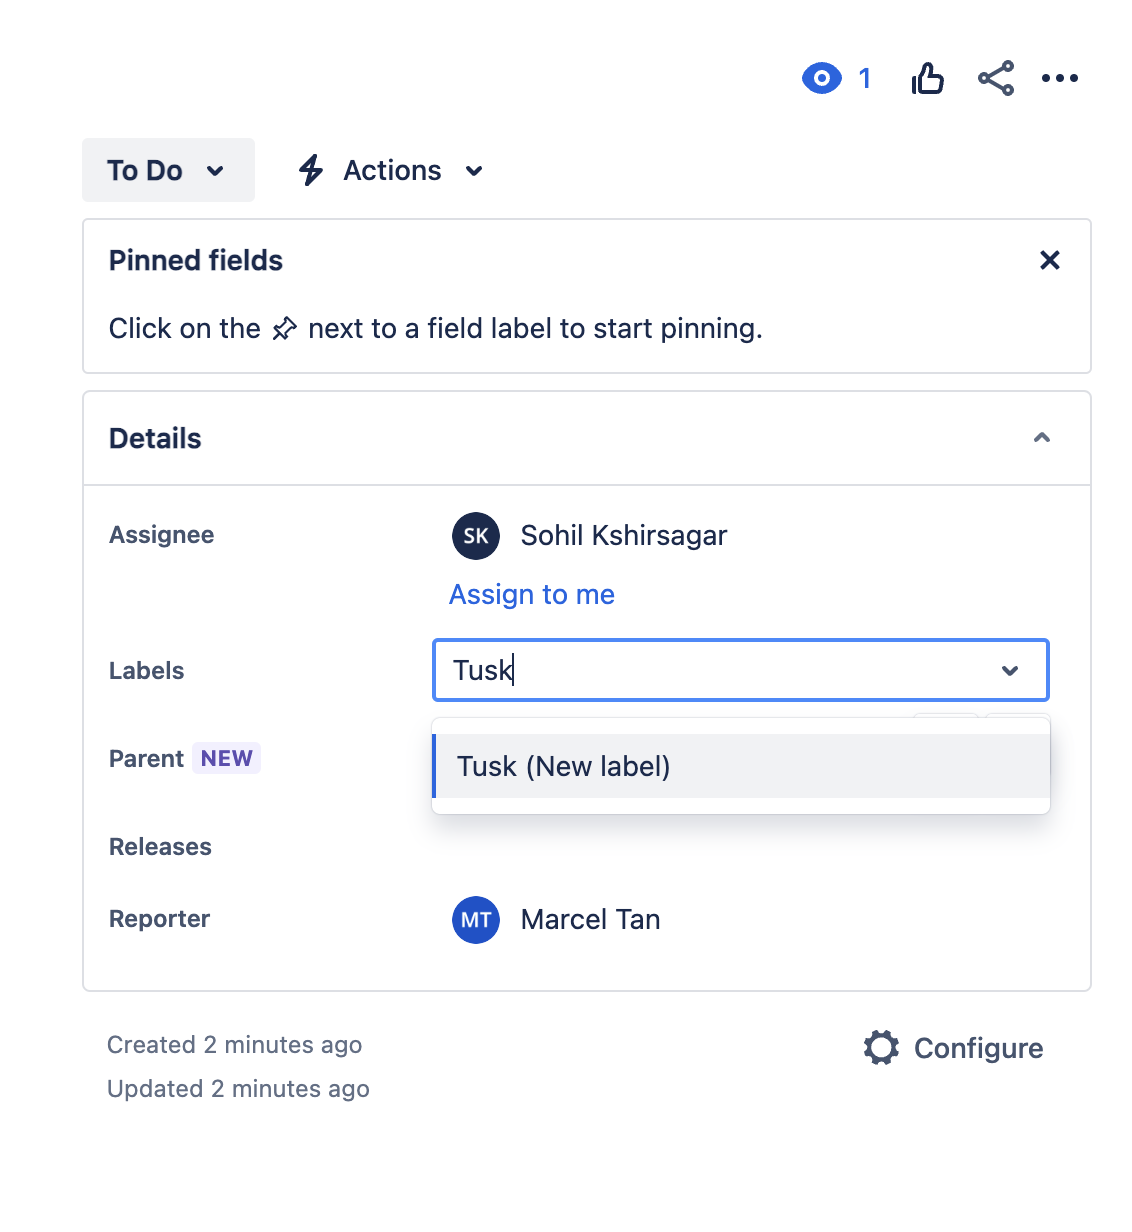 8. Add the newly-created “**Tusk**” label to any issue to assign it to Tusk.
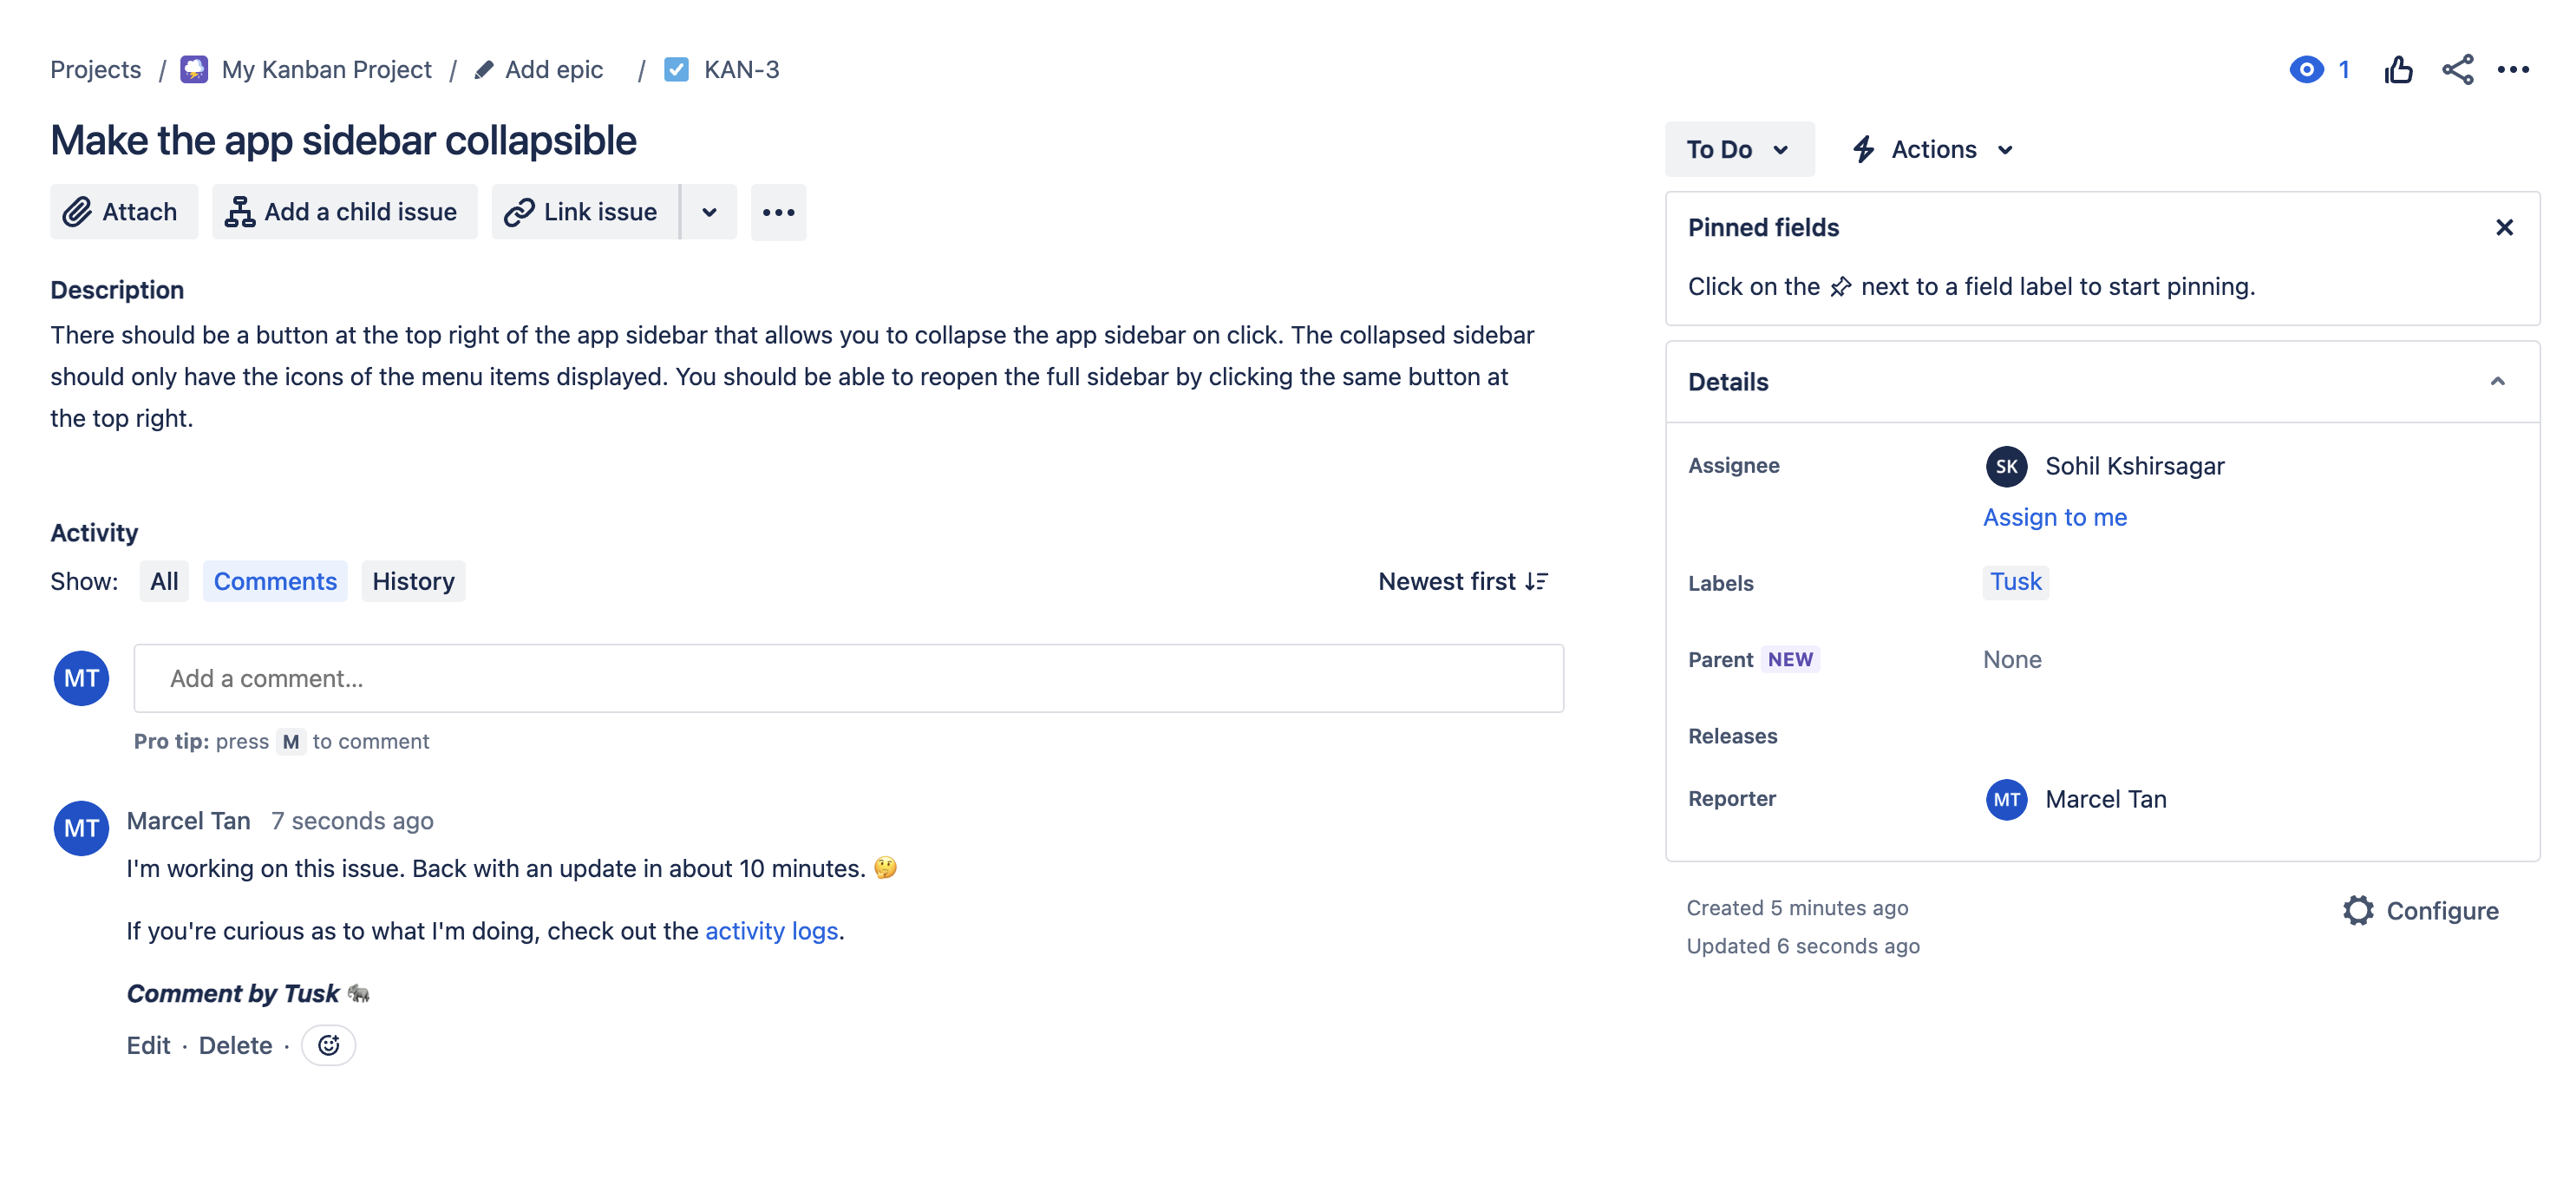
 9. Tusk will comment on the issue telling you that it’s working on it. The comment will be attributed to the person who originally granted Tusk access to your Jira site. You can check the activity logs for the issue in the Tusk web app.
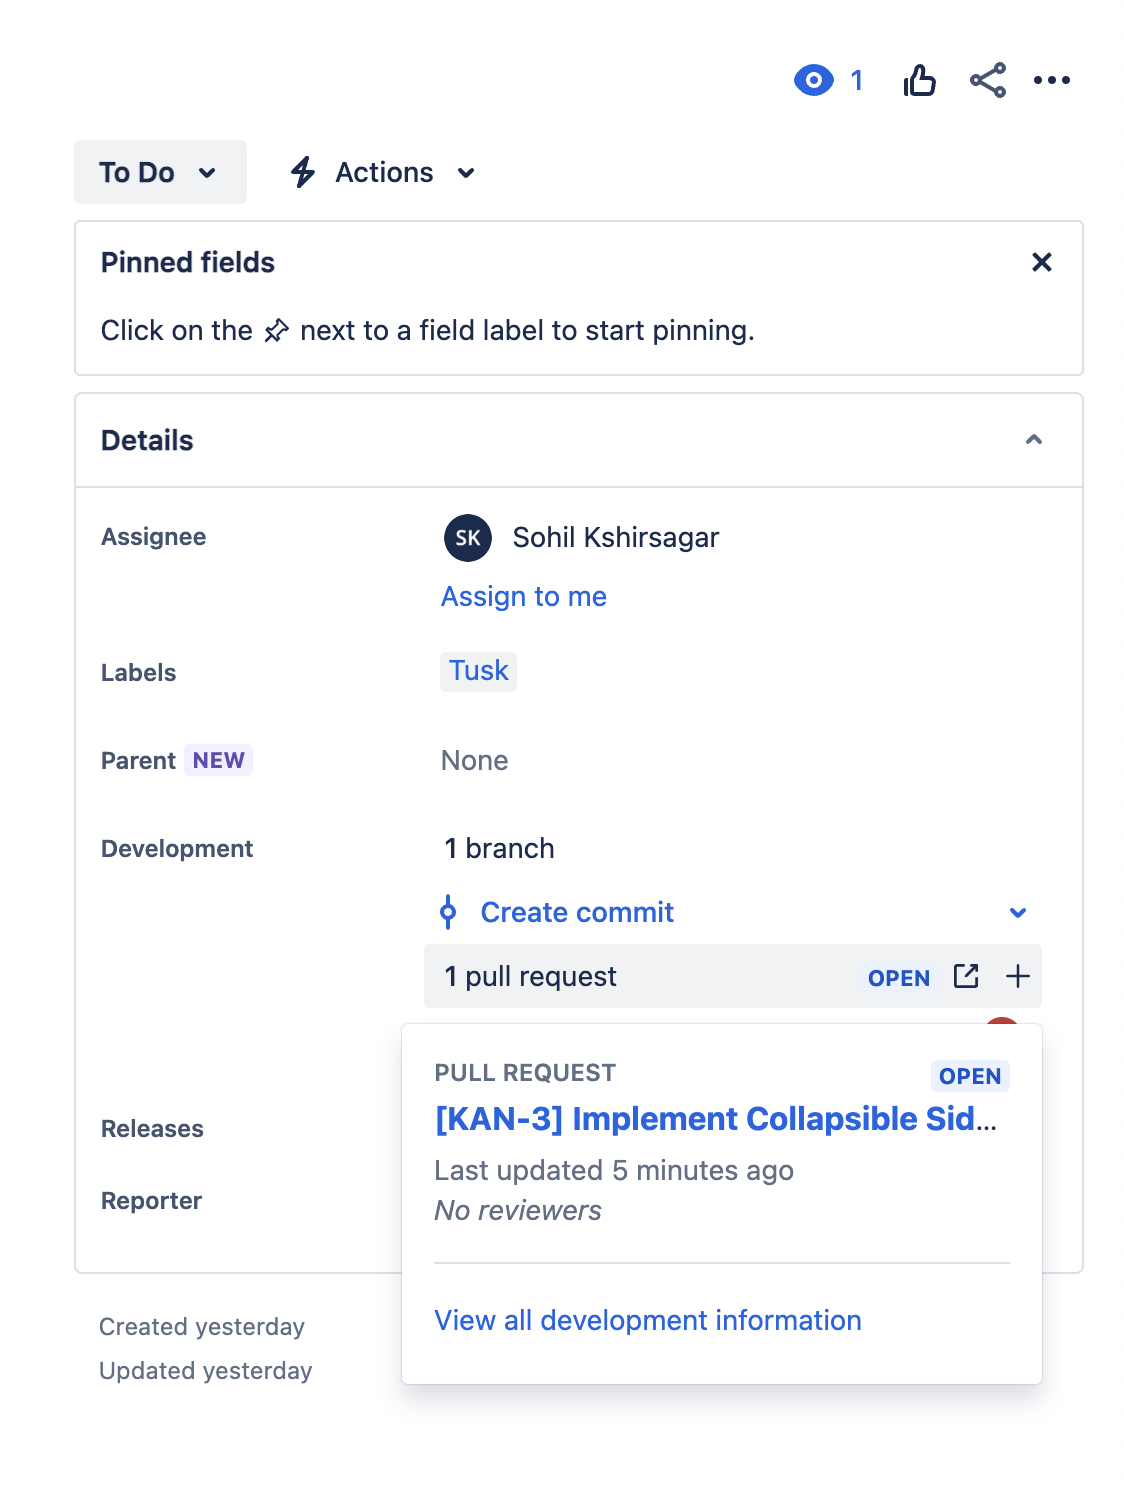
 10. Recommended: Get the [GitHub for Jira integration](https://marketplace.atlassian.com/apps/1219592/github-for-jira?hosting=cloud\&tab=overview) to link the Jira issue you assigned to Tusk with the corresponding Tusk-created PR. Tusk automatically adds the issue key at the beginning of the PR’s title so that the PR, with its latest status, shows up in the issue under the “Development” field.
 ***
## Connecting to Notion
1. Log into Tusk and go to the **Settings** page.
2. Under the **Integrations** tab, find the Notion integration card under "Project management platform.” Click **Connect**.
***
## Connecting to Notion
1. Log into Tusk and go to the **Settings** page.
2. Under the **Integrations** tab, find the Notion integration card under "Project management platform.” Click **Connect**.
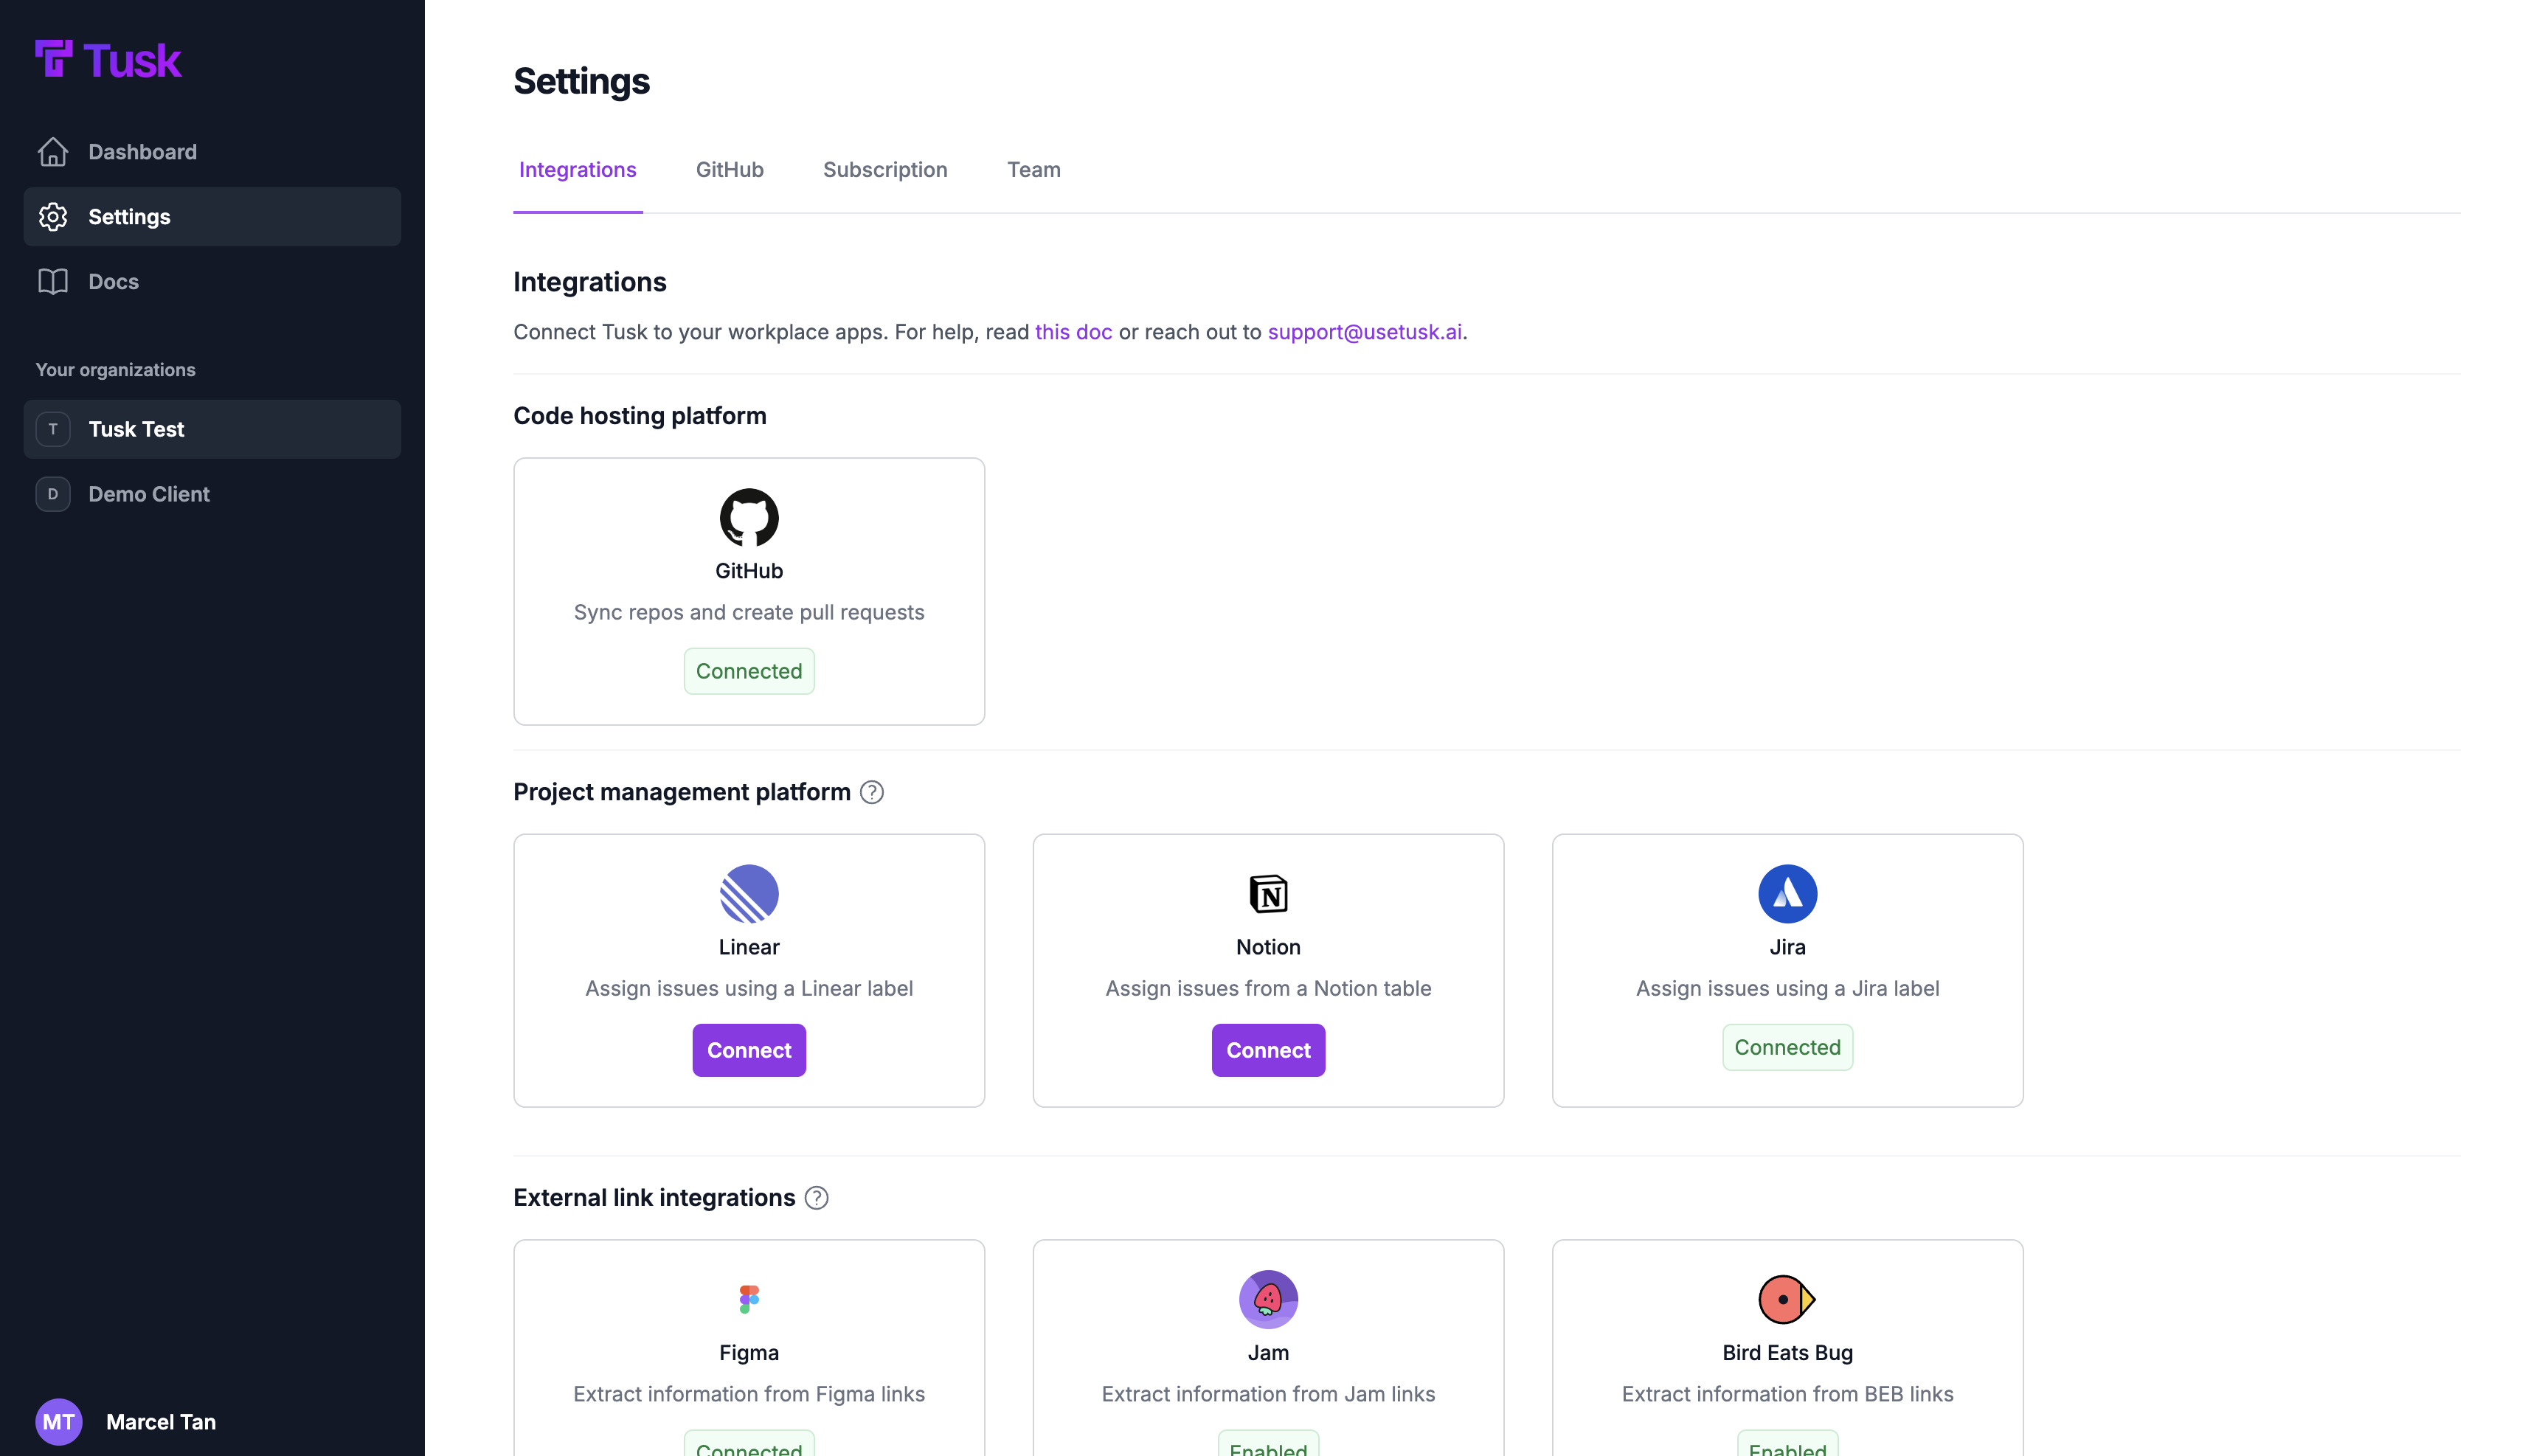 3. You’ll be redirected to Notion to grant Tusk access to your Notion workspace. Make sure to choose the correct workspace on the top right corner.
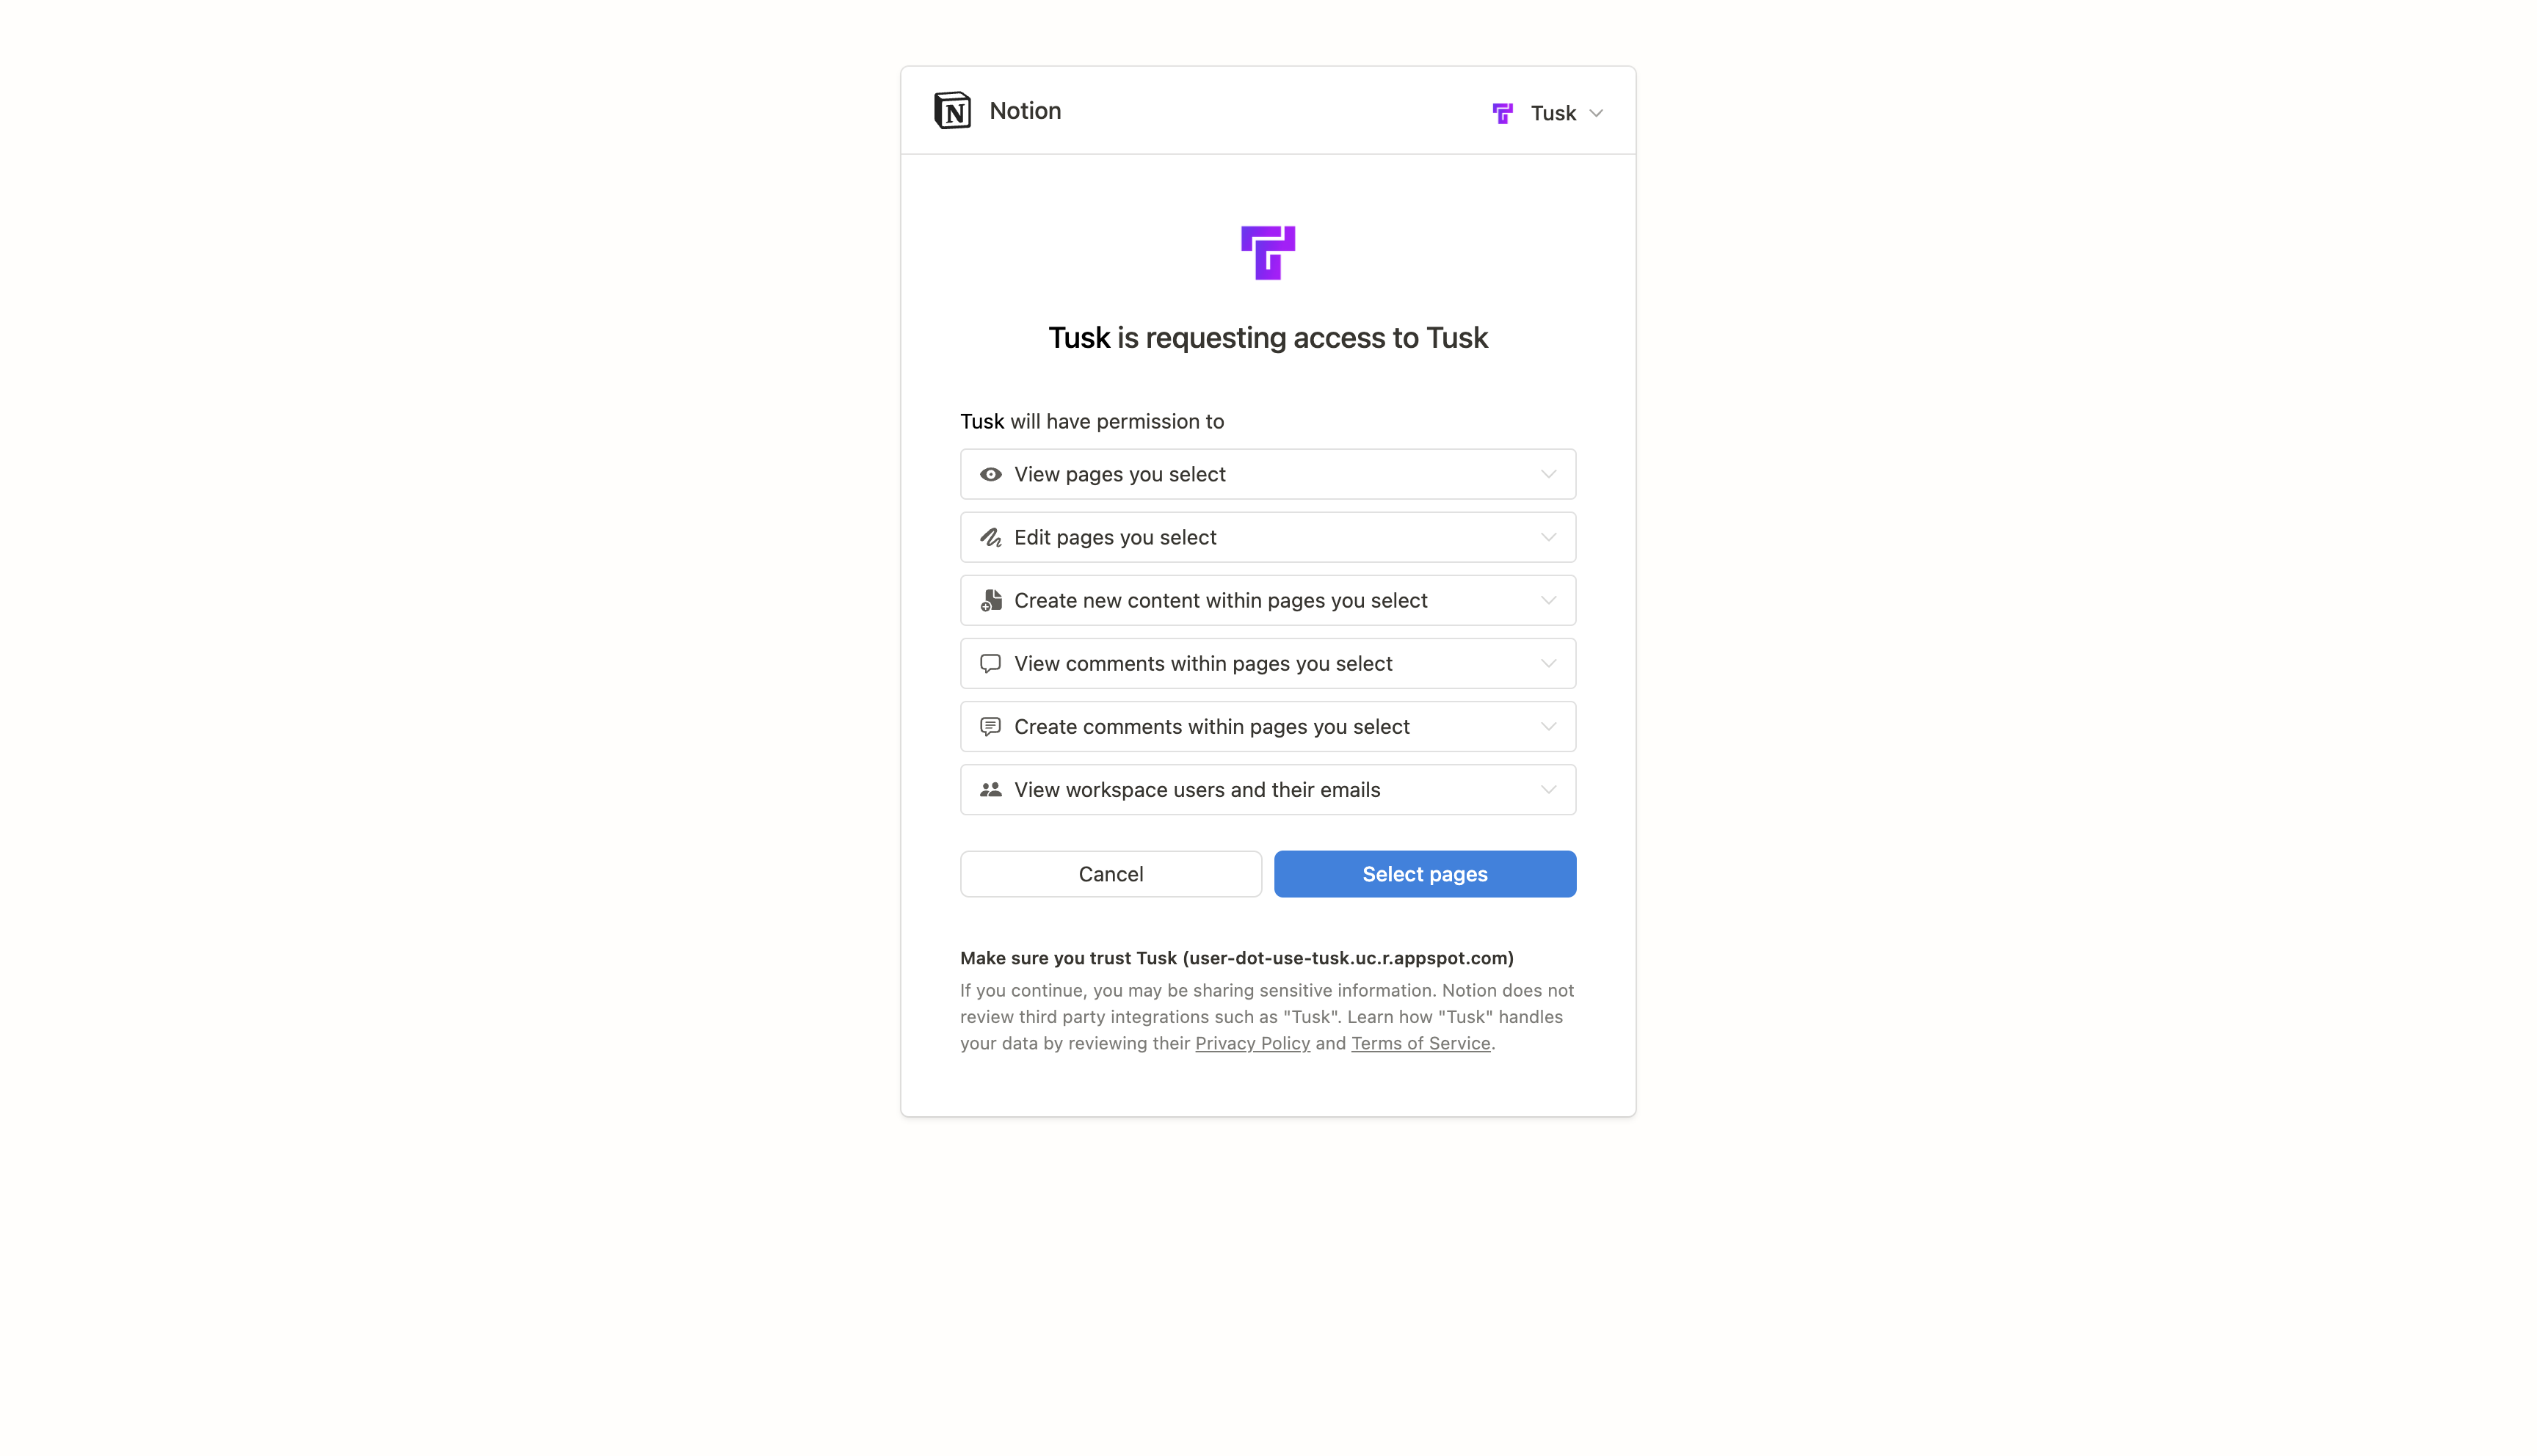 4. Select the page that you want to grant Tusk access to. This should typically be the **Tasks database** where you create tasks for your engineering team. Click **Allow access**.
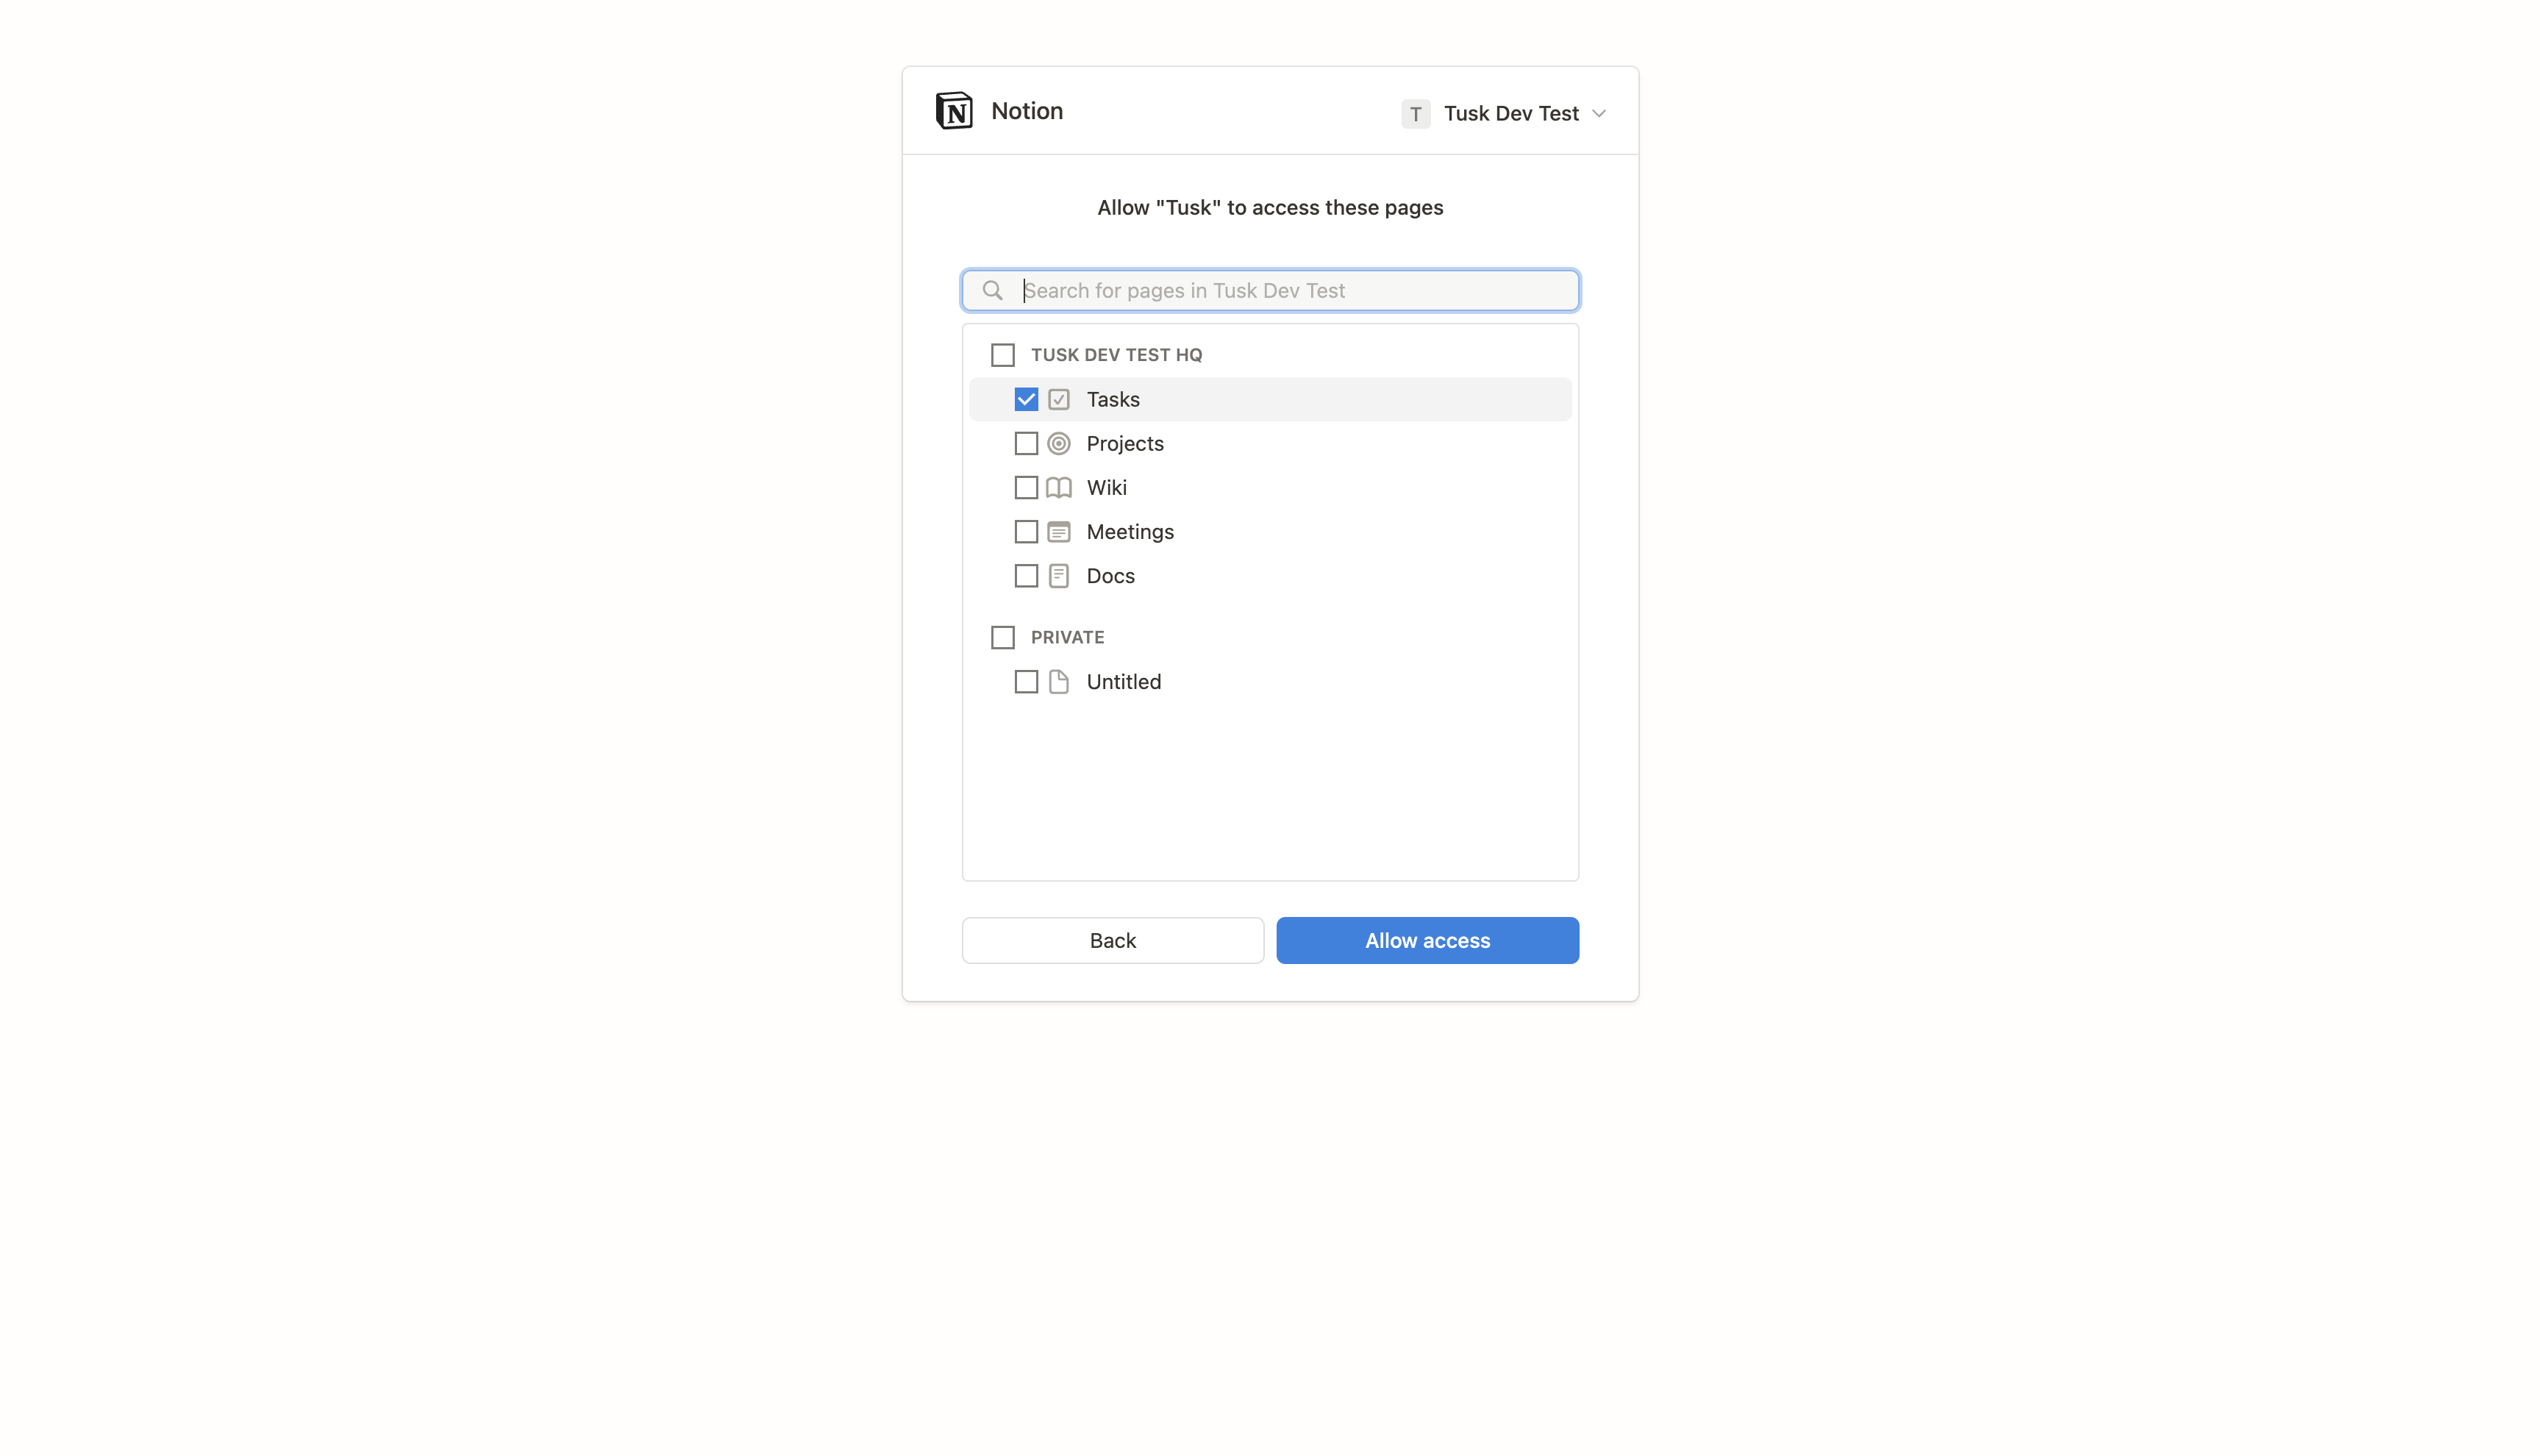 5. You’ll then be redirected back to the Tusk app, where you should now see a status badge displaying “Connected” on the Notion integration card.
At this point, please contact [support@usetusk.ai](mailto:support@usetusk.ai) to finish setting up the
Notion integration. We will respond promptly.
5. You’ll then be redirected back to the Tusk app, where you should now see a status badge displaying “Connected” on the Notion integration card.
At this point, please contact [support@usetusk.ai](mailto:support@usetusk.ai) to finish setting up the
Notion integration. We will respond promptly.
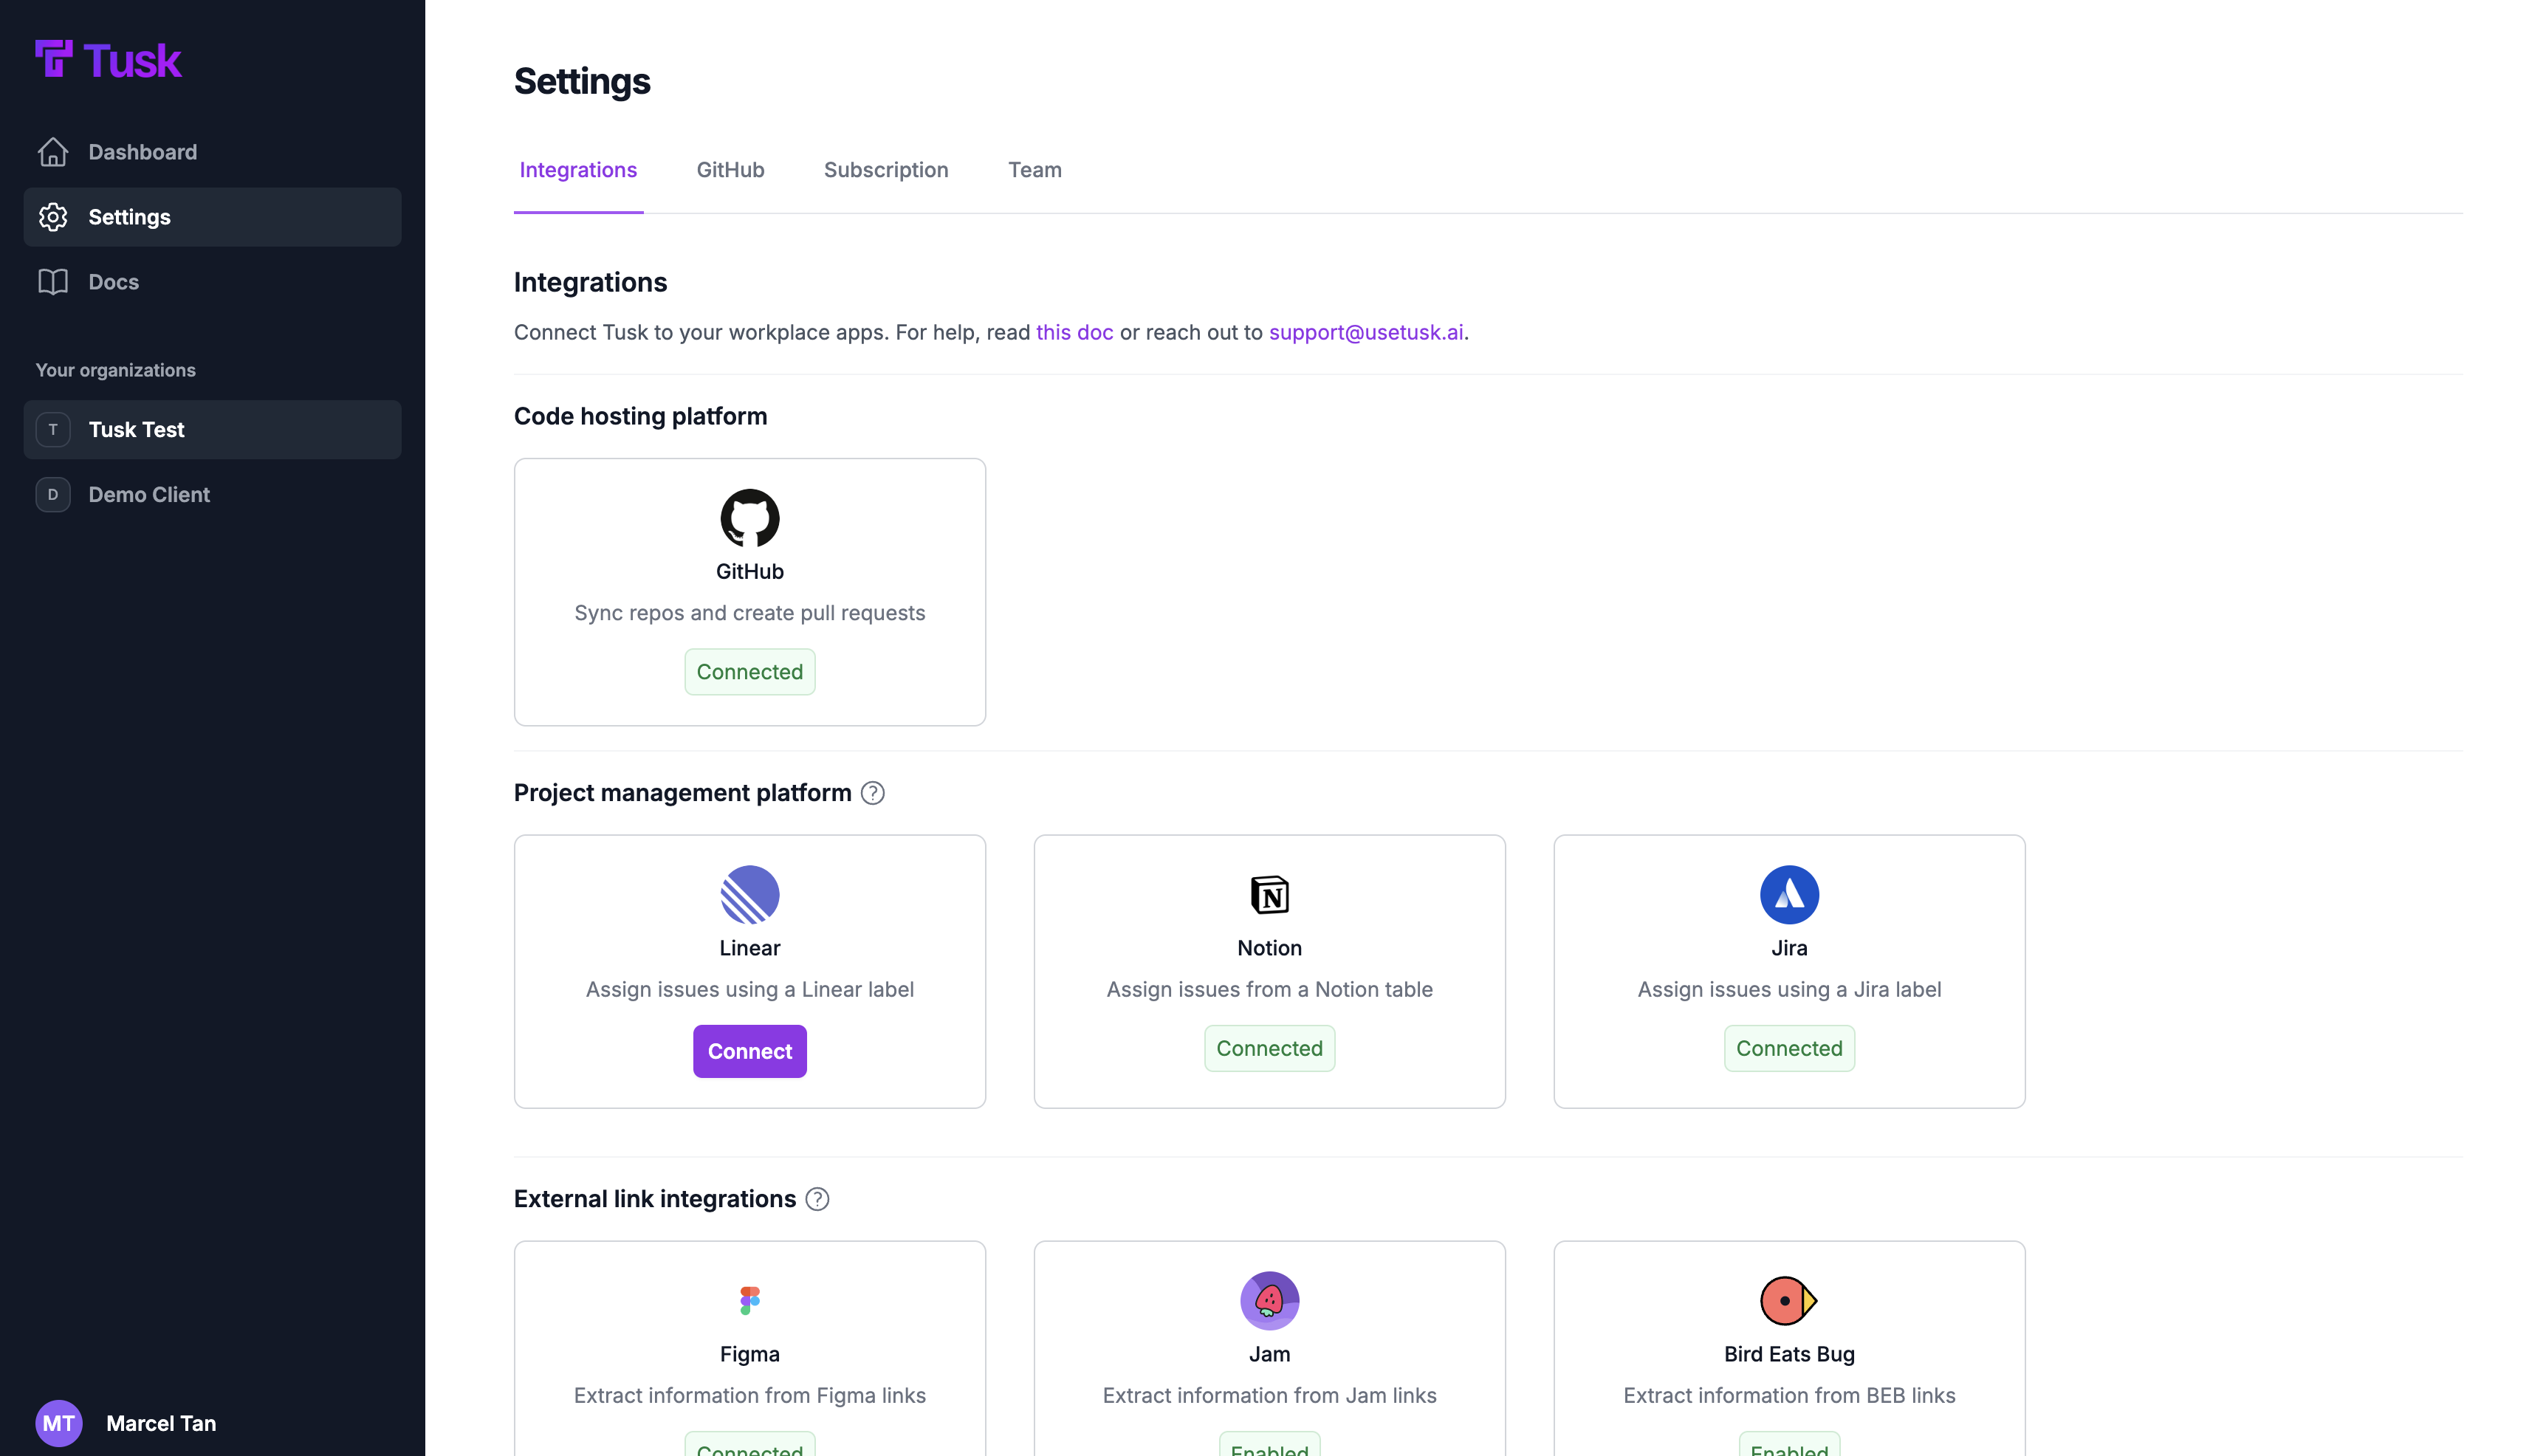 6. To assign tasks to Tusk in your Notion database, go to any task in Notion.
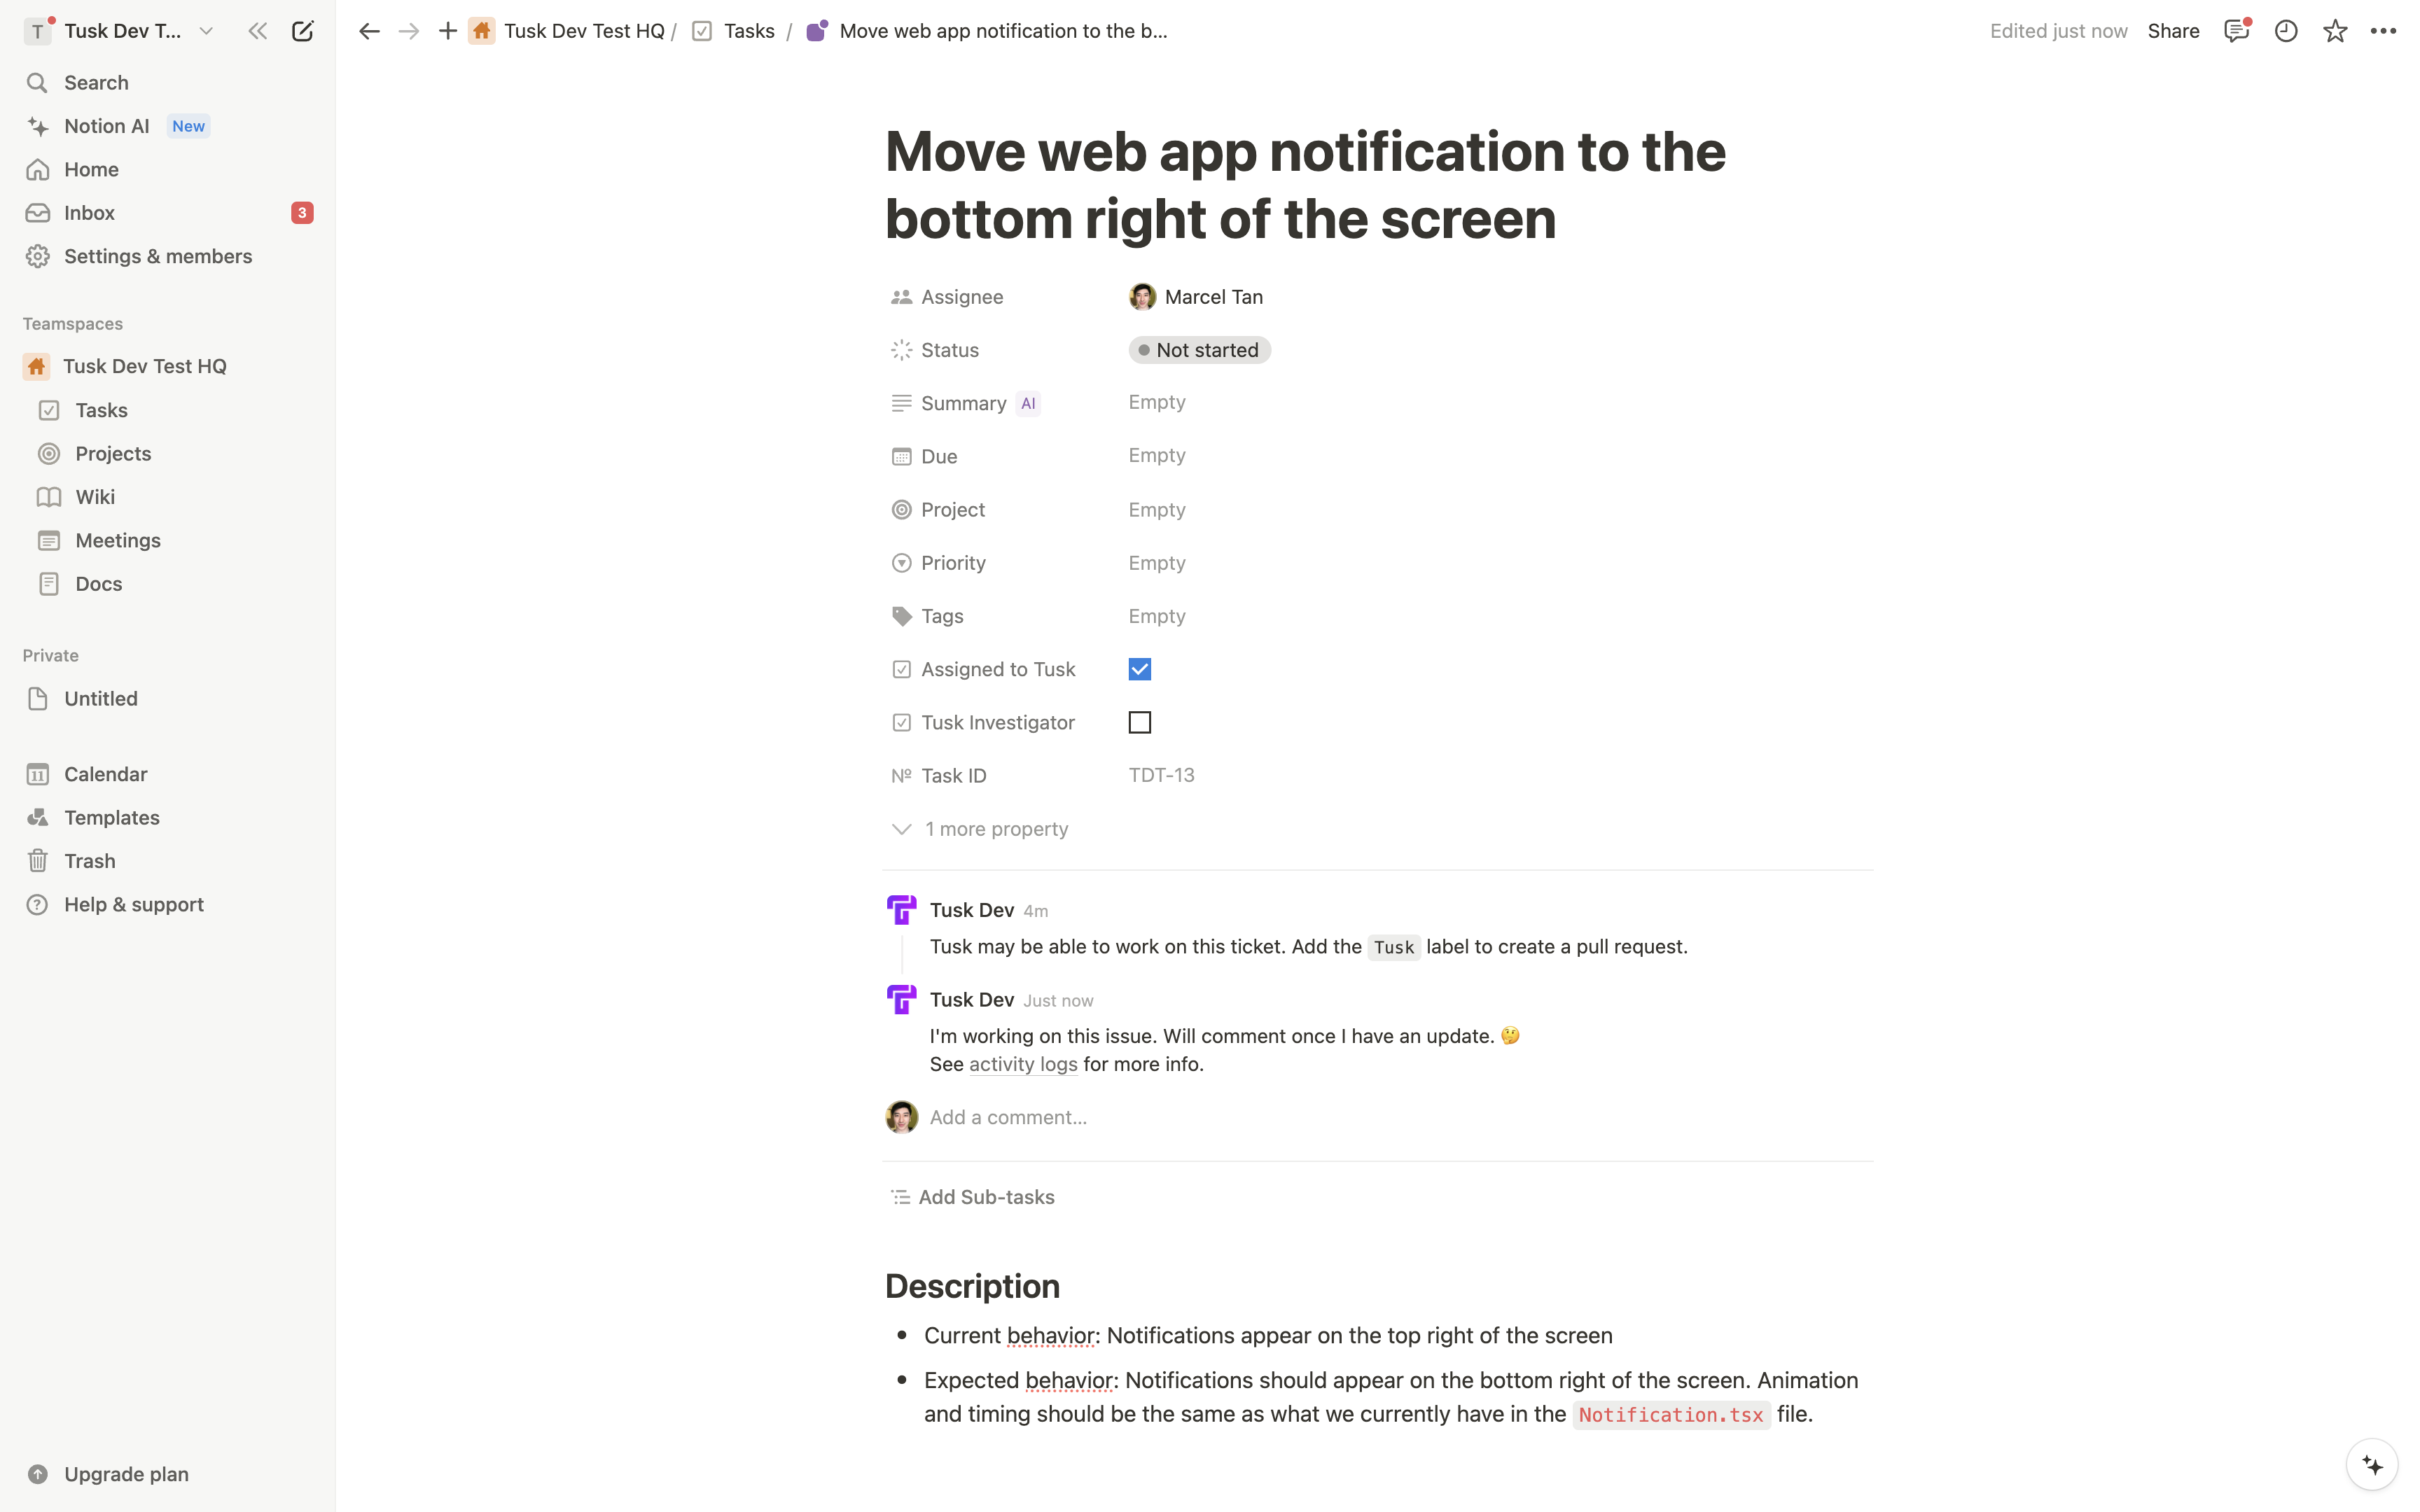
7. Check the **“Assigned to Tusk”** checkbox field to assign the task to Tusk.
6. To assign tasks to Tusk in your Notion database, go to any task in Notion.
7. Check the **“Assigned to Tusk”** checkbox field to assign the task to Tusk.
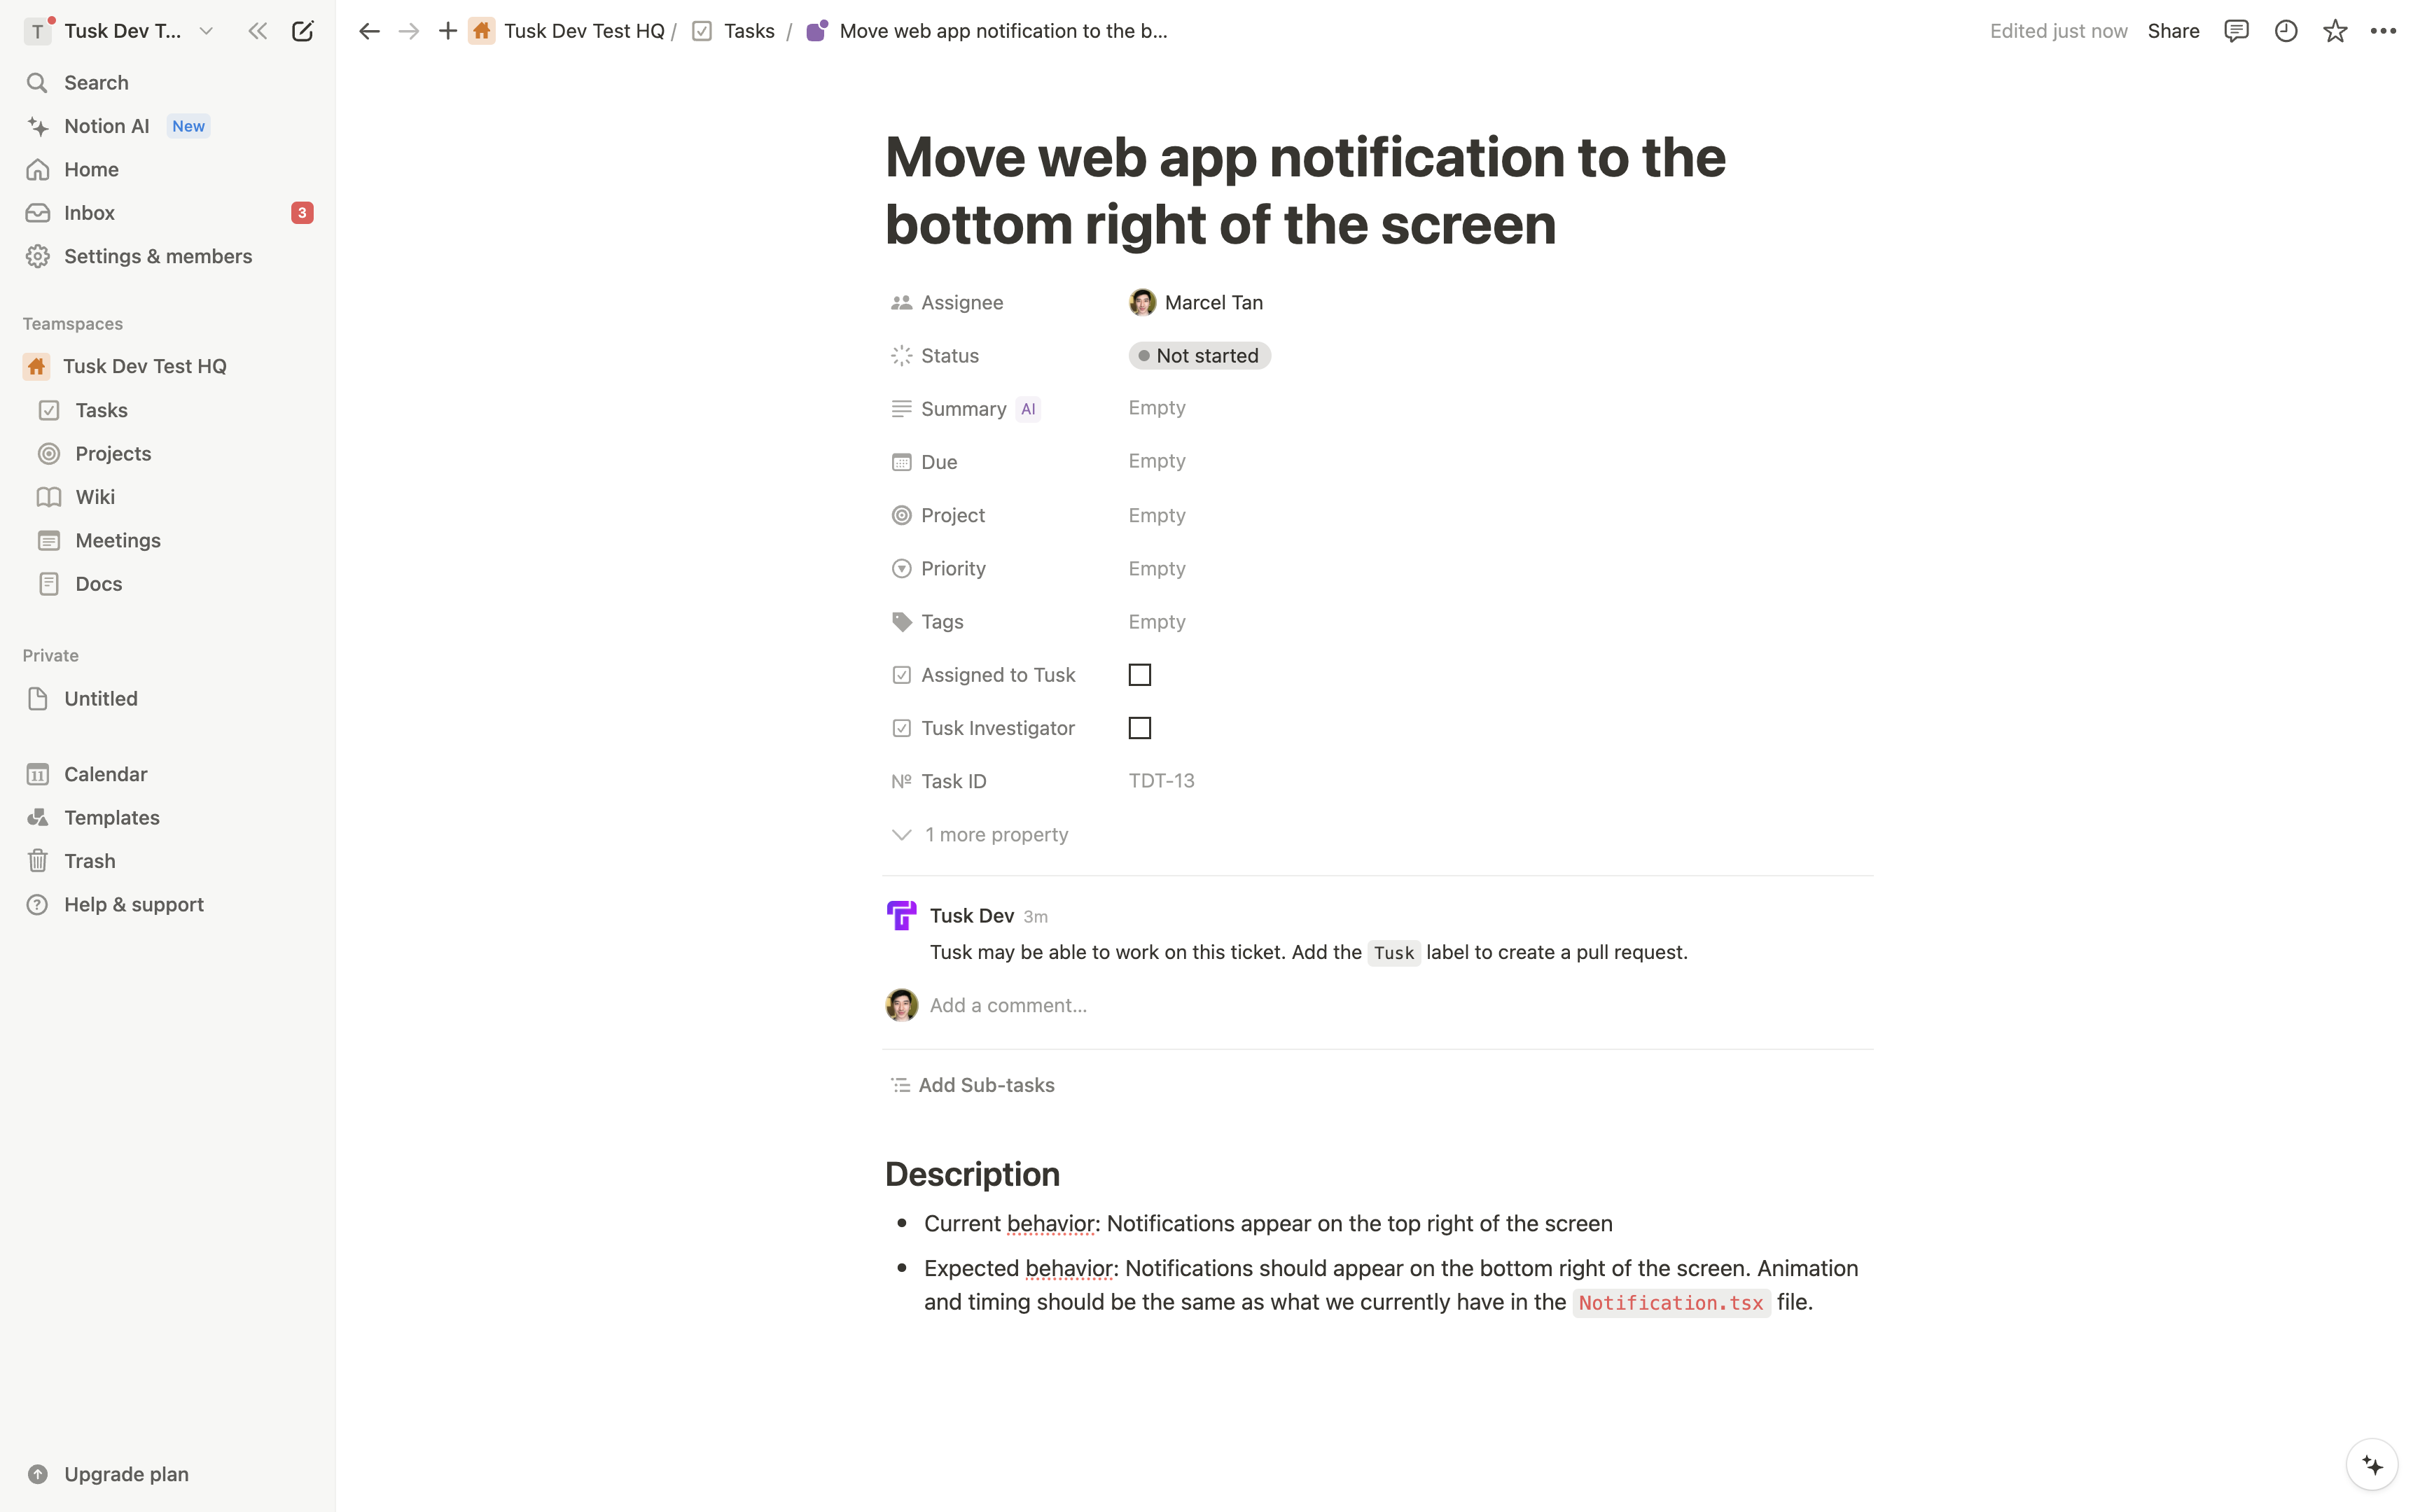 8. Tusk will comment on the task telling you that it’s working on it. You can check the activity logs for the issue in the Tusk web app.
 9. Recommended: [Integrate GitHub with your Notion database](https://www.notion.so/integrations/github) to link the Notion task you assigned to Tusk with the corresponding Tusk-created PR.
10. Once the Notion task is linked to the Tusk-created PR, Notion automatically changes the status of the task according to the status of the linked PR. [Learn more about Notion's GitHub integration](https://www.notion.so/help/github).
## FAQs
To disconnect Tusk, go to Applications or Connections in your project management app's Settings. Depending on the app, click "Remove access" or "Revoke access" for Tusk.
You will need to provide us the ID for the Notion database that you want Tusk to be able to read. This is typically the Tasks database. Here's how to find the database ID:
1. Open the database as a full page in Notion.
2. Use the `Share` menu to `Copy link`.
3. Paste the link in a text editor.
The URL uses the following format: `https://www.notion.so/{workspace_name}/{database_id}?v={view_id}`
Find the part that corresponds to `{database_id}` in the URL that you pasted. It is a string with 36 characters. This value is your database ID.
9. Recommended: [Integrate GitHub with your Notion database](https://www.notion.so/integrations/github) to link the Notion task you assigned to Tusk with the corresponding Tusk-created PR.
10. Once the Notion task is linked to the Tusk-created PR, Notion automatically changes the status of the task according to the status of the linked PR. [Learn more about Notion's GitHub integration](https://www.notion.so/help/github).
## FAQs
To disconnect Tusk, go to Applications or Connections in your project management app's Settings. Depending on the app, click "Remove access" or "Revoke access" for Tusk.
You will need to provide us the ID for the Notion database that you want Tusk to be able to read. This is typically the Tasks database. Here's how to find the database ID:
1. Open the database as a full page in Notion.
2. Use the `Share` menu to `Copy link`.
3. Paste the link in a text editor.
The URL uses the following format: `https://www.notion.so/{workspace_name}/{database_id}?v={view_id}`
Find the part that corresponds to `{database_id}` in the URL that you pasted. It is a string with 36 characters. This value is your database ID.