Overview
Tusk uses a custom GitHub workflow for our customers to ensure that any pull request created passes your sanity checks. Do this by creating a GitHub workflow at.github/workflows/tusk-sanity-check.yml. This workflow should:
- Auto-fix any formatting/lint errors
- Commit those changes (if any) to the branch
- This commit message must start with
fix(${{ github.run_id }}):
- This commit message must start with
- Run a type check/build step
Example workflow
Here’s an example workflow for a company that uses Node.js, has a frontend app and backend app, and has pre-existing lint/build commands.Tips and Tricks
Running lint/formatting steps
Make sure that you auto-fix as many errors as possible. This results in higher quality code because Tusk doesn’t have to “think” about issues that are auto-fixed. If you don’t use something likelint-staged (see below section if you do), you may only want to auto-lint or auto-format files that are modified. You can use the output of dorny/paths-filter to do this. Some notes:
- We need to strip out the sub-directory of the file so it becomes the local path (
paths-filterreturns the full file path) "${file#frontend/}"removesfrontend/fromfile(e.g.frontend/app.tsxbecomesapp.tsx)
Using lint-staged
If you already use lint-staged, you need to modify thecheckout step to include fetch-depth
- Set
fetch-depth: 40. 40 commits should be more than enough for all the new Tusk commits on that branch.lint-stagedwill use these commits to determine the files that are changed. - Pass in a diff command to
lint-staged(e.g.npx lint-staged --diff=origin/masterornpx lint-staged --diff=origin/${{ github.event.repository.default_branch }}
Using dorny/paths-filter
Use dorny/paths-filter to figure out the sub-directories that are modified (the example below is for a repo withfrontend and backend).
- You need to set the base branch, for most repos this can just be the default branch but if you’ve asked Tusk to use a different default branch for Tusk make sure to specify that.
- After this, you can then use something like
if: steps.filter.outputs.frontend == 'true'to determine whether to run certain future steps. - This will also list the files/that are modified as part of the output (in case we need to pass to any lint/buld commands). You can use this like
${{ steps.filter.outputs.frontend_files }}.
Committing any auto changes
We use the stefanzweifel/git-auto-commit-action to auto-commit any changes that are made to the branch based off of your formatting/lint steps.Testing your workflow
- Make sure that your workflow is merged into your main branch on GitHub (if it doesn’t exist there you won’t be able to manually dispatch it to test it)
- Once your workflow is merged on the main branch, if you test the workflow on a different branch it will use the workflow file on the branch you are testing it on. This allows you to test changes to the workflow without merging to main.
- We also recommend testing a branch that has a change in it that should be auto-fixed based on your workflow, and ensuring that this workflow auto-fixes it.
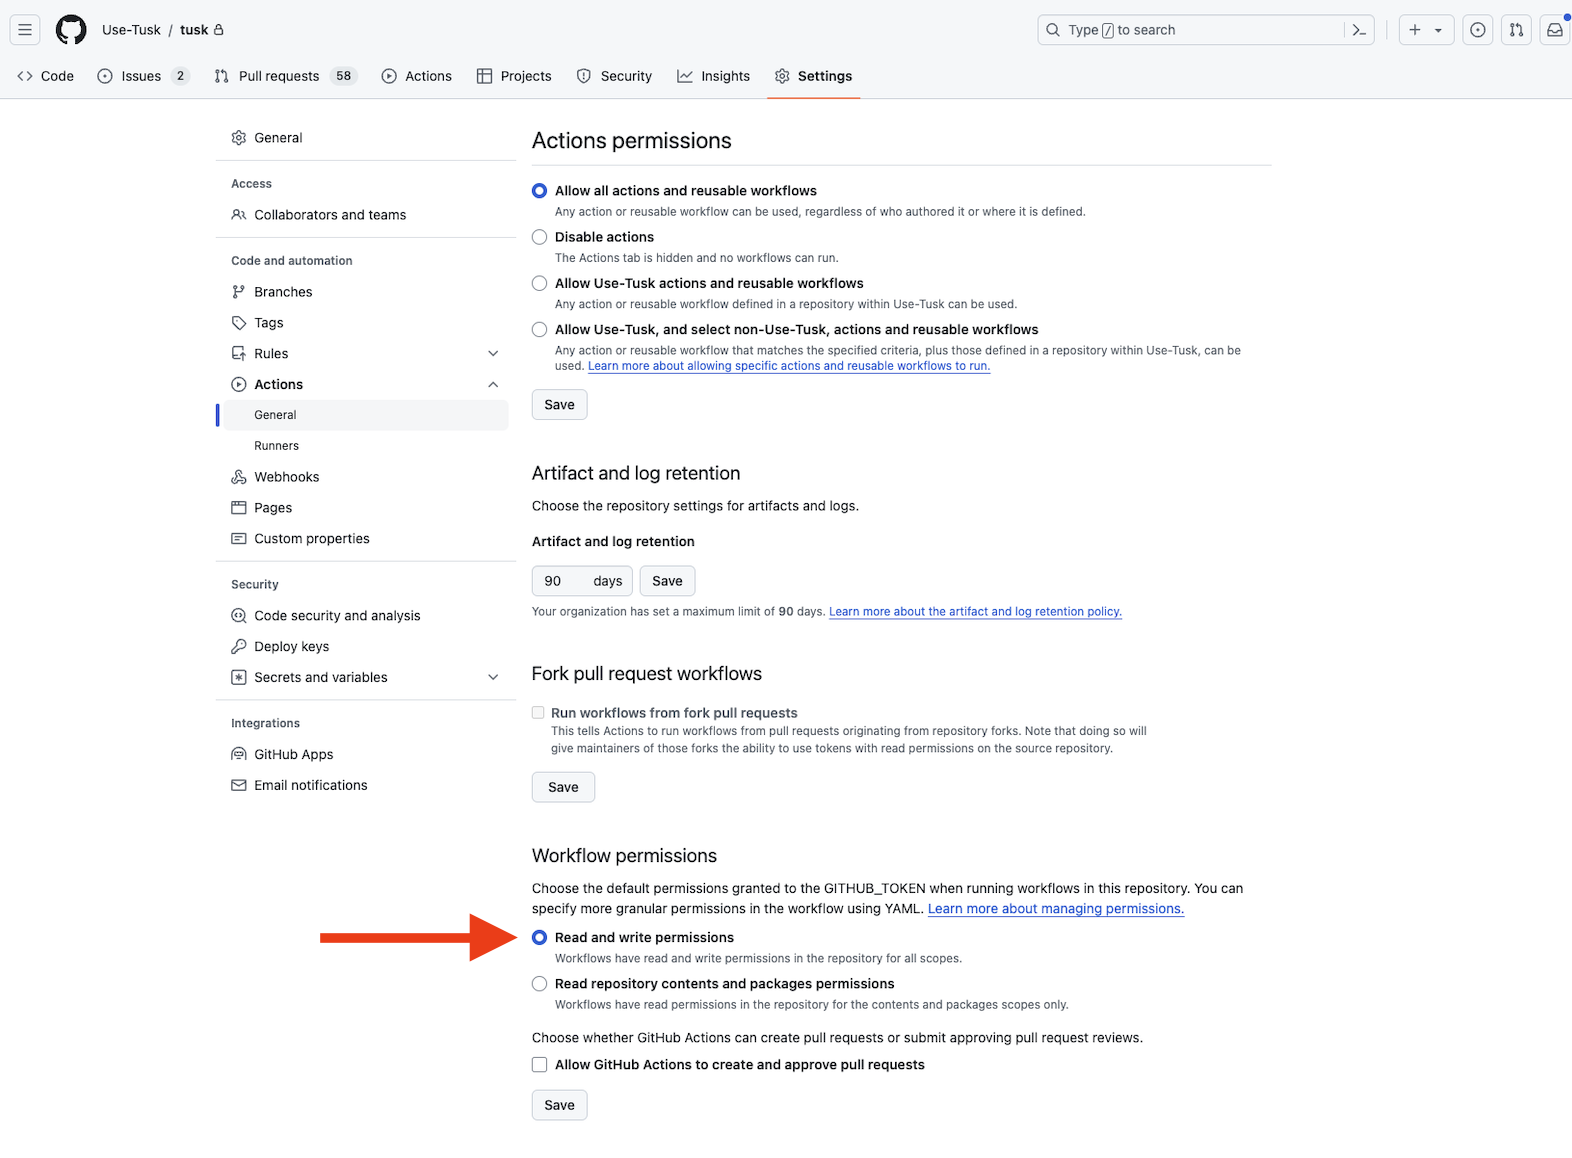
- Make sure your “Workflow permissions” are set to “Read and write permissions”