How Tusk Works
1
Tusk generates tests
When a commit is pushed to a PR/MR, Tusk will look at the code changes, existing tests and mocks, and linked Jira/Linear tickets to generate tests for happy path and edge case scenarios.
2
Tusk runs tests
Tusk will run these new tests in an isolated, ephemeral sandbox or via your Tusk Test Runner workflow to get the test results.
3
Tusk self-iterates
If any tests fail and Tusk determines that the failure is due to flakiness in the test code, Tusk will autonomously fix its test code.Moreover, if there are existing errors in the test file(s) in question (e.g., syntax errors, missing imports, pre-existing failing tests), Tusk will automatically address these errors.
4
View results
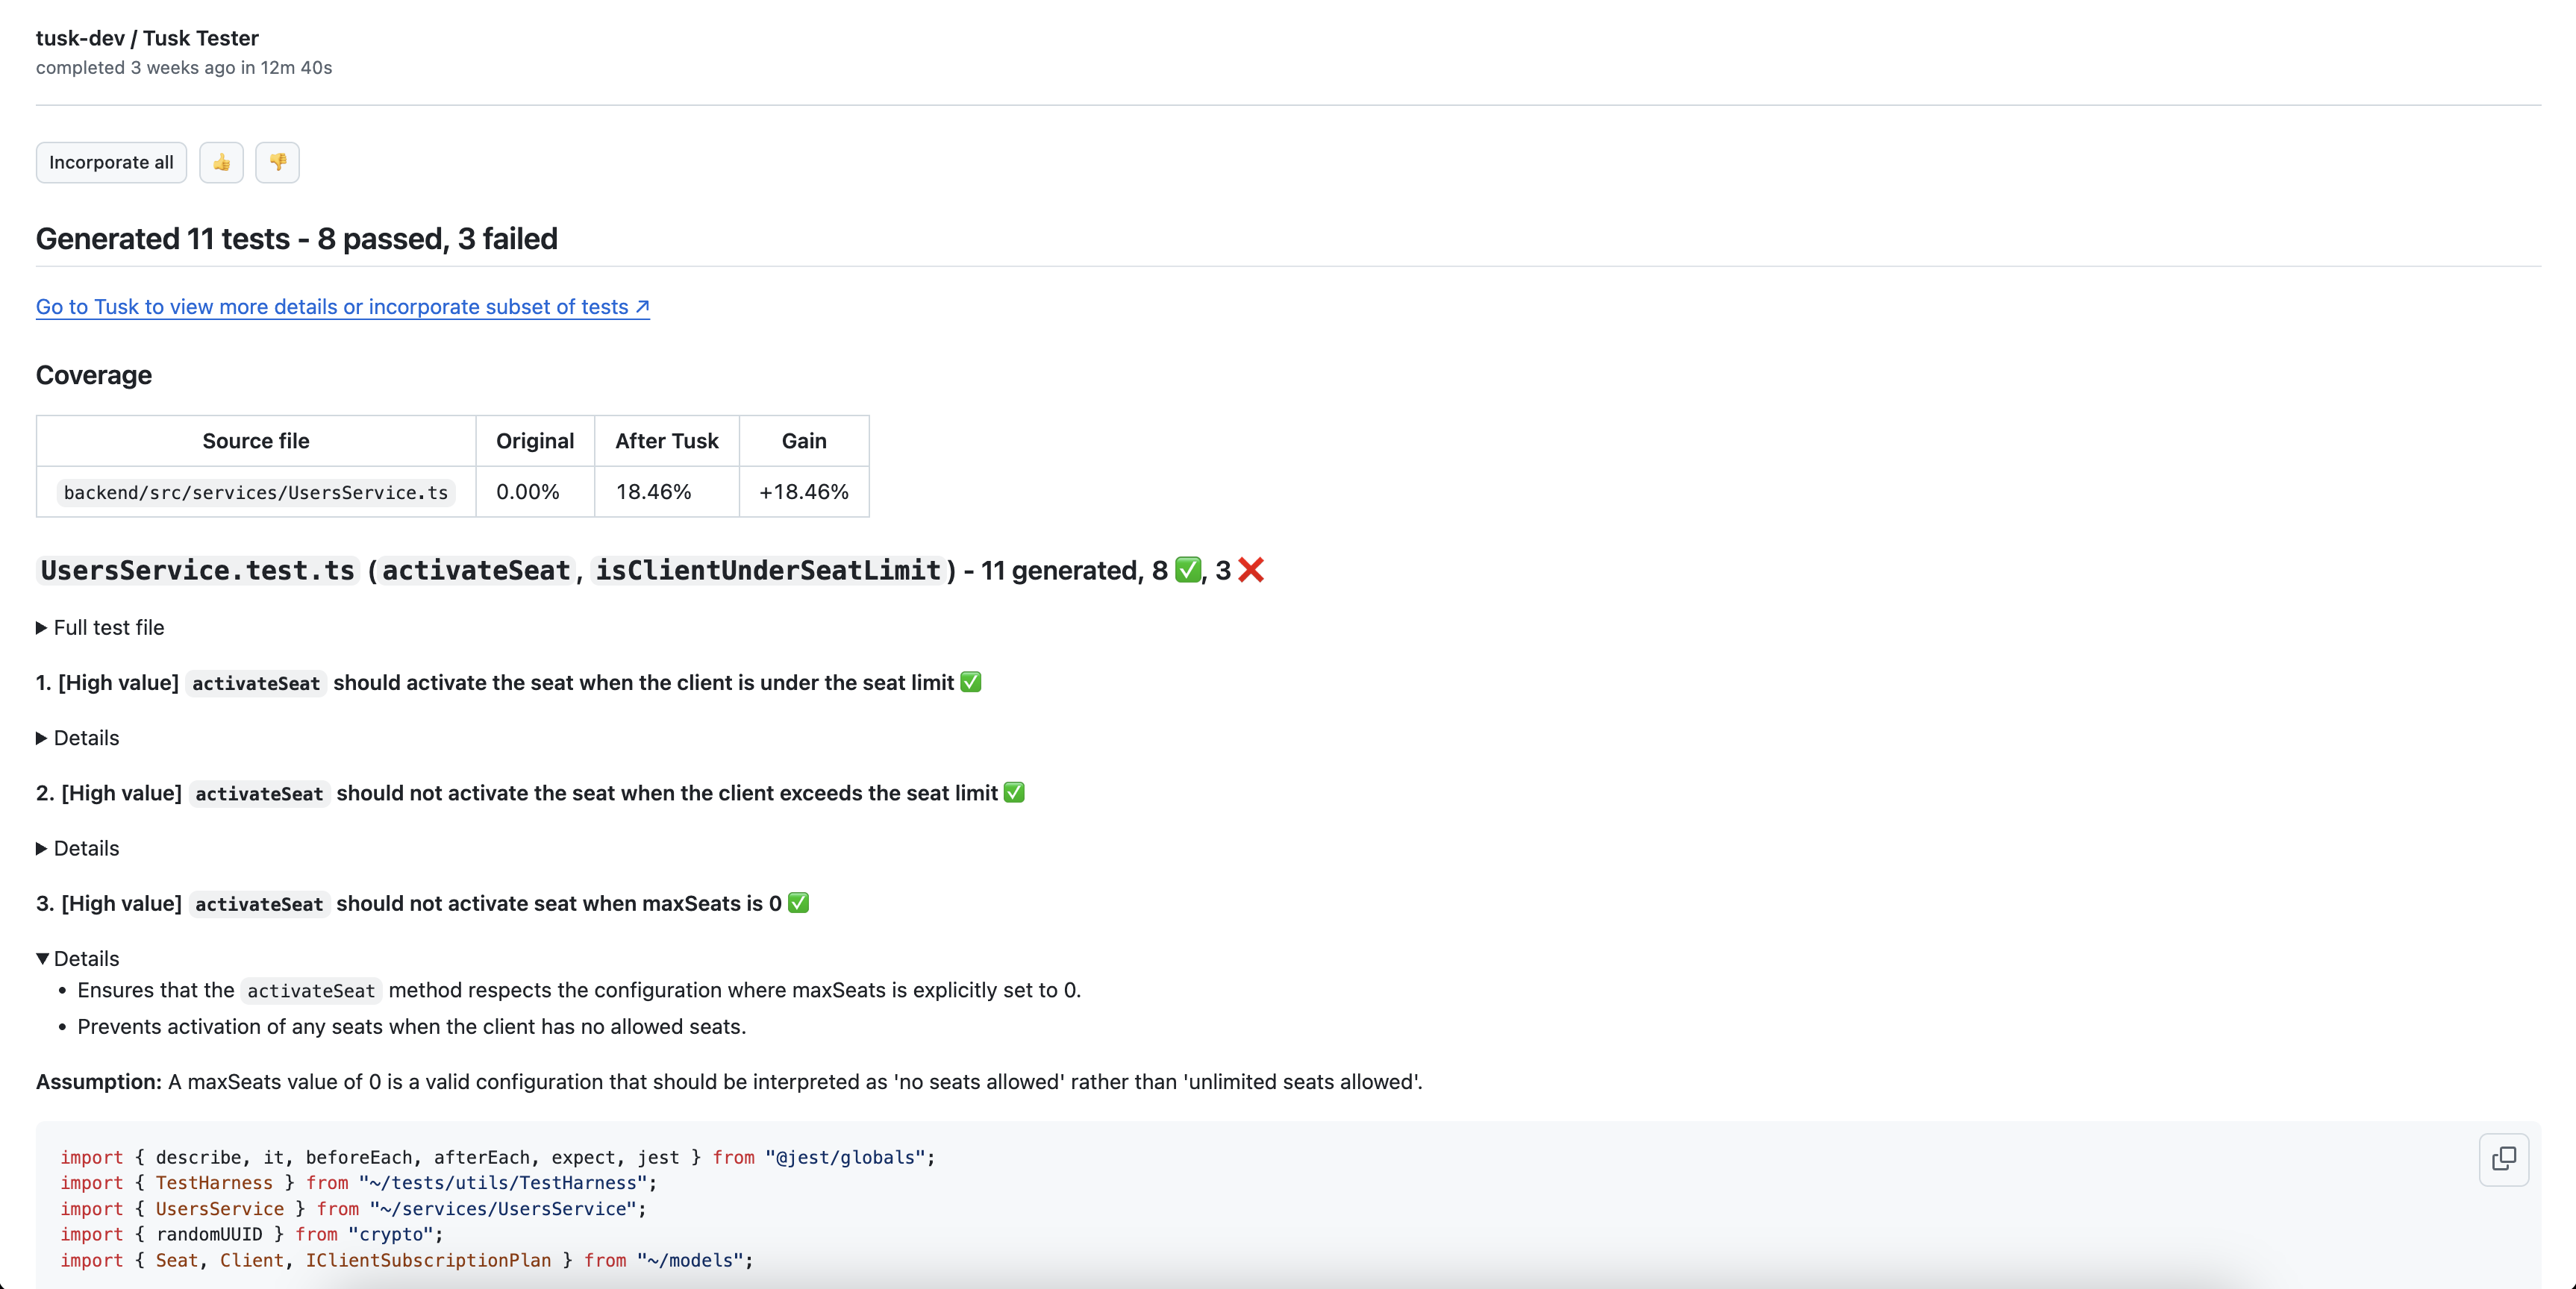
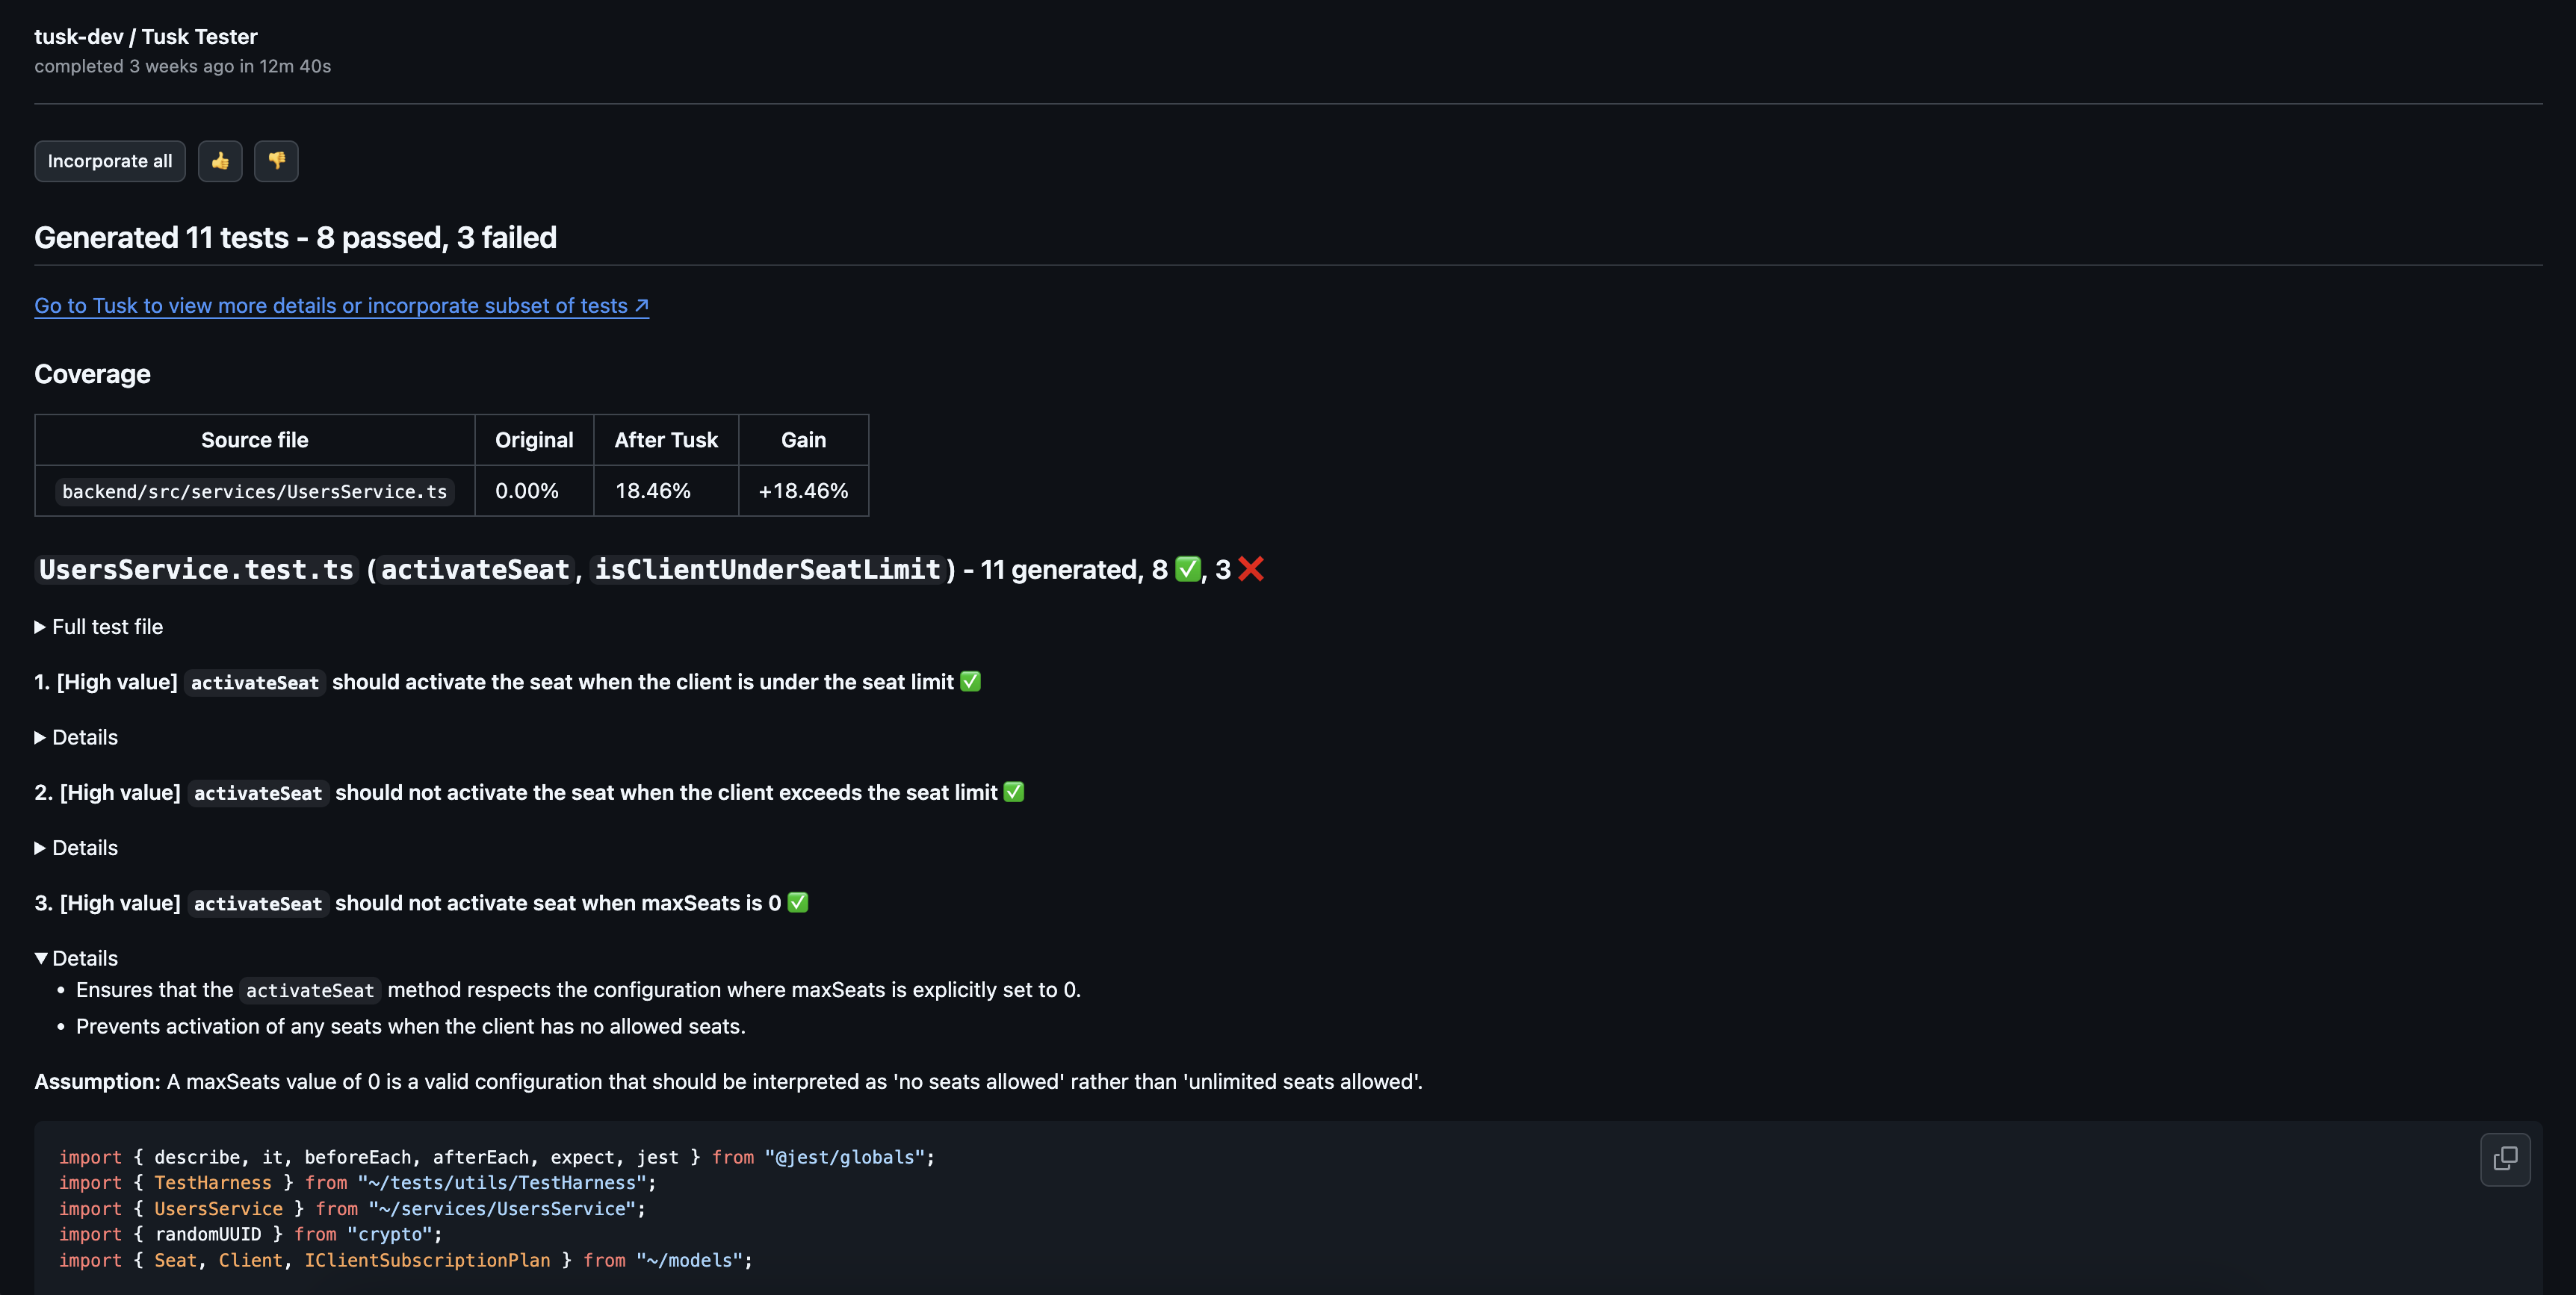
Once the PR/MR check is complete, Tusk will leave a self-updating comment with a summary of the tests generated as well as the check history.By default, Tusk only surfaces failing tests to catch edge cases. You can disable this feature in your repository’s Test Check Configuration or use the 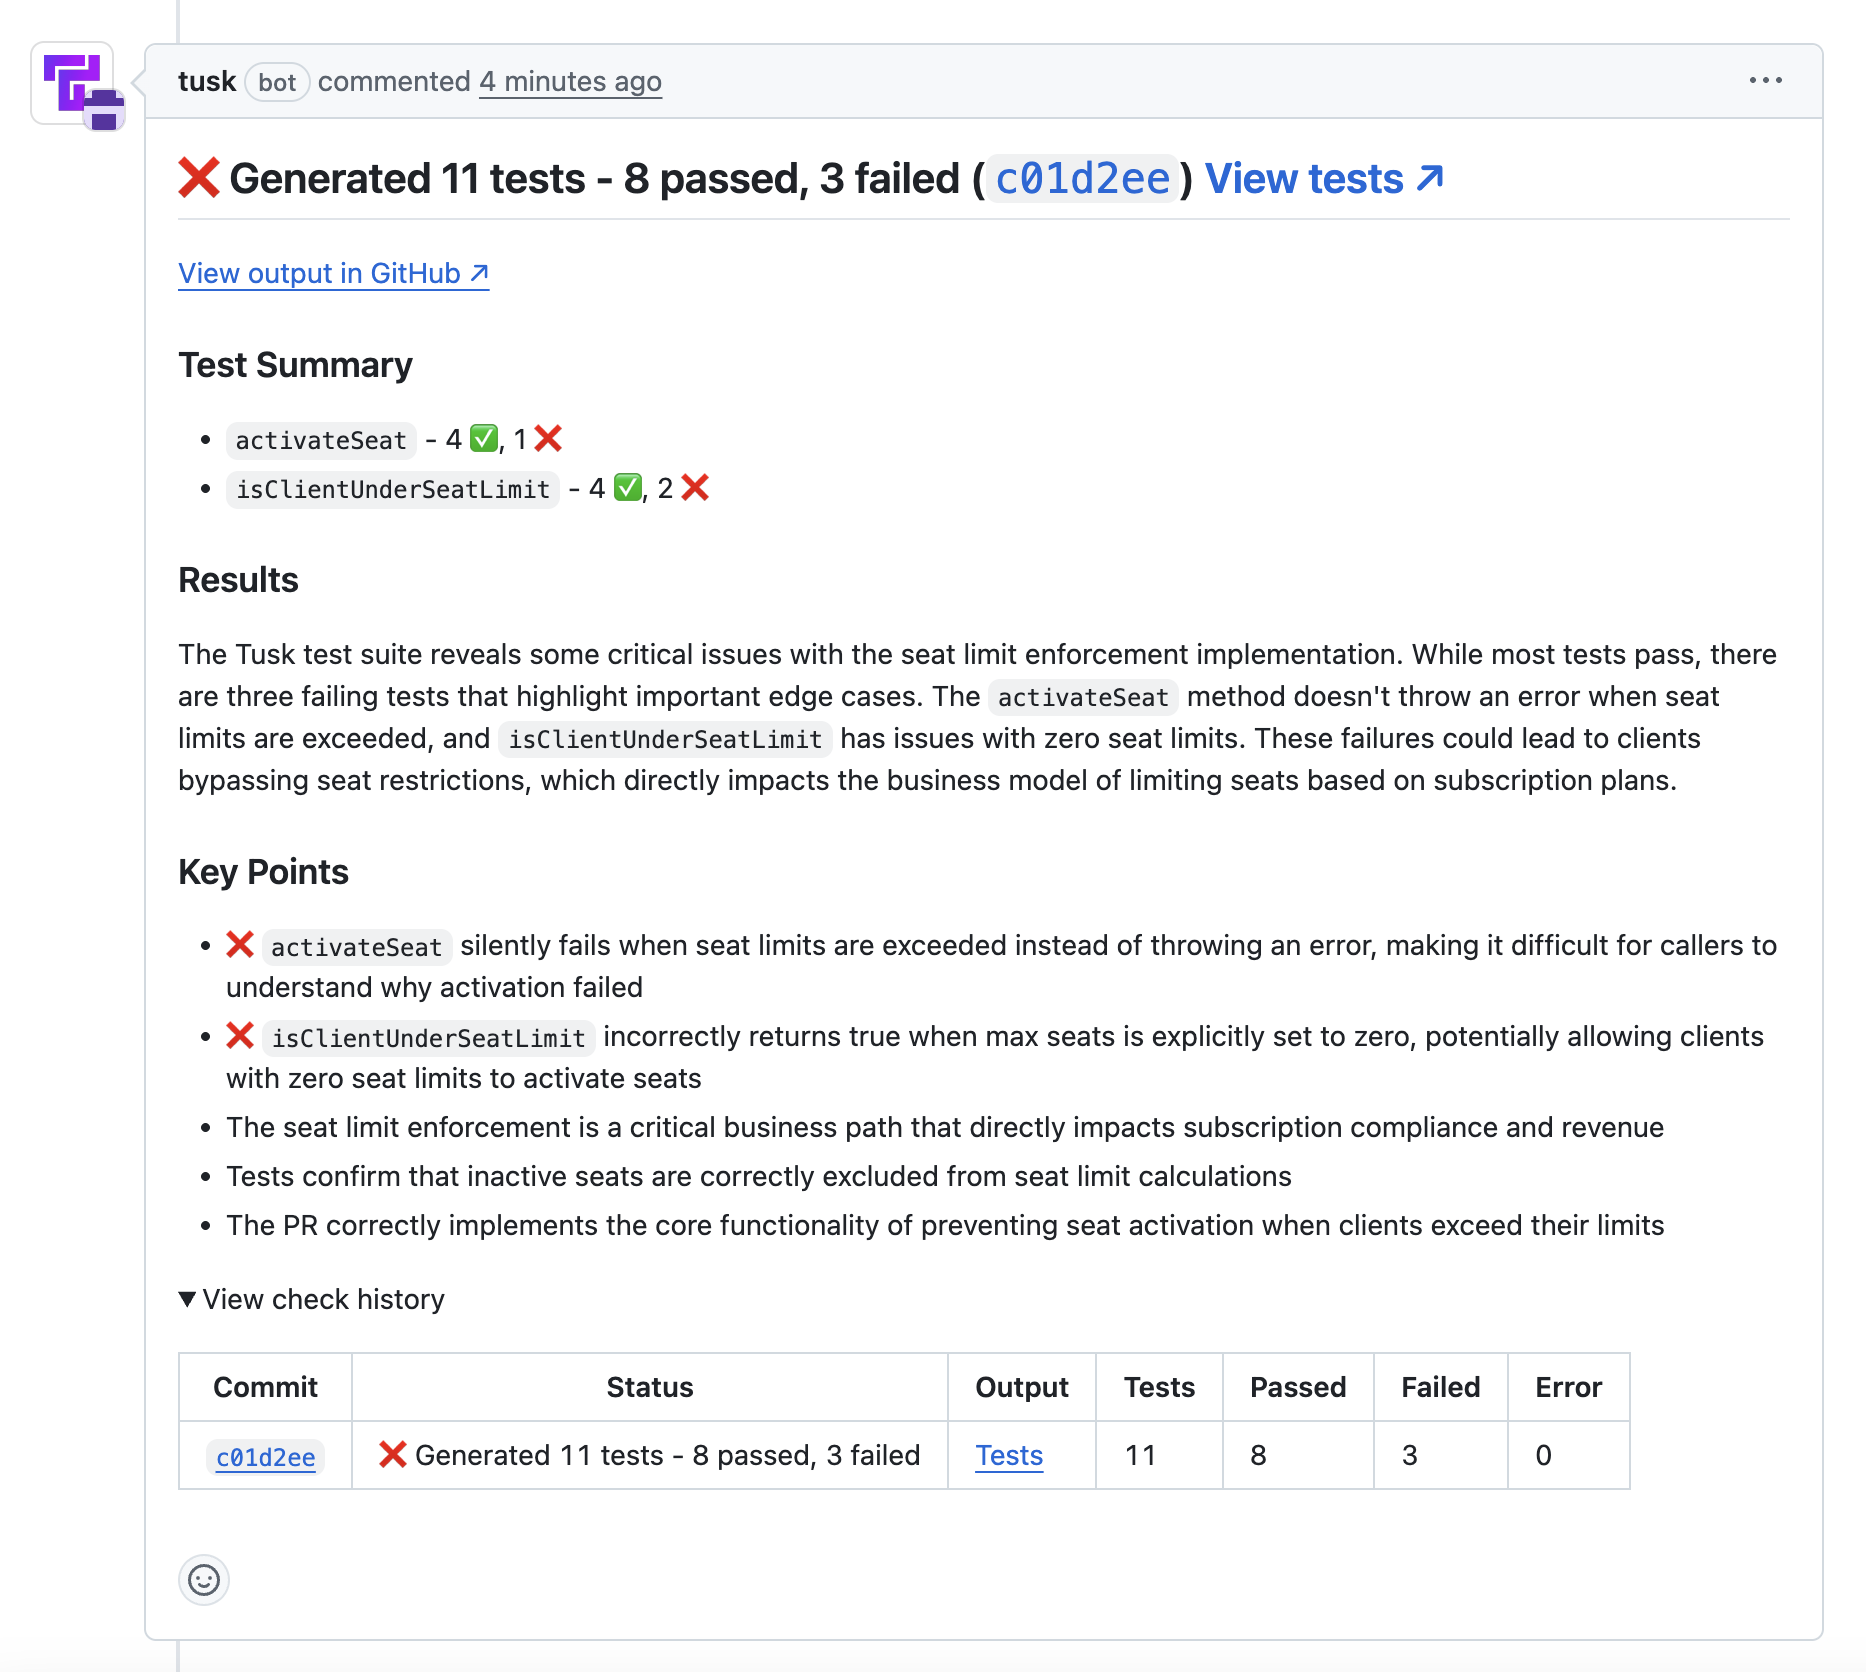
Tusk - Generate Tests PR/MR label to generate the full test suite with passing tests.GitHub: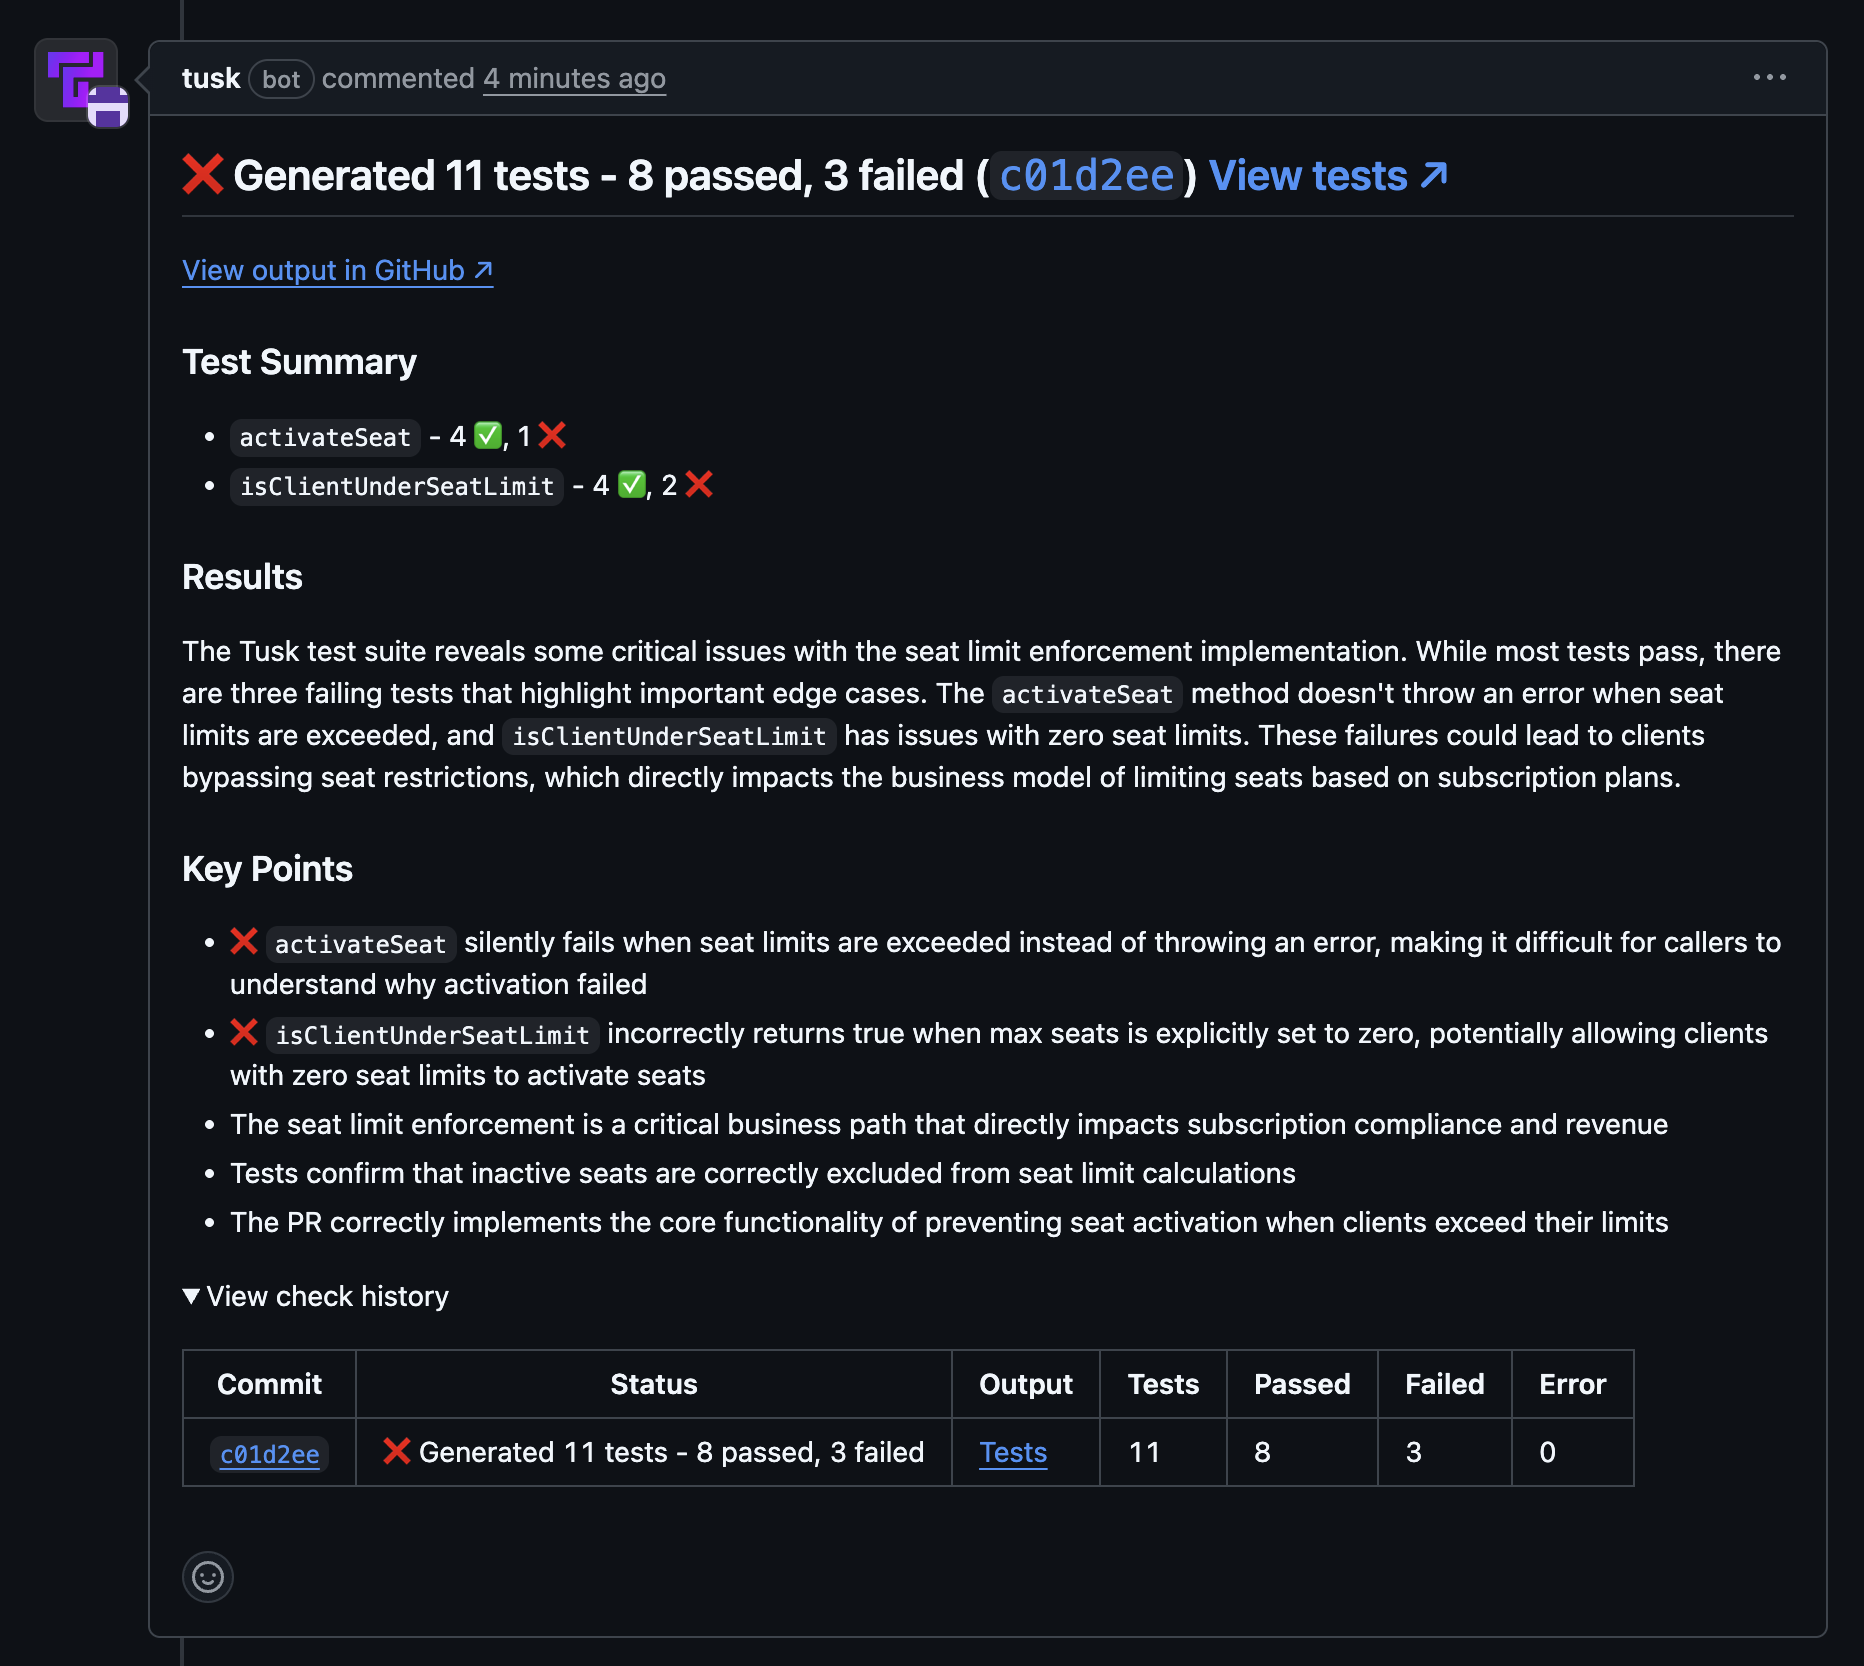
5
Review test cases
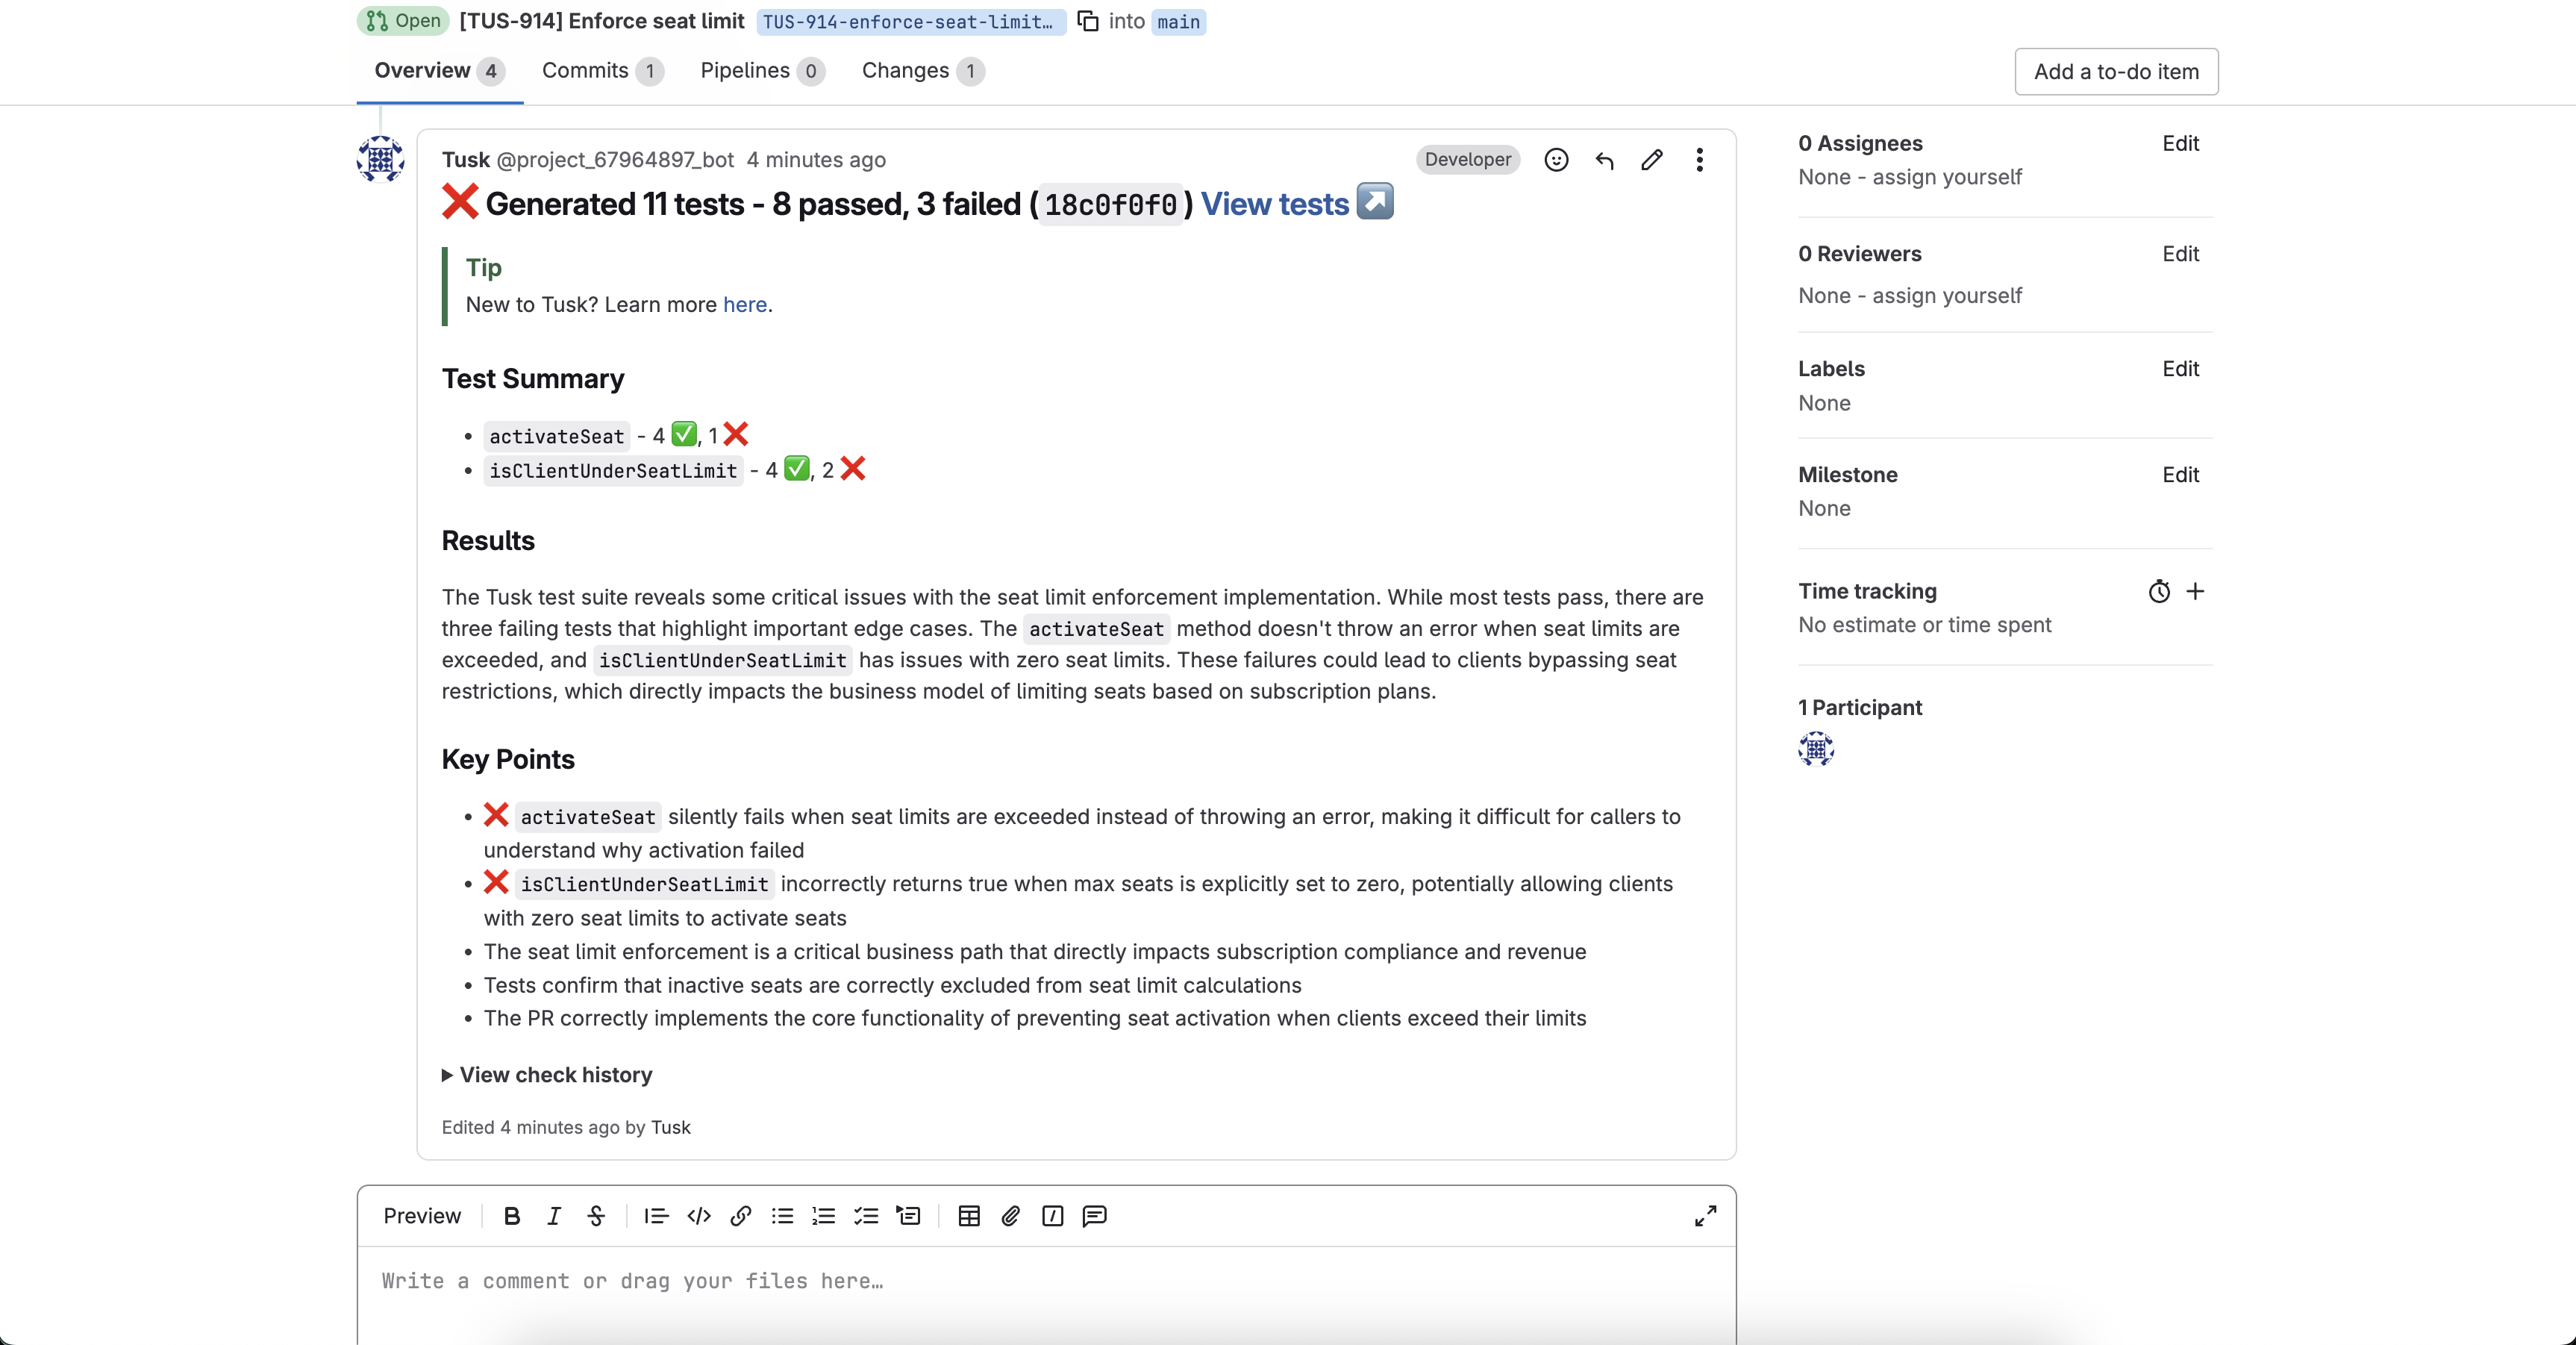
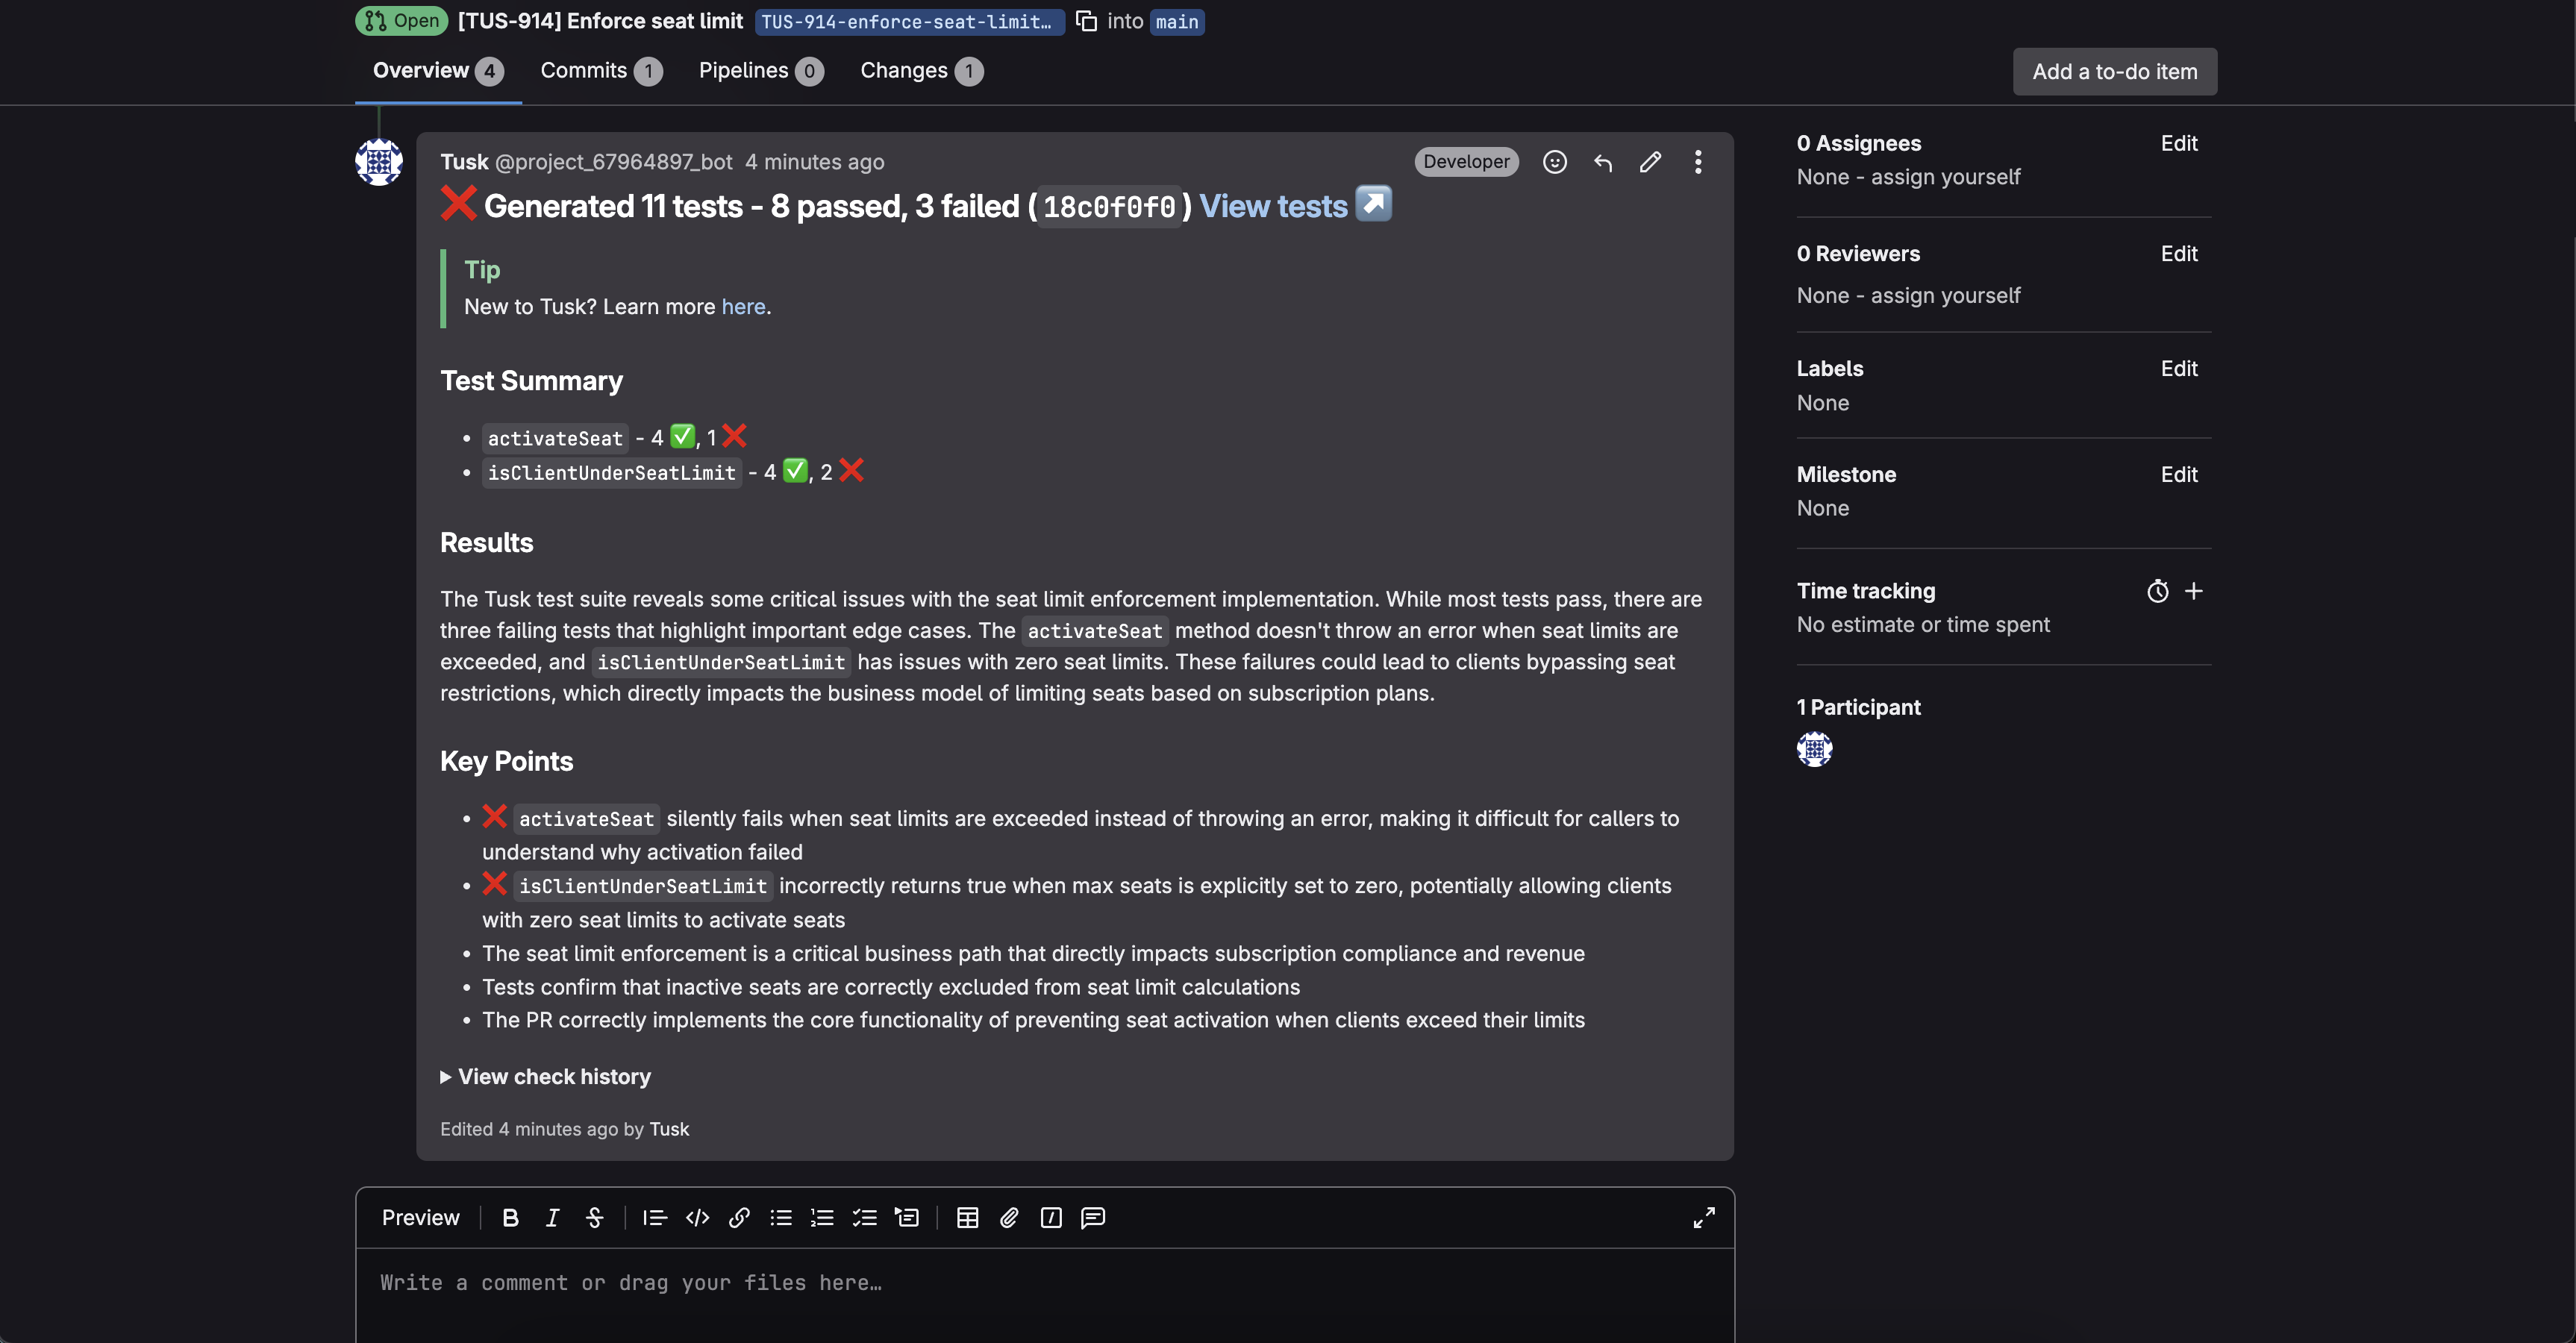
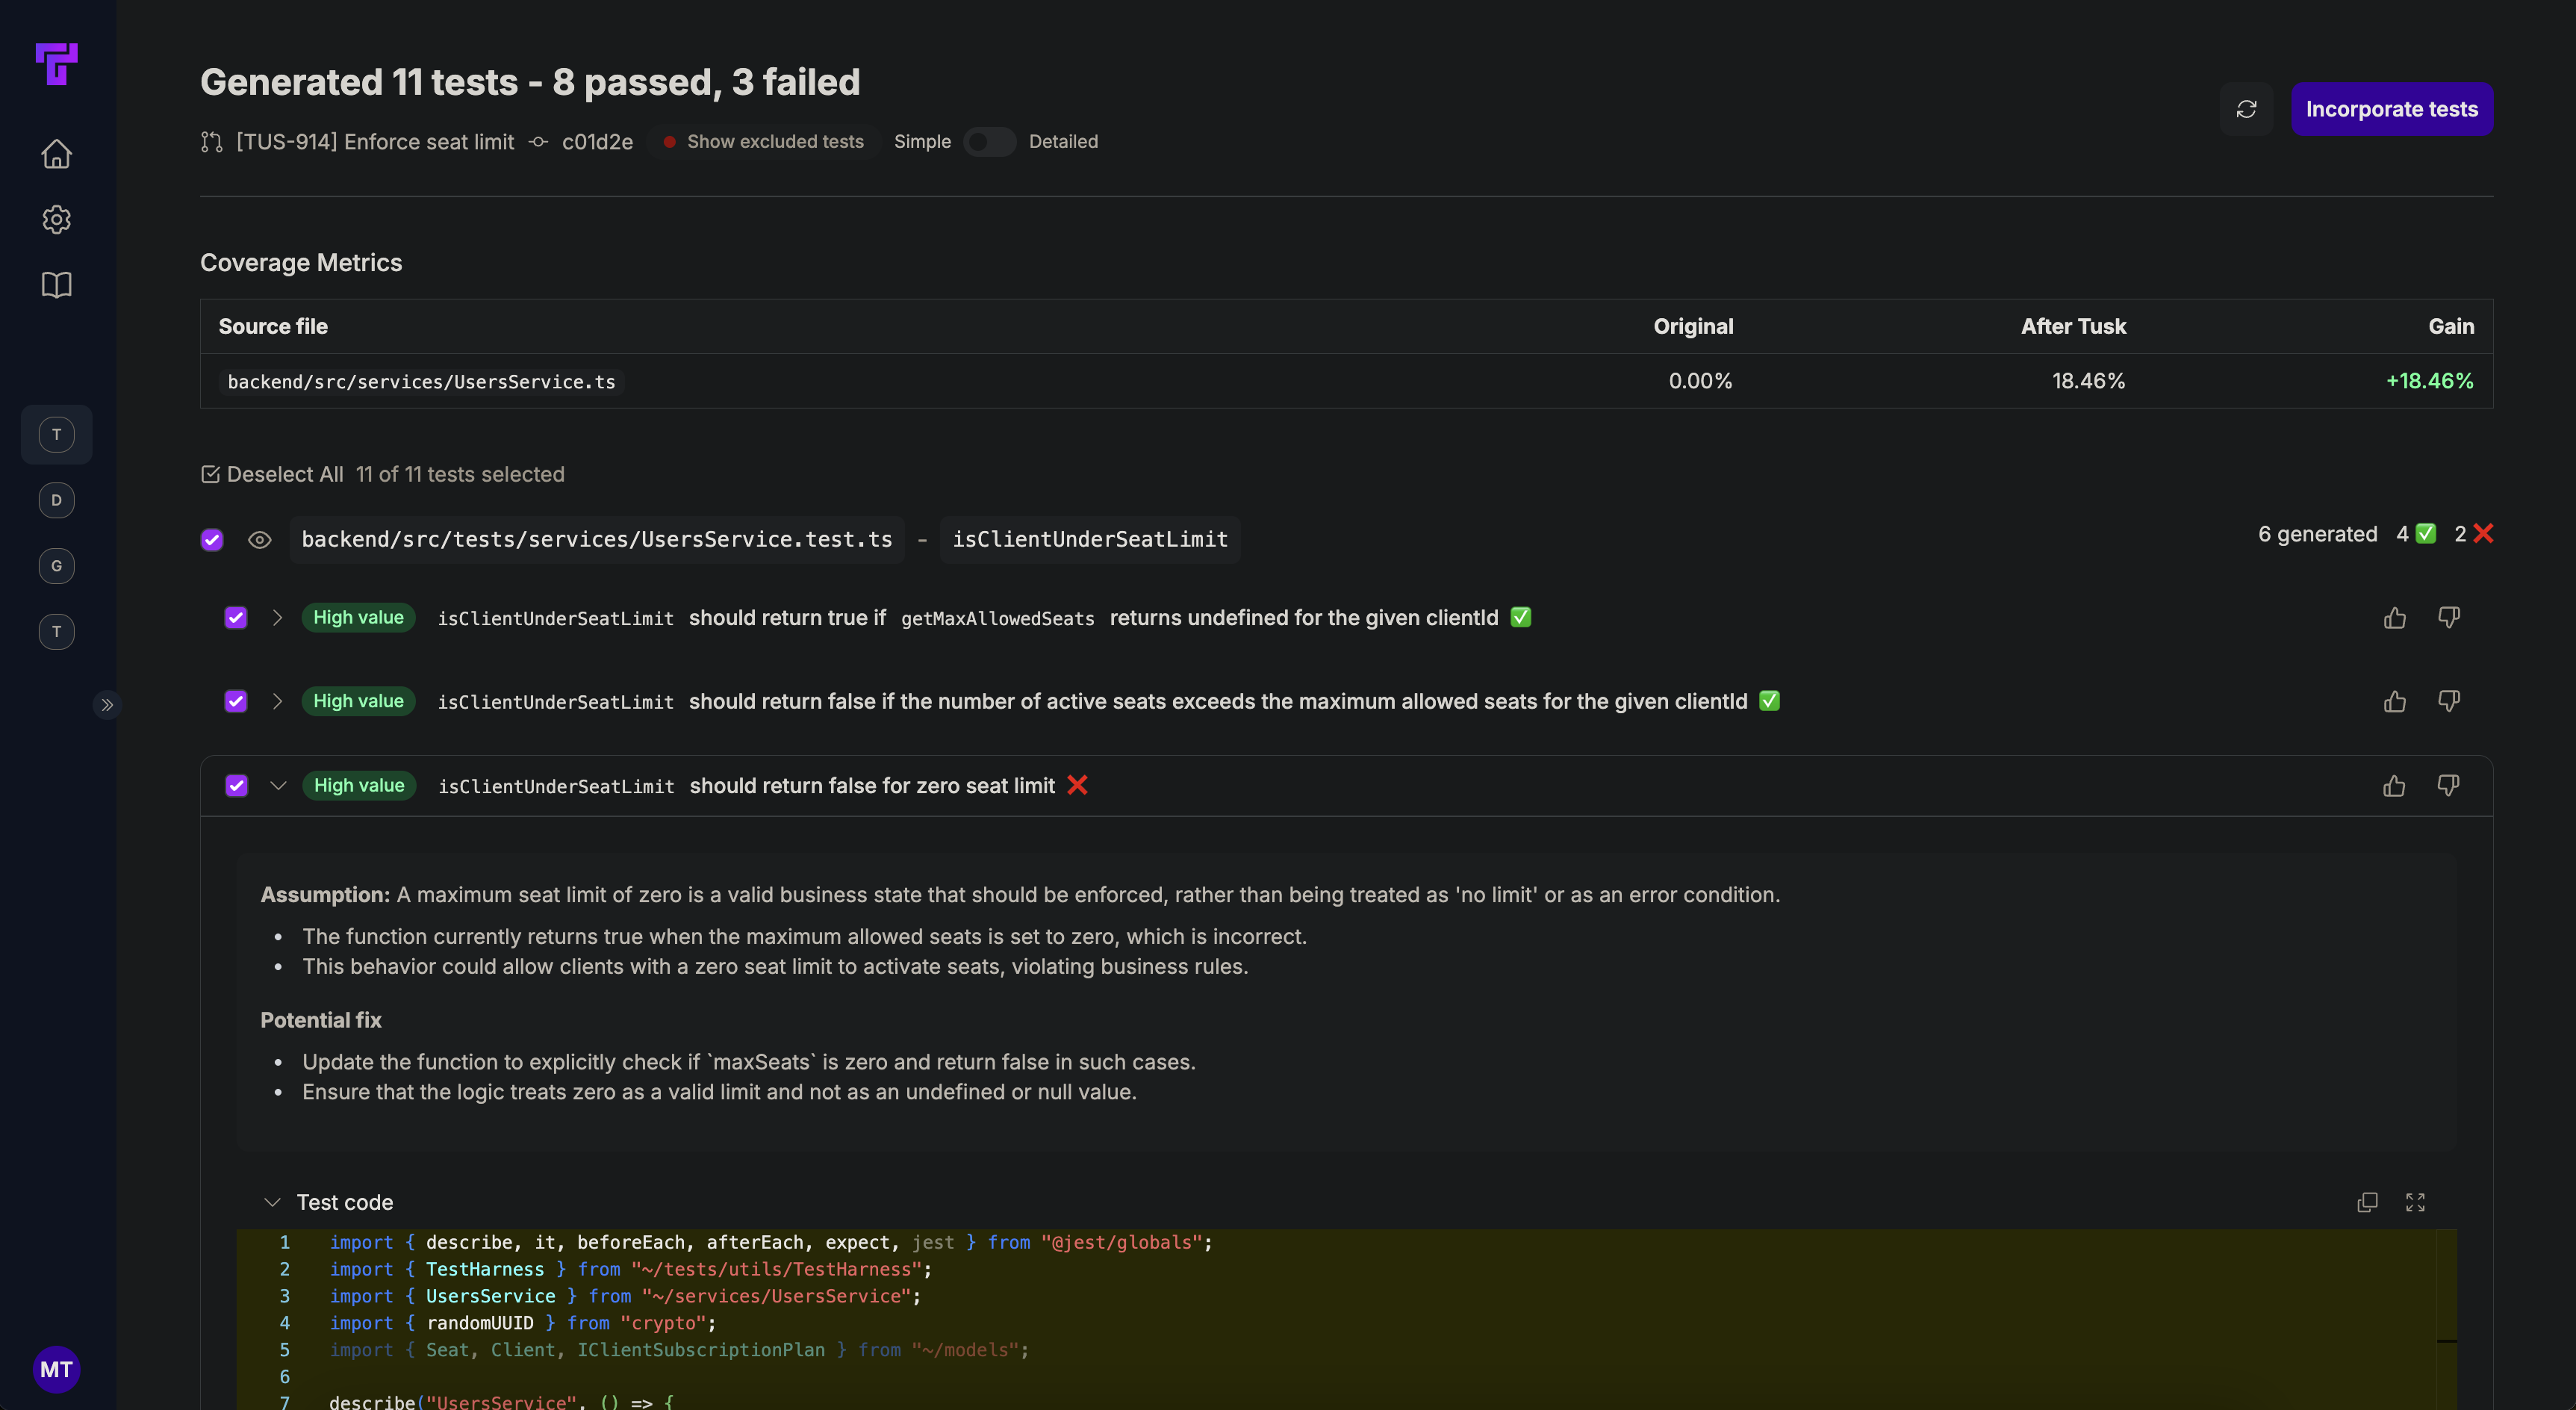
Click View tests at the top of Tusk’s PR comment to view the generated test cases in the Tusk web app.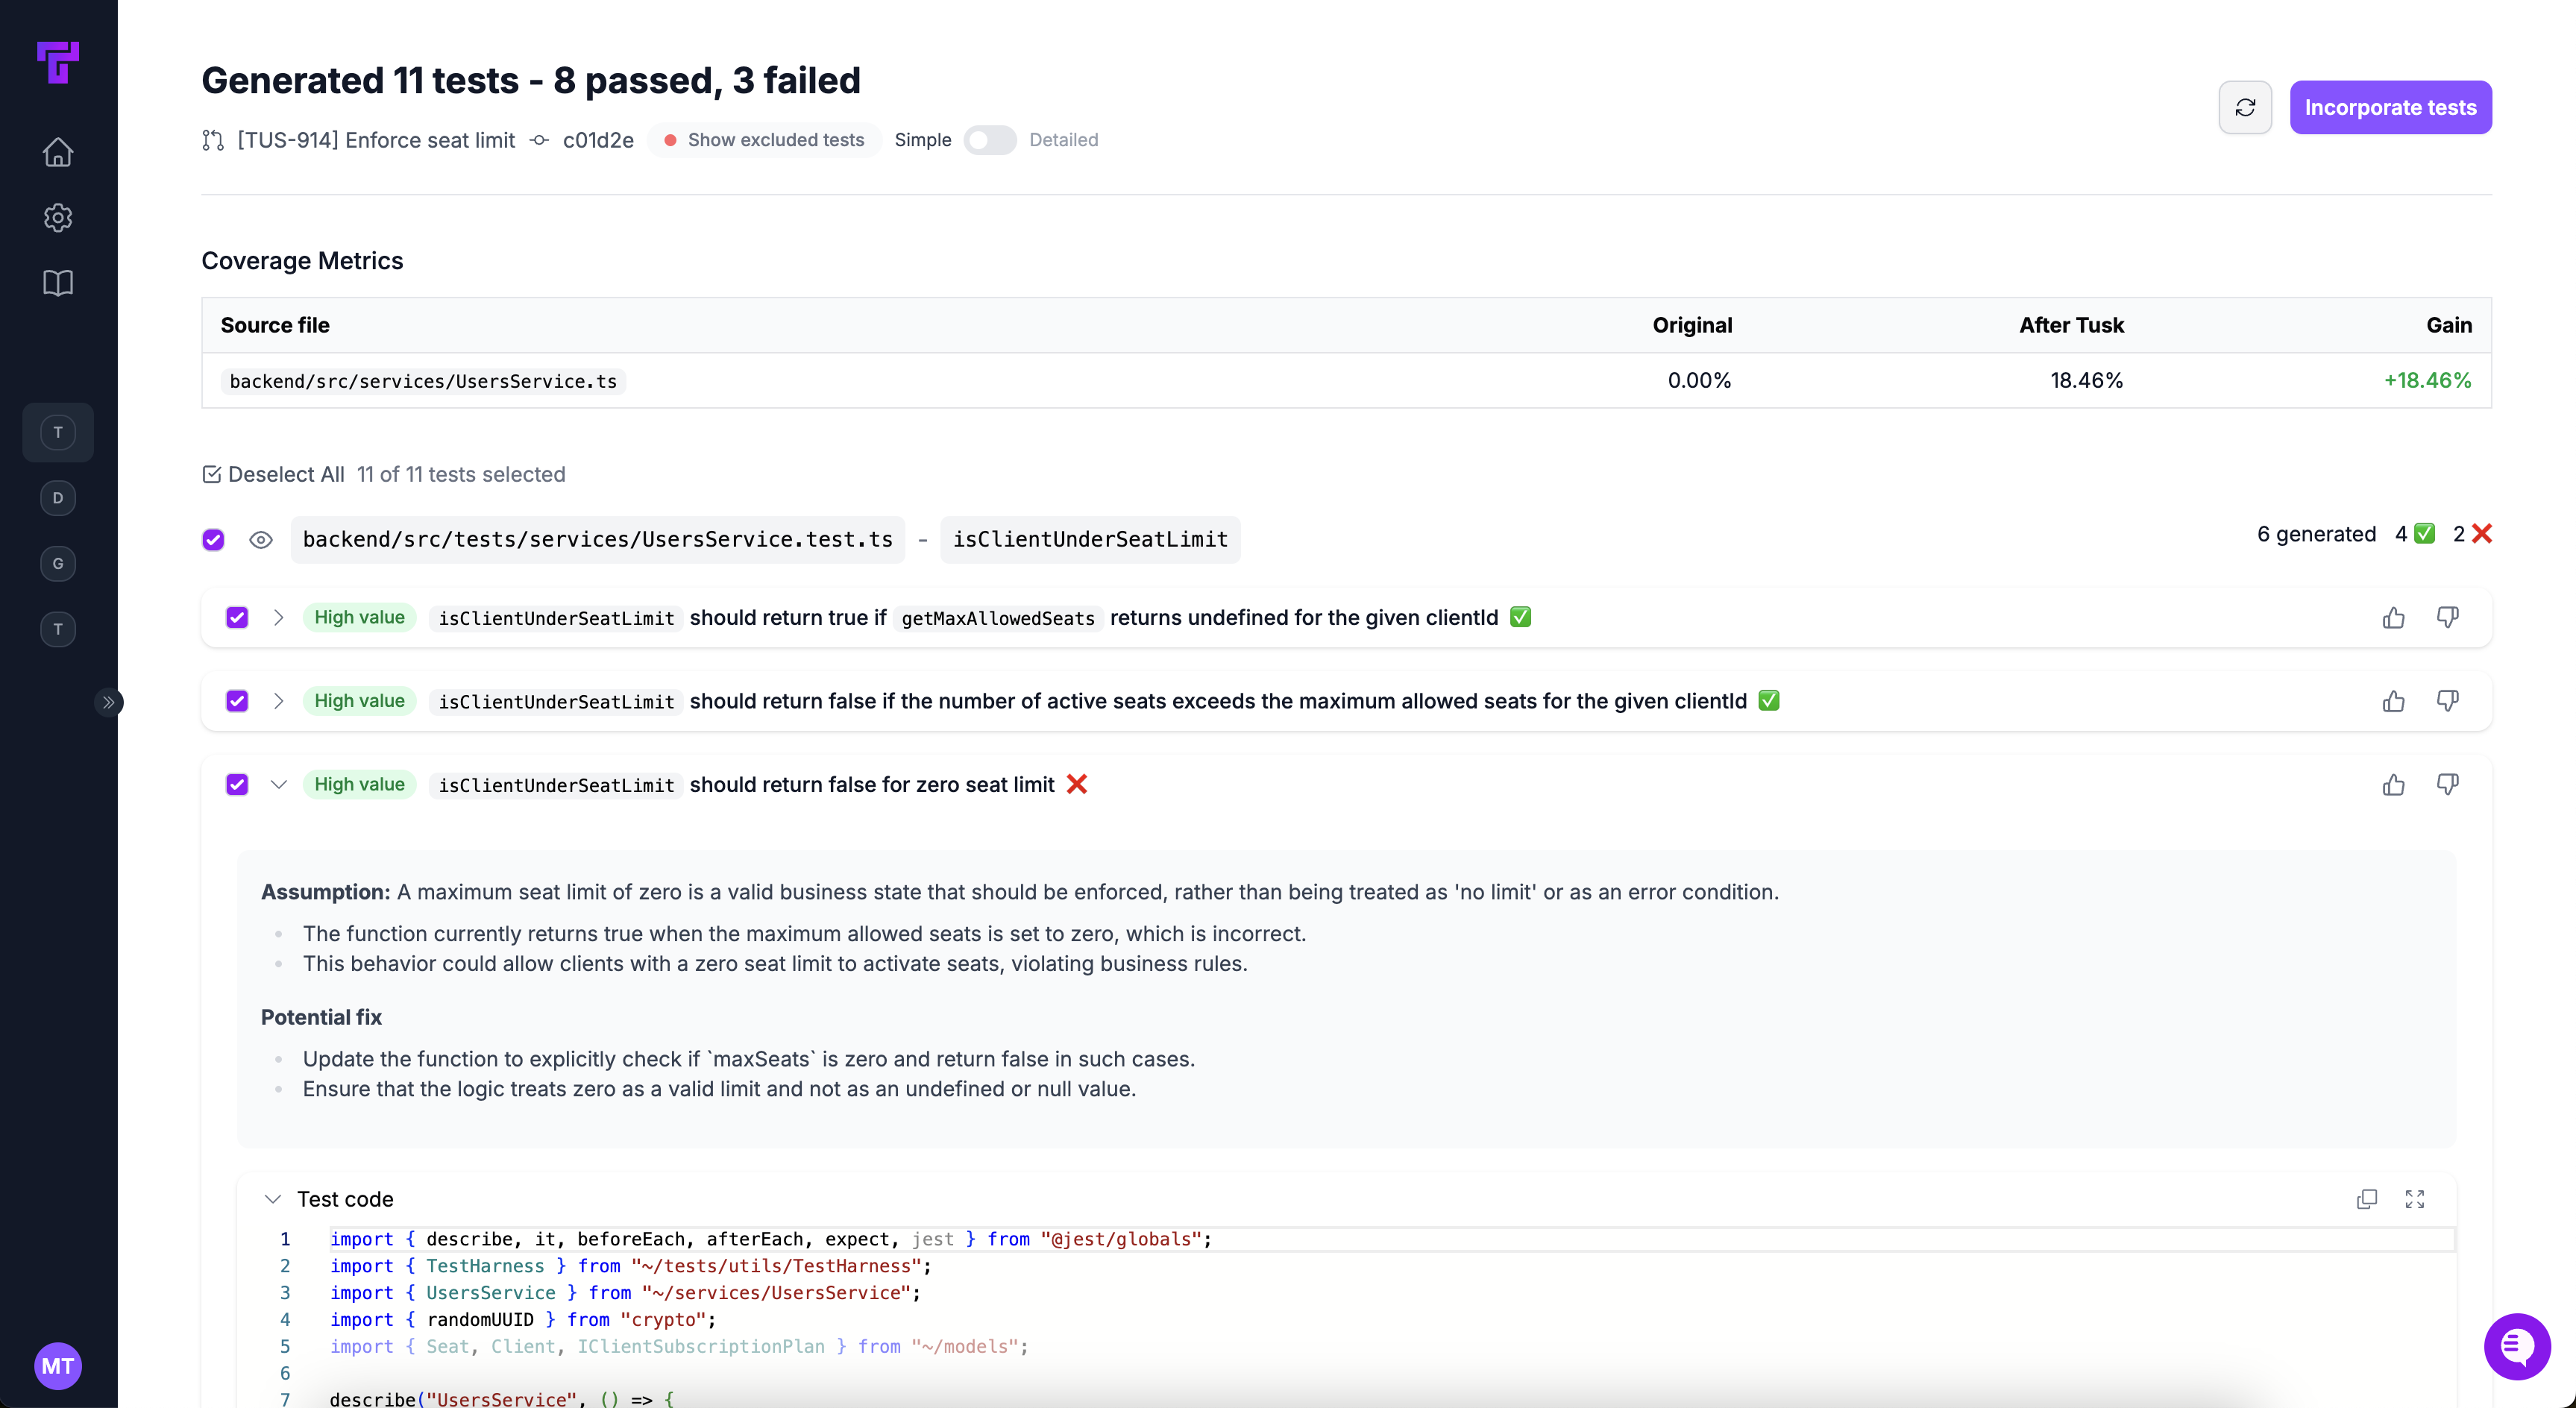
6
Examine test details
Review the test code and justification for each test case, whether it passed or failed, the test execution logs, as well as potential fixes for failing tests.
7
Add tests to PR/MR
In the Tusk web app, select the test cases you want, then click Commit X of Y tests. You can also create a separate PR/MR for the tests if you’d like to resolve failing tests separately.If using GitHub, you can click Incorporate tests from within the check output to add all generated tests to the PR/MR’s branch.
8
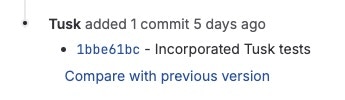
Agent commits tests
You will see a new Tusk commit in the PR/MR with your selected tests. Note that this may take a few minutes if you’re not selecting all tests or all passing tests.GitHub:

9
Fix bugs as needed
If there are failing tests, pull down the branch, fix the bug, and manually run the Tusk test locally to verify that it is now passing. Remove the
[Tusk] FAILING TEST comment above the test and push the fix.